
Black Myth: Wukong
- Madden NFL 25
- Mortal Kombat
- Graphics Comparisons
- Video Game Tips
Street Fighter 6 Guide – All SiRN Chest Locations
Sirn chests are part of the new world tour and provide some pretty good gear for your character. here's how to find them all..
Posted By Ravi Sinha | On 19th, Jun. 2023

Capcom’s Street Fighter 6 has a lot going for it, whether it’s the revamped lobby system known as Battle Hub with its avatars and classic games or the new Drive System mechanics. However, World Tour is a major pillar because it introduces some of the most important things to a fighting game – loot and chests. Sarcasm is fully intended, for those unaware.
Jokes aside, you’ll want to find the different SiRN Chests that litter the two locations in World Tour. That’s because they provide gear and consumables. Gear can provide buffs and fashion choices while increasing stats like defense, while consumables can either grant temporary buffs and heal you during fights or be sold for Zenny. Some even provide permanent stat boosts to your character. Zenny is the main currency, so any way to get more is always a good thing.
Ensure you’ve unlocked the Master Actions for Luke and Chun-Li beforehand since they’re required to break environment objects. The latter can also provide brief hovering, which is good for crossing gaps. Here are the locations for all the SiRN Chests in World Tour, starting with Metro City.
All SiRN Chest Locations in Metro City
Faith avenue (chest 1).
The first SiRN Chest is very easy to spot. When entering Beat Square, which marks your entry into the city proper, look to your right. The SiRN Chest will be near the public library. For further reference, when speaking to Alice, do a 180. You should see the chest across the street.
Crows’ Nest (Chest 1)
From Beat Square, go right and take the same road leading to Hong Hu Lu China Town. However, take a right instead of left to reach the Crow’s Nest alley. You’ll find a SiRN Chest behind a chain link fence. Find your way around to open it.
Crows’ Nest (Chest 2)
In the Crow’s Nest alley, make your way to the rooftop. Look around for some barrels before using the ladder, and there should be another SiRN Chest.
Hong Hu Lu China Town (Chest 1)
Venture to Hong Hu Lu China Town, and you’ll notice that you can move across different rooftops. Explore enough, and you’ll eventually find a ladder that leads to the top of a building. Another SiRN Chest is located here.
Westbay Avenue (Chest 1)
On Westbay Avenue, located just opposite Bayside Park, there’s a place called Chanko House Edomon. You’ll meet E. Honda here for the first time, but if you go to the back, there’s a SiRN Chest.
Westbay Avenue (Chest 2)
Also located on Westbay Avenue, look for a hot dog vendor and check behind it for another SiRN Chest.
Parking Lot (Chest 1)
To the southwest of the Masters Building, and just behind the starting point in Beat Square, is the Parking Lot, though it’s more of a car park with multiple floors. On the first floor, check between two cars on the northeast side for the first SiRN Chest.
Parking Lot (Chest 2)
The second SiRN Chest is on the second floor. It’s in the same position as the first one, in the northeastern part, but it’s more in the open.
Parking Lot (Chest 3)
The third chest is also on the second floor. Check the staircase that faces Grace Marina at nighttime to access it.
Parking Lot (Chest 4)
To reach the roof of the Parking Lot, you must first speak to the person blocking the way. Return at night, and the path is clear, allowing you to go to the roof. Check out the southwest side for the chest.
Parking Lot (Chest 5)
When coming down from the roof, you’ll arrive at the third floor. The end is blocked off, and the SiRN Chest will be next to them.
Urban Park (Chest 1)
Go to the Municipal Parking Lot and look for a vendor named Apparel Clerk Gomorrah. If you check behind the cars where he’s standing, you’ll find a SiRN Chest.
Urban Park (Chest 2)
In Urban Park, to the north-western-most part. Right in the corner is a SiRN Chest.
Urban Park (Chest 3)
Near the middle of Urban Park is the Adventure Playground. Check on one of the platforms near a tree for another chest.
Red Steel Factory (Chest 1)
Right across from the Municipal Parking Lot, where you meet Apparel Clerk Gomorrah, is a building called the Red Steel Factory (no relation to Ubisoft’s Red Steel ). Look under the stairs outside it, and you’ll find a SiRN Chest.
Red Steel Factory (Chest 2)
Another SiRN Chest is located inside the factory. Go to the first floor to find it.
Red Steel Factory (Chest 3)
Upon venturing outside of the Red Steel Factory, a SiRN Chest can be found at the top of the staircase.
Red Steel Factory (Chest 4)
This chest requires going to the second floor, specifically to the outside. Look towards Haggar Stadium and check that side to find it.
Red Steel Factory (Chest 5)
Go to the roof of the Red Steel Factory to find this chest.
Red Steel Factory (Chest 6)
While outside, you may have noticed a SiRN Chest on top of a shipping container. To reach it, use Chun-Li’s Spinning Bird Kick from the roof and maneuver carefully to land on the container.
Red Steel Factory (Chest 7)
There’s another SiRN Chest to find on the Red Steel Factory’s roof, but you’ll have to return at night. When you do, check the wall facing Mike Haggar Memorial Stadium to find it.
Red Steel Factory (Chest 8)
After you’ve opened the second SiRN Chest on the roof at night, go right (while facing Mike Haggar Memorial Stadium) and take a right turn. Take another right turn at the end, and you’ll find a third chest against the wall.
Downtown (Chest 1)
In Downtown, go to the South Area and check the alley for a chest.
Downtown (Chest 2)
From Beat Square, take the road to the right, which eventually leads to Hong Hu Lu China Town. Don’t go that far ahead, though. Instead, hang around the Downtown part (the North Area) and look for a restaurant called Greedy Grills and find a ladder that goes up. You’ll see a single high-level NPC, The Watcher, who’s dressed like a superhero. Just behind them on the left is a SiRN Chest.
Downtown (Chest 3)
Further behind The Watcher is an area accessible by another ladder. If you swing all the around the block and find the ladder, it will lead you here to another SiRN Chest.
Mike Haggar Memorial Stadium (Chest 1)
Travel to Mike Haggar Memorial Stadium, where there are several stalls. Check on the westernmost side to find a SiRN Chest.
Mike Haggar Memorial Stadium (Chest 2)
In the northernmost part of the Mike Haggar Memorial Stadium is another SiRN Chest. Look behind the stalls to find it.
Mike Haggar Memorial Stadium (Chest 3)
Near the second SiRN Chest in Mike Haggar Memorial Stadium are some construction materials. Check behind them for another chest.
Bayside Park (Chest 1)
Go to Bayside Park, which is the southernmost part of Metro City. Look for some overpass stairs and check underneath (where lots of purple flowers are growing) for this SiRN Chest.
Buckler Security Services (Chest 1)
Head to the southeast part of the map, on the opposite side of Bay Park. You’ll find Buckler Security Services here. A SiRN Chest is found near some barrels in the area.
Seaside Street (Chest 1)
On Seaside Street, which is close to Buckler Security Services, you’ll spot several skyscrapers. Check near their shadows to find another chest.
Beat Street (Chest 1)
On the westernmost part of the map is the Masters Building. Check its northern part to find a chest.
Grace Marina (Chest 1)
Go south of the Masters Building, and you’ll spot a pier. At the very end is a SiRN Chest.
SiRN Building – Construction Site (Chest 1)
This chest is located on the top floor of the SiRN Building’s Construction Site. Look for Ken and then go up a floor to find it.
SiRN Building – Construction Site (Chest 2)
When visiting the SiRN Building Construction Site, go to the second floor. Look for a ladder in the middle area and check the wall behind it for the SiRN Chest.
SiRN Building – Construction Site (Chest 3)
In the nighttime, you can go from the second floor down to the first and end up in the southwest part to find another chest.
SiRN Building – R&D (Chest 1)
When you’re on the second floor, check near some office cubicles in the northern part of the area to find the SiRN Chest.
SiRN Building – R&D (Chest 2)
This SiRN Chest is on the fourth floor, but first, you must go to the fifth floor. Venture down a floor on foot, and near the elevator door is the chest.
SiRN Building – R&D (Chest 3)
In the same fashion, you need to go to the fifth floor first in the SiRN Building and then venture downstairs to reach the third floor and this chest.
SiRN Building – R&D (Chest 4)
For this chest, you’ll need to take the elevator to the seventh floor. You’ll find a path that leads down to the fourth floor – take it to reach the western side and the chest.
SiRN Building – R&D (Chest 5)
You’ll first need to go to the seventh floor via the elevator and then take the staircase on the right. Follow the path past all the enemies to the sixth floor and bypass all the Self-Propelled Servers to loop back to the seventh floor.
SiRN Building – R&D (Chest 6)
Located on the roof of the SiRN Building. Follow the path to the previous chest, and then take the path directly behind you to go further up, past several more enemies. You’ll eventually reach the eighth floor, but this isn’t the end.
Upon passing through the door to reach the eighth floor, take the door to your left and go straight, then take the next one to your right. Navigate past the enemies to continue going up. Eventually, you’ll run into some Copy Fighters, which must be fought. After winning, look for an open container and go through to find the chest.
SiRN Building – Storage Area (Chest 1)
You first need a key card from the fourth-floor Server Room. Follow the same path from the seventh floor, going down the stairs on your right. However, instead of going left where all the enemies are on the path, take a right into the sixth-floor office. Go past the enemy Refrigerators (yes, seriously) down the fifth-floor Server Room and then further through to the fourth-floor Server Room.
You’ll eventually hit a dead end and get the key in the chest. Go to the elevator, return to the first floor and go to the right, passing through the corridor until you reach the Base Server Room. Go through the other doors marked Base Server Room to reach the Storage Area. The first SiRN Chest is behind some boxes when you first enter, so destroy them.
SiRN Building – Storage Area (Chest 2)
The second SiRN Chest in this area is the opposite of the first. Turn around, and you’ll see it.
SiRN Building – Storage Area (Chest 3)
On the right side of the Storage Area, between the first two server rows, is the third SiRN Chest.
SiRN Building – Storage Area (Chest 4)
Located between the second and third server ros in the Storage Area.
SiRN Building – Storage Area (Chest 5)
Located in the back corner of the Storage Area behind the last row of servers.
Crows’ Nest (Chest 3)
At Crows’ Nest, look for a broken guard rail on a building. Use Chun-Li’s Spinning Bird Kick and hover across to the next SiRN Chest.
Crows’ Nest (Chest 4)
At the start, look for a ladder and climb up. Look for the Dora’s Diner sign and then use Spinning Bird Kick to reach the roof it’s on. Break some of the boxes nearby to find the chest.
Crows’ Nest (Chest 5)
In the Crows’ Nest, next to the House of Magic & Illusion sign. You must jump over the ledge to grab this one.
Crows’ Nest (Chest 6)
Look for an area with lots of graffiti. If you go behind the wall, you’ll find another SiRN Chest.
Crows’ Nest (Chest 7)
After collecting the previous chest, face West and use Chun-Li’s Spinning Bird Kick to hover on the roof across from the ledge to find another chest.
Crows’ Nest (Chest 8)
From the previous chest, go slightly north, and you’ll find another chest next to a satellite dish.
Crows’ Nest (Chest 9)
Drop down from the previous rooftop into the alley, and you’ll find another SiRN Chest, one that no doubt baffled you as it sat behind a chain-link fence as you passed by on street level.
All SiRN Chest Locations in Nayshall
Nayshall is another explorable city area that becomes available after finishing the main story of World Tour. It also has SiRN Chests to find, and some of the best gear. Here are their locations.
West District (Chest 1)
Look to the opposite of your hideout in the West District and scale the wall to find a SiRN Chest.
Old Nayshall Station (Chest 1)
Go to Old Nayshall Station and venture to the platform. Reach the end and check the fence’s opposite side for the SiRN Chest.
Iron Bridge (Chest 1)
See the long bridge that extends across Old Nayshall? If you go towards the start, there’s a SiRN Chest.
Iron Bridge (Chest 2)
Naturally, there’s also a SiRN Chest at the bridge’s end. Go to the end and break the crates to find it.
Riverside Steps (Chest 1)
In the southeast part of the map, near Rananculus Bank, is an area called Riverside Steps. If you go behind the market and venture down the steps, this chest is in the middle.
West District (Chest 2)
From the first SiRN Chest, you’ll need to cross the gap to the next area for another SiRN Chest. It’s easy with Chun-Li’s Master Action, so use that to make the jump.
West District (Chest 3)
The next SiRN Chest isn’t too far from the last one – they’re right next to each other. Look to the left of the previous chest, and you’ll see the third chest in the shadows.
Riverside Steps (Chest 2)
This one’s a bit tricky. Further southeast, you’ll find a chest out on the water. To reach it, you’ll need to use various moves like Spinning Bird Kick to platform across the boats, until finally getting to the brown one.
Riverside Steps (Chest 3)
On the staircase leading down to the market, check near the stalls for a chest.
The Lowlands – North Area (Chest 1)
While still in The Lowlands, check the North Area rooftops for another chest.
The Lowlands – North Area (Chest 2)
Go to the river bank in the North Area, where there’s a bunch of trash and some hanging sheets. Check near some blue and yellow sheets to find another SiRN Chest.
The Lowlands – North Area (Chest 3)
In The Lowlands, you’ll catch glimpses of a large pipe that runs the area’s length. If you check in the North Area next to it, there will be another chest.
Old Nayshall – Back Alley (Chest 1)
In the Back Alley, where Juri is at nighttime, you’ll find another chest.
Old Nayshall – East Alley (Chest 1)
In the East Alley, just near the alley where Juri is, go to the top of the ladder, and you’ll find a chest.
Old Nayshall – South Alley (Chest 1)
In the South Alley, look for a square of sorts with a tree in the center. There’s here near some wooden crates. It’s also close to the alley where Juri is, so it’s hard to miss.
Old Nayshall – South Alley (Chest 2)
In the same South Alley, look for Shopkeeper Tsanpa. Check just the opposite of them, and you’ll find this SiRN Chest beneath an arch.
Old Nayshall – Commerce Plaza (Chest 1)
In The Lowlands, which is located on the east side of the map, head to the Commerce Plaza. Look for Lehanna’s shop and find a way to get to the roof. Another chest awaits there.
The Lowlands – North Area (Chest 4)
Scrap Factory Mouse will provide lots of Zenny later in World Tour. However, if you look next to them, you’ll find a SiRN Chest right out in the open.
The Lowlands – River Bank Area (Chest 1)
The big pipe can also be traversed. While in the River Bank Area, get on it and go to the end. You’ll discover another SiRN Chest.
The Lowlands – South Area (Chest 1)
In the South Area, on a platform that provides a view of the arena in the River Bank.
The Lowlands – Mountain Path Area (Chest 1)
Old Nayshall has Mount Vashal, but to get there, you must take the Mountain Path in The Lowlands. When you reach the top of the mountain, go over the edge and land on this ledge to get the chest.
The Lowlands – River Bank Area (Chest 2)
If you stay on various roofs of the housing in the River Bank Area, you’ll find a chest. It’s just south of the previous chest.
The Lowlands – River Bank Area (Chest 3)
During the story, you’ll meet Punch at an arena in the River Bank Area. Go back here and check above the location to find a chest.
Mount Vashal – Ruins Entrance (Chest 1)
When you reach the Ruins Entrance of Mount Vashal, there’s a chest right behind an NPC named Kirk.
Mount Vashal – Base (Chest 1)
In the Base area, right next to Merchant Mello.
Vashal Foothills – East Path (Chest 1)
Once you reach the top, which falls under the East Path, look towards the bridge in the distance. There will be a chest just near the rocks.
Vashal Foothill – Ruins (Chest 1)
Vashal Foothills also has some ruins if you travel off the beaten path to the right (which falls under the northern part of the map) where you’ll find a chest.
Vashal Foothills – West Path (Chest 1)
If you take the passage leading to the West Path of the Vashal Foothills, you’ll find another SiRN Chest.
Suval’hal Arena – Entrance (Chest 1)
At the entrance of the arena where JP usually hangs around at night, check the southeast part for a chest.
Suval’hal Arena – Great Stairs (Chest 1)
Before climbing up the Great Stairs of the arena, check to the right. There’s a chest right next to a potted plant.
Street Fighter 6 is available for Xbox Series X/S, PS5, PC and PS4. Check out our review here .
Games You May Like
Street fighter 6.

Publisher: Capcom
Developer: Capcom
Platforms: PS5, Xbox Series X, PS4, PC

Publisher: Sony
Developer: Team Asobi
Platforms: PS5
Publisher: Game Science
Developer: Game Science
Platforms: PS5, Xbox Series X, PC
Amazing Articles You Might Want To Check Out!
Share your thoughts below ( always follow our comments policy ), keep on reading.

Post Trauma Launches on October 29
Red Soul Games and Raw Fury's classic Resident Evil-inspired survival horror title will be available for PS5, ...

SPINE Gameplay Trailer Showcases Slick Gun Fu Action
Developer and publisher Nekki has showcased a new gameplay trailer for the action title, which is in developme...

Squirrel with a Gun Launches on August 29th for PC
Coming to PS5 and Xbox Series X/S this Fall, a new gameplay trailer highlights all the insane things players c...

Atomfall Developer Discusses Influences and Set-up in New Gameplay Trailer
Players won't know their backstory when starting but can discover clues, with Rebellion also confirming access...

GreedFall 2: The Dying World Trailer Highlights Setting, Diplomacy, and New Combat Options
Learn more about the setting and story of Spiders' RPG sequel, which arrives on PC via Steam Early Access on S...

Monaco 2 Launches in 2025 for PC
A new gameplay trailer reveals four new crew members, who specialize in charming, knocking out, and beating up...
Street Fighter 6: World Tour - Chapter 8 Walkthrough

Your changes have been saved
Email is sent
Email has already been sent
Please verify your email address.
You’ve reached your account maximum for followed topics.
Pokemon GO Player Realizes They Have Super Valuable Pokemon 5 Years After Catching Them
Valheim sits on a gold mine best saved for after early access, kingdom hearts: missing link is set to sidestep one controversy pokemon go faced, quick links, chapter 8 - 1: a toast to victory walkthrough, chapter 8 - 2: tracking the mystery code walkthrough, chapter 8 - 3: the elusive former national champ walkthrough, chapter 8 - 4: big in japan walkthrough, chapter 8 - 5: meeting at the sirn building walkthrough, chapter 8 - 6: scraping the sky walkthrough, chapter 8 - 7: high flying man walkthrough, optional master: jamie.
With seven main story missions and a few optional Masters, Chapter 8 of World Tour mode has the potential to keep Street Fighter 6 players busy for quite some time. Unlike one or two of the chapters that came before it , though, this doesn't feel like busy work, with players running into several familiar faces as well as a couple of brand-new ones.
RELATED: Street Fighter 6: How to Farm Money Quickly in World Tour Mode
Completing Chapter 8 of World Tour mode will probably take most Street Fighter 6 players around an hour or so; longer still if they need to do a bit of grinding in order to level up. Thankfully, there aren't too many mandatory fights in this Chapter, though as there are a couple of big dust-ups in the next one, it might be a good idea to do a bit of fighting during the infiltration mission just to level up a little.
Chapter 8 begins with players having to visit the Back Street area of Hong Hu Lu Chinatown at night, which will result in an encounter with Jamie. He'll mistake the playable character for one of the Canary Crate grunts and challenge them to a one-on-one fight. It doesn't really matter if players win or lose this fight, as the end result will be the same either way. Once the resulting cutscene ends, players can then carry on up the alleyway and speak with Li-Fen.
Li-Fen will reveal that she has recovered some images from the data card from Bosch and forward them over to the player's phone. Each image shows the location of a poster with two numbers on it, and together, these form a six-digit code that needs to be entered into the player's phone. They can track down these posters if they like (two are found during the daytime and one can only be found at night) or simply enter the code by pressing Triangle (PlayStation) or Y (Xbox) while on the messages. The six-digit passcode is 332951 .
Entering the code will lead to players receiving a message from somebody named Asterisk. After an introduction of sorts, they'll ask the player to infiltrate the SiRN building in Metro City in pursuit of a former national champion, who just so happens to be Ken . To do this, they'll need to head to Apparel Clerk Gomorrah in the Urban Park area and buy a Safety Helmet, as they won't be able to enter the construction site that surrounds the SiRN building without one.
With the helmet equipped, they head inside the construction site and speak with the worker with the red safety helmet to trigger a fight if they haven't done so already and then head up the stairs to find Ken. To complete the mission, they'll simply need to observe him, but it's also possible to speak with him here and ask to become his student. Those who unlocked Ken as a Master at the end of Chapter 7 can of course skip this step.
Next, players will be tasked with tracking down a Japanese fighter at Chanko House Edomon, which is in the Urban Park area of Metro City. Upon entering the Japanese-style building, players will meet E. Honda, and will then need to snap a picture of him using the camera. To do this, they'll have to stand in the spot where the blue camera icon appears at the bottom of the screen and then open the camera app and choose "Mission Mode." Players can also speak with Honda to become his student at this time.
Speaking with Honda will also lead to him mentioning another legendary Japanese fighter who can be found at the Genbu Temple in Japan, which means that a trip to the World Map screen is in order. When they arrive at the temple, players will need to snap a photo of Ryu to complete the mission. They can also ask to become his student, which will lead to a one-on-one fight, though, as with many of the other Master fights, it doesn't matter if players win or lose.
After they've taken a picture of Ryu, Asterisk will instruct players to return to the SiRN Building during the daytime and speak with the security guard outside. He'll give them a Key Card and tell them to come back at night, at which point, their objectives will be to steal a SiRN Lab Coat and track down a Name Badge.
After switching to nighttime, players should head inside the construction site and swing a right, then head up the stairs and speak to Gus. Once they've beaten him in a fight, they should climb the ladder in the area behind him. This will lead them to an NPC named Cairo, who'll tell them that they need to find the power source for the crane in order to progress. Thankfully, this is pretty easy. They simply need to drop down off the rooftop behind Cairo to the metal beam near Gus, then jump down from the left side of the beam and follow the path around to the power box.
With the crane now powered, players can head back up to where they spoke with Cairo and activate the crane by interacting with the nearby terminal. This will enable them to ride a shipping container over to a new area. Here, they should keep climbing higher, then, after a few cutscenes, activate another terminal, climb the nearby ladder, and then ride another shipping container over to another new area.
Stepping onto this container will lead to three Attack Drones flying in. Thankfully, players will fight these one at a time, though they can still cause quite a bit of damage by themselves if players aren't careful. Once the drones have been taken care of, players will find themselves inside the main SiRN Building. They want to head up to the second floor and an NPC named SiRN Staff Grace, who mentions that there just so happens to be a SiRN Lab Coat in the nearby chest.
The next quest marker leads players to the third floor and a guy named SiRN Staff Emil, who mentions that there might be a name badge on one of the upper floors. Unfortunately, the player's current Key Card won't let them ride the elevators that high, so they'll need to upgrade their clearance at the nearby terminal. When they try to do so, however, they'll be attacked by Kimberly and will need to square off with her in a one-on-one fight. As usual, it doesn't matter if they win or lose.
Kimberly will leave after the fight, allowing players to upgrade their clearance and ride the elevator up to the fifth floor. There, they'll find a guy called SiRN Staff Liu, who mentions that he left his Name Card in the breakroom. Heading there will lead to players squaring off against a bunch of household appliances, after which, they'll be instructed to escape the building using fast travel. Before doing so, though, they should follow the corridor on the left-hand side of the break room, which will take them to a chest containing a Stamina Booster.
Once back outside, players will get another message from Asterisk, who instructs them to return to the security guard outside the SiRN Building during the daytime while wearing the Lab Coat. He'll tell them to visit the Grace Marina, which, like the SiRN Building, is on the east side of Metro City.
When they arrive at the marina, players will be taken to an aircraft carrier, where an NPC named Curtis will ask for their help dealing with some rampaging robots. The two Hyoombas shouldn't cause too much trouble, but the Drone can be pretty deadly if its rocket attack makes contact, so players should exercise caution and be ready to use healing items as and when needed.
Defeating all three robots will lead to a cutscene in which players are introduced to Guile. Once it finishes, Asterisk will instruct them to take a photo of him, which will again require them to stand in the designated spot, open up the camera app, and then choose Mission Mode. Snapping this photo will mark the end of Chapter 8 and the player being awarded 5,000 Zenny and a Wrench. Before they leave, players can also speak with Guile again to become his student .
Strictly speaking, all five of the Masters introduced in Chapter 8 of World Tour mode are optional, but only Jamie will require players to go out of their way. At around the midway point of Chapter 8, he will relocate from the alleyway where players first encounter him to the rooftop where players first met Boluo during Chapter 2 . If they speak with him here during nighttime hours they can ask to become his student, which will unlock his fighting style as well as a few additional moves.
Street Fighter 6 is available now on PS5, PS4, Xbox Series X|S, and PC.
World Tour Mode Chapter 7 Walkthrough
Street fighter 6: complete guide & walkthrough, world tour mode chapter 9 walkthrough.
- Video Games
- Street Fighter 6
- Street Fighter
Solve the SiRN code puzzle in Street Fighter 6 with this simple code

Written by
Jack Roberts
Published
4th Jun 2023 16:16
As you journey through Street Fighter 6 ’s World Tour mode, you’ll come across several puzzles to solve before you can advance in certain locations. One of these puzzles is the SiRN code math equation. Here, we’ll be breaking down where you can find the SiRN code puzzle in the game , and everything you need to solve it.
Where can you find the SiRN code puzzle?
As you explore Metro City in World Tour mode , you’ll be expected to complete various missions to progress. The SiRN code puzzle is in Chapter 13-4, during the ‘A Most Beautiful Mess’ mission.
Eventually, you happen upon the SiRN Building. As you explore it, you will find SiRN Staff Member, Grace up on the seventh floor. After speaking with her, she will ask you to solve a maths equation: 2^6x3x643.

How to solve the SiRN code puzzle
Despite the somewhat daunting and convoluted equation that you’re expected to work out, the answer to the SiRn puzzle is remarkably simple.
To solve the equation, you first need to open up the keycode section of your Messages app . Once there, type in 123456 , and hit OK. That is the solution to the puzzle.

Now that you have cracked the code, you will get Grace (Mysterious Mad Scientist) added to your contacts. You’ll also be rewarded with a Stamina Booster, which boosts and restores Vitality.
Sign Up To Our Newsletter
Get exclusive news, content, and discounts sent directly to your inbox
You've joined our newsletter. Thank you!
Sorry, there has been an issue in subscribing to the newsletter..
If you’re looking for more to do in Street Fighter 6, check out how to complete the Scrap Heap minigame as well. For more guides, be sure to head over to our Street Fighter 6 homepage .

Established in 2019, we don’t just cover games - we live them. Our expert team is full of dedicated gamers, qualified journalists, and industry insiders who collectively boast decades of experience covering gaming and esports. This deep-rooted expertise allows us to provide authoritative and nuanced perspectives first-hand from a team who are playing, and researching every game covered on our website.
Our foundation is built on a profound commitment to editorial independence, ensuring our content remains free from external influence and advertising pressures and is held to the highest level of editorial conduct, integrity, and quality.
Every article on GGRecon comes from rigorous research, informed analysis, and a passion for gaming that resonates with our readers. We uphold these standards through a transparent editorial policy, accessible here , which governs our processes and maintains our accountability.
Street Fighter 6: World Tour - Chapter 8 Walkthrough

Your changes have been saved
Email is sent
Email has already been sent
Please verify your email address.
You’ve reached your account maximum for followed topics.
9 Best Arcade Games Of All Time
7 best rogues in gaming, civilization 7 collector's edition doesn't include the game, quick links, chapter 8 - 1: a toast to victory, chapter 8 - 2: tracking the mystery code, chapter 8 - 3: the elusive former national champ, chapter 8 - 4: big in japan, chapter 8 - 5: meeting at the sirn building, chapter 8 - 6: scraping the sky, chapter 8 - 7: high-flying man, notable avatars, hidden sirn chests.
So, you just won the Novice League Tournament, and you're a Metro City town hero. Life is good, right? Unfortunately, the good times don't last long in Street Fighter 6's World Tour. Just when you thought you could walk away from the Bosch drama, it pulls you right back in!
Related: Street Fighter 6: World Tour - Chapter 7 Walkthrough
Still, a little drama isn't a bad thing, especially when you meet FOUR ORIGINAL WORLD WARRIORS! If you thought World Tour mode was fan service before, wait until you've played Chapter 8. (Oh, and you'll fight refrigerators, too. But more on that later.)
Li-Fen reached a significant breakthrough with the encrypted memory card data while you kicked ass in the Novice League tournament. Head to Chinatown and grab some shaobing to get the 411.
Step 1: Fight Jamie
On your way to Bao Bao Bro, you'll walk in on Jamie taking down some Canary Crate ne'er-do-wells. After all, he is the "neighborhood peacekeeper." Unfortunately, he'll assume you're also a gang member and initiate a fight.
Unlike earlier matches, like the Juri fight, the match with Jamie is more balanced and easier to win. One stellar way to catch him off guard is to punish him whenever he goes for a drink from his flask .
Once the misunderstanding gets resolved, you'll become friends with Jamie. However, you won't be able to study under him yet.
Step 2: Talk To Li-Fen
Li-Fen will reveal that the data key contains three photos from around Metro City featuring posters containing random letters and numbers . These vital posters form a mysterious contact number you must unlock on your smartphone.
- Flight Ticket x 5
After your conversation with Li-Fen, she'll send you the rest of the poster photos to your phone. All that's left to do is collect the posters.
Step 1: Collect The Posters
You'll find the posters in the following locations marked on your map:
- Bayside Park
- Construction Site near Baller Mando
- Westbay Promenade
You can use the poster clues to enter the passcode or follow the next step below.
Step 2: Enter The Passcode
Once you collected all three posters, open the Messages app on your smart device. Then enter the following six-digit code:
- 8,000 Zenny
- Mighty Jawdestroyer x 5
Your new anonymous contact, Asterisk , will ask if you're Bosch. Once you confirm you're not him, Asterisk will offer you information regarding Bosch in exchange for intel on various Street Fighters. The first fighter on Asterisk's list? A former National Martial Arts Champ.
Step 1: Enter The SiRN Construction Site
To enter the SiRN construction site, you must have a Safety Helmet equipped with your gear . You can get a Safety Helmet by completing the "Safety First" sub-mission or purchasing one for 2,000 Zenny at the Kiss Ache Away store near Urban Park .
Talk to Nia at the entrance while wearing your helmet to enter the site.
Step 2: Meet Ken Masters
When you enter the construction site, a cutscene will occur where you will push someone out of the way from a falling beam. Ken will appear and deflect the beam away from you with a fiery kick.
Ken will enter the left scaffolding tower at the cutscene's end.
Step 3: Defeat Gus
But, of course, you can't stroll wherever you want on the construction site. To enter Ken's scaffolding tower, you must prove your strength to Gus, a worker guarding the scaffolding's entrance . Defeat him to enter the tower.
Step 4: Snap A Photo Of Ken
You'll find Ken on the scaffolding's second floor . Once you approach him, a blue marker will appear , signaling you to enter your smart device's camera app. After opening the app, select "Mission Mode" and take the photo .
Send this intel to Asterisk, and they'll direct you toward your next mark.
Master Opportunity: Ken
How would you like to learn from a champion? Talk to Ken and request you become his student. Then, you'll both enter a match so he can gauge your strengths and weaknesses. You'll become Ken's student after completing the match and the following cutscene.
- 1,000 Miles
- Lukewarm Beer x 1
Asterisk's next assignment directs you toward a fighter from Japan. However, with multiple Japanese fighters in this game, that's not the clearest request.
Step 1: Snap A Photo Of E. Honda
Your first instinct is to take a snapshot of a famous sumo wrestler living in Metro City. Visit the Sumo Restaurant near Urban Park to view a cutscene introducing the one and only Edmond Honda!
Once the cutscene is over, go to the designated photo spot and follow the same steps from Chapter 8 - 3 . Unfortunately, once you send the photo to Asterisk, they'll reveal it wasn't the fighter they sought.
Master Opportunity: E. Honda
Ready to become a professional sumo wrestler? Talk to E. Honda and request you become his student. You'll enter an awesome cutscene where the two of you duke it out in the sumo ring! After this initiation, you'll enroll in his style.
Step 2: Snap A Photo Of Ryu
Your conversation with Asterisk will direct you to Genbu Temple , thus unlocking it on the World Map. Fly over there to meet Street Fighter's legendary protagonist, Ryu!
After a fantastic cutscene that may make you cry (Just me? Okay.), Ryu will sit down to meditate . Use this opportunity to snap a mission photo of him . When you send the picture to Asterisk, they'll confirm he is the warrior they wanted.
Master Opportunity: Ryu
The time has come to enter the "heart of battle." Speak with Ryu and request to become his student. You'll fight in a match to convince him to take you on as a mentee.
After the match, you and Ryu will enter a disciplined training session (seriously, it's an awe-inspiring moment!). When this cutscene ends, you'll become his student.
- 5,000 Zenny
Your last target will take some additional steps to meet. Specifically, you must enter a high-security building and commit identity theft. (NBD, really).
Step 1: Get The SiRN Key Card
This mission is straightforward. Travel to the SiRN construction site and speak with Jonathan , the SiRN security guard in the blue shirt with the yellow tie. He's working with Asterisk and will hand over the card to you.
Related: Street Fighter 6: Beginner's Guide To Ken
Now that you have a SiRN key card, you can nab the materials you need to impersonate a SiRN researcher. To complete this mission, you must grab a lab coat and a SiRN staff name tag .
Step 1: Get Into The SiRN Building
First, head to your hangout and wait until Night time . Then, you can enter the Night Shift area of the construction site that leads to the SiRN offices. Here are the step-by-step instructions:
- Enter the construction site and turn right to enter the Night Shift area .
- Head upstairs and fight Gus to cross the bridge to the next platform.
- Drop off the bridge and make three right turns until you find the yellow power box . Turn on the box to power up the cranes.
- Head back from whence you came and climb the two metal slab piles to return to the Night Shift entrance .
- Cross the bridge and climb the ladder at the end of the room , located on the right.
- Check your key card at the SiRN reader around the corner. A crane will move a platform in front of the STOP line.
- Step on the crane platform and travel to the next scaffolding tower.
- Run to the back of the tower and climb the ladder to the next floor. Then, follow the ramps up the tower until you reach the next SiRN reader.
- Check-in at the SiRN reader . Then climb the ladder to the next floor and head onto the crane platform past the STOP line .
- You'll encounter three poisonous drones on your way to the SiRN building . Use anti-air attacks like Shoryuken or Rising Uppercut to defeat them quickly.
- Now you can enter the Base Server Room located on the right .
Step 2: Get The Lab Coat
Continue ascending the SiRN office floors to get to the Lab Coat. It's located in a SiRN chest in the 2nd Floor Office . Speak to SiRN Staff Grace to help you find it.
Step 3: Upgrade Your Security Clearance
You must upgrade your security clearance before you can access the elevator that reaches other SiRN floors. This requires a login from a desktop located in the 3rd Floor Office .
However, when you reach the 3rd Floor Office, you'll encounter Kimberly . She, too, is breaking into SiRN for unknown reasons. You must defeat her in a match to continue with the mission. Once you win, she'll deactivate the security alarm for you , thus making your upgrade much more manageable.
Now, approach this desktop to complete the upgrade.
Step 4: Get The Staff Name Tag
Use your new security clearance to ride the elevator to the 5th floor . Then, speak with SiRN Staff Liu , who happens to be missing his name card. He'll ponder if he left it in the server room, which provides your next lead.
Head down to the 3rd Floor Server Room, and you'll see an AI Refrigerator . Approach the refrigerator to begin an intense boss battle!
This three-on-one match pits you against the fridge, a drone, and a Hyoomba . In addition, the Shock Zone gimmick is in play. This means you'll get electrocuted if you get caught between the two electrical prods when they descend on screen.
Once you defeat the fridge, you'll obtain the Name Card, thus accomplishing your goal.
At this point, you've fought plenty of Hyoombas and attack drones. But what about AI Refrigerators? These opponents are tricky. Refrigerators have plenty of armor that absorbs most attacks. The key to beating the fridge is to cross it right before it starts hurling food at you. Then, strike it from the back . If you hit the fridge during its projectile attack, you'll trigger Pressure Time.
Step 5: Leave The SiRN Building
All that's left to do is to leave the SiRN building via Fast Travel . We don't know how a bus can transport you from inside a third-story building to the street below. But we won't look a gift horse in the mouth.
- 7,000 Miles
- Street Fiber (Head) x 1
So, what is the purpose of all this lab researcher cosplay? You'll soon discover that you must infiltrate a US government aircraft carrier. Who knew federal crimes were on the docket today?
Step 1: Meet Jonathan At The Construction Site
Equip the lab coat and meet Jonathan, the security guard, at the same spot you met him in Chapter 8 - 5 . He'll check over your look and give you the go-ahead for the rest of the mission. Your next stop is a US Navy aircraft carrier.
Step 2: Talk To Officer Curtis
Now that you're in disguise, and cleared to proceed, head to the Grace Marina and speak to Officer Curtis . Since you're posing as a SiRN researcher, he'll brief you on a maintenance job regarding SiRN's AI cleaning bots assigned to the Aircraft Carrier Byron Taylor. Then, he'll welcome you aboard.
Step 3: Complete The Maintenance Job
When you arrive on the aircraft carrier, you'll see that the AI cleaning bots have become very aggressive. So, it's your job to get them under control. Your next battle is against two rampaging Hyoombas and one rampaging drone . Fortunately, you'll face them one at a time.
After the battle, a cutscene will occur as your avatar tries to take down the last nasty Hyoomba. Luckily, a famous soldier will enter in the nick of time and flash-kick that sucker clean in half! Yes, we're talking about Guile .
Step 4: Snap A Photo Of Guile
Finally, find the proper position and use your camera's Mission Mode to get a snapshot of Guile to send to Asterisk. Asterisk will confirm Guile's identity, and thank you for your intel collection.
While Asterisk will not have more intel ready yet, they will invite you to visit Bosch's home country of Nayshall. This begins the next chapter.
Master Opportunity: Guile
Like the other masters in this chapter, there are no hoops to jump through to get Guile to become your teacher. If you approach him with the request, he'll oblige. After all, how could he refuse one of Luke's students?
There are so many interesting characters you'll find in Chapter 8. However, two avatars stand out for offering awesome gear drops!
Miharu Abeno
- Location: Genbu Temple, Japan
- Location: Grace Marina, Metro City (Day)
Chapter 8 - 6: Scraping The Sky has some great SiRN chests to discover. If you're looking for extra miles, a permanent stat boost, or some stellar new gear, search for the following SiRN chests:
Next: Street Fighter 6: World Tour Tips
Chapter 7 Walkthrough
Street fighter 6: complete guide, street fighter 6 review - knockout punch.
- Triple-A Games
- Street Fighter 6
- Street Fighter
- #Luxury travel
- #Unusual Moscow
- #Jewish Heritage
- #Russian traditions

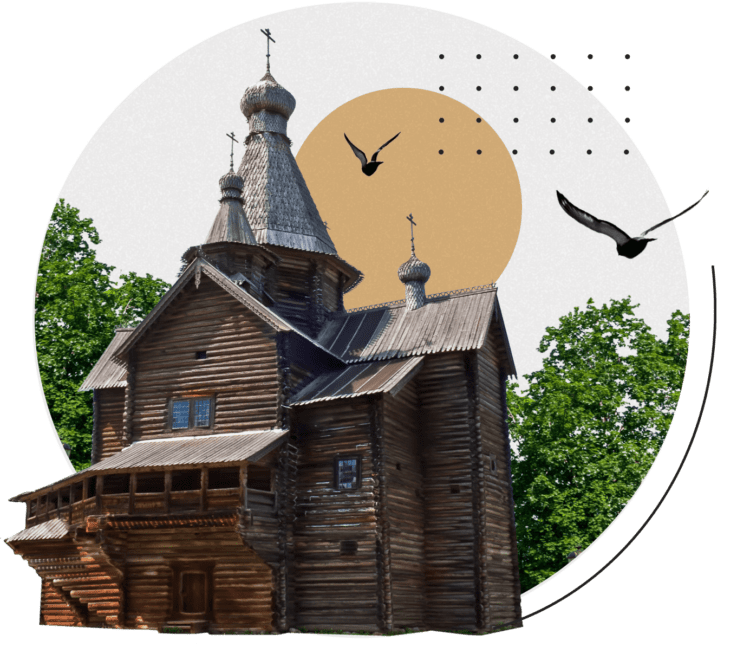
Veliky Novgorod
The whole city of Veliky Novgorod is a big museum; there are many well-preserved monuments dating back to the 11th century and later centuries.

Veliky Novgorod attractions
Novgorod kremlin, trade side and yaroslav’s courtyard, st. george's monastery, vitoslavlitsy museum of wooden architecture.

Request a private tour, tailor-made for individuals and small groups to meet your needs and preferences.

Discover historical attractions of Veliky Novgorod
- Private trip from St. Petersburg
- Visit Novgorod Kremlin and the Cathedral of St. Sophia
- Explore Yaroslav’s Court with its medieval churches
- Pick-up and drop-off at your hotel
Group of 2: 16000 Rubles/person
- Ask a question
Take a walk through the most ancient Kremlin in Russia
The Novgorod Kremlin, which is also called ‘Detinets’, is located on the left bank of the Volkhov River. The first fortified settlement was set here during the reign of prince Vladimir Yaroslavich, the son of Yaroslav the Wise. During these times, all the state, public and religious life of Novgorod was concentrated here. It was the place where people kept chronicles and copied the texts of books. The Novgorod Kremlin, the most ancient one in Russia, was founded here in the 15th century.
St. Sophia Cathedral (11th century), The Millennium Of Russia Monument, Episcopal Chamber (15th century) and the main exhibition of The State Novgorod Museum-reservation located in a public office building of the 18th century are all situated in the Novgorod Kremlin. The exhibition will tell you about the whole Novgorod history from ancient times to the present day. There are also restoration workshops, a children’s center, a library and a philharmonic inside the Kremlin walls.

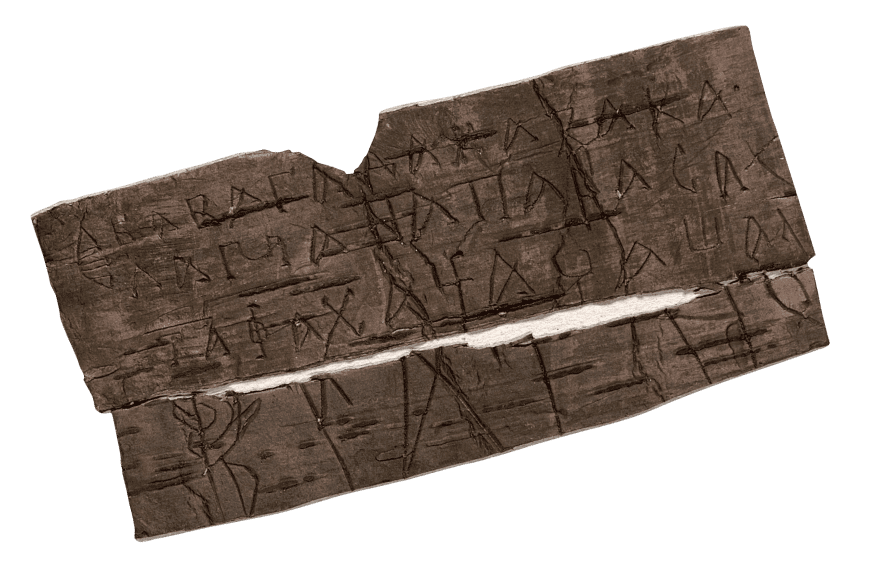
Send a letter with the State Novgorod Museum-reservation stamp
While visiting the main building of the Novgorod Kremlin museum, you’ll see a small bureau near the souvenir area. Two more bureaus like that can be found in the Fine Arts Museum and the Museum information centre. This is the Museum Post, the joint project of the State Novgorod Museum-reservation and Russian Post.

The tradition to exchange letters (at that time written on birch bark sheets) dates back to the 11th century so it’s hardly surprising that such a project appeared here. The bureaus are desks and mailboxes at the same time, so you can send your friends a postcard with a view of Novgorod right from the museum.
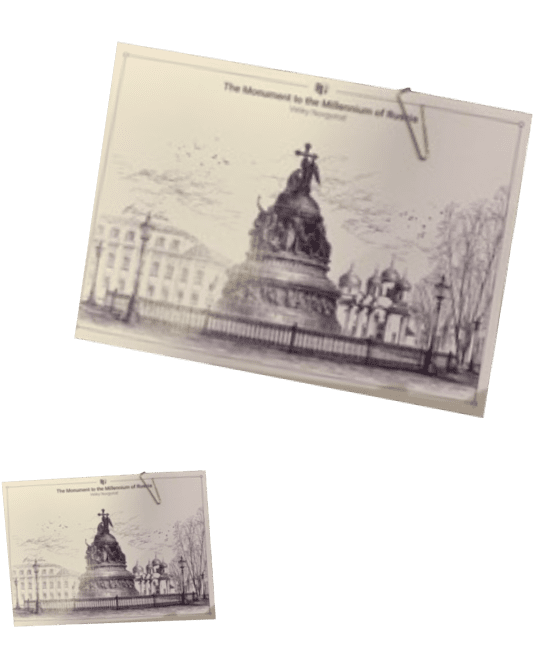
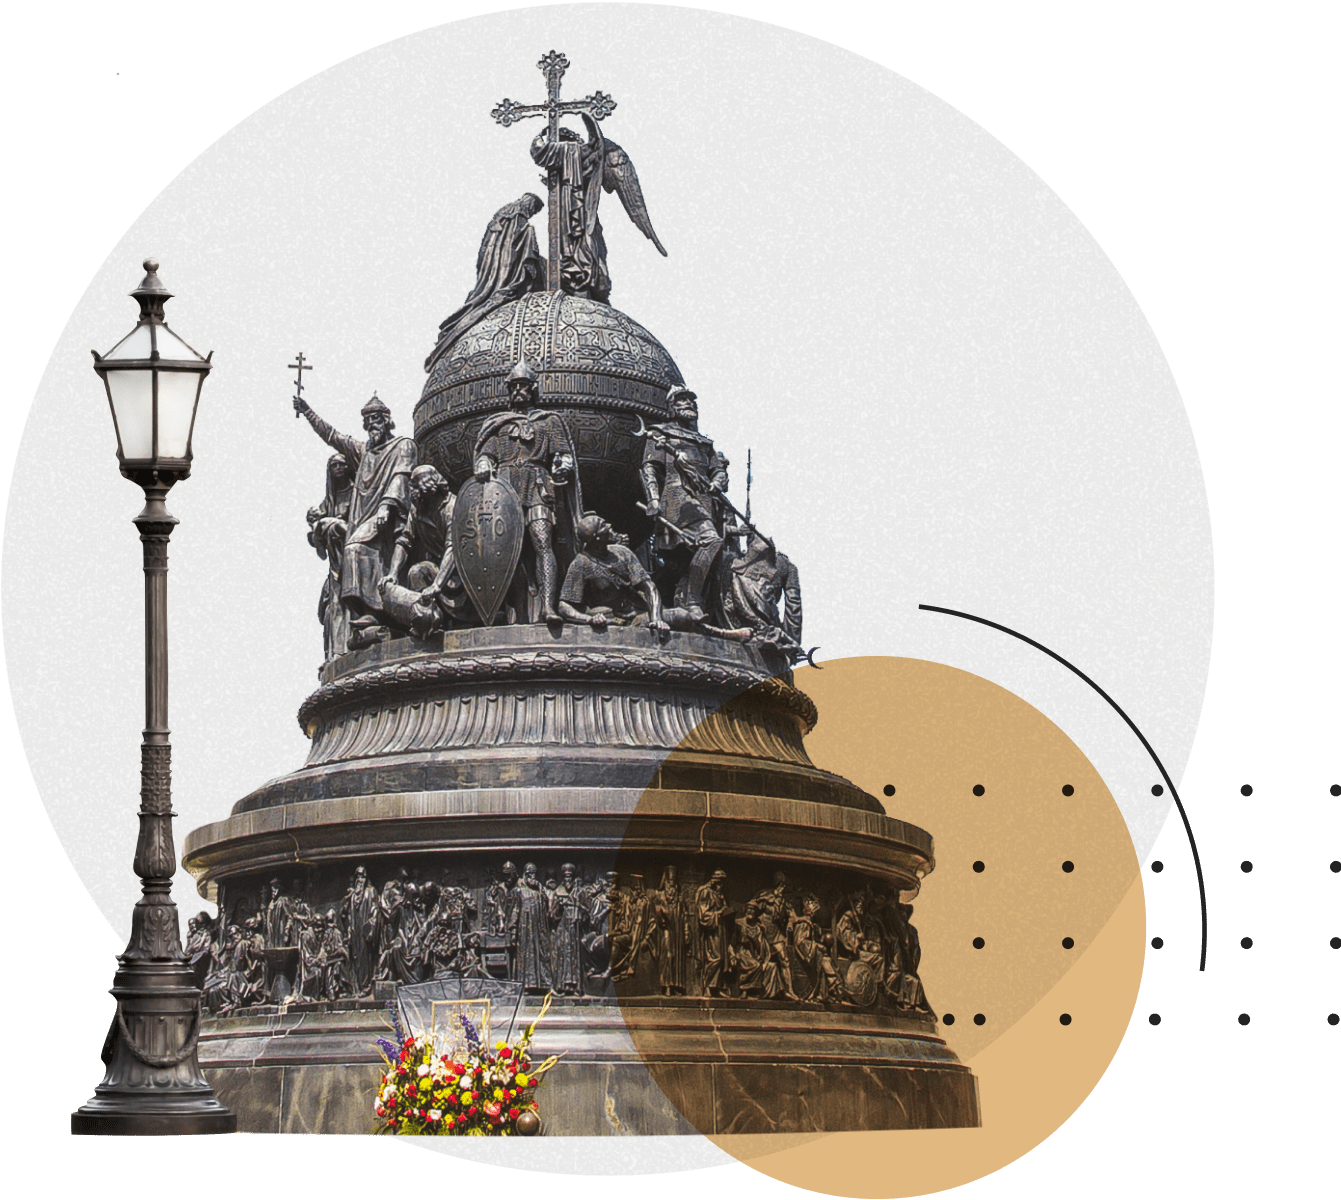
Find the famous Russian poet Alexander Pushkin among the figures of The Millennium Of Russia Monument
In 1862, 1000 years after the Varangians were called to Russia, a monument dedicated to this event was launched in Novgorod. To tell the story of Russia’s one thousand years, the sculptor used 129 bronze figures: from state and military leaders to artists and poets.
One of figures portrays Afanasy Ordin-Nashchokin, a politician and reformer who was responsible for Russia’s diplomatic relations in the middle of the 17th century. He is believed to be the father of international and regular mail in Russia. He was also the person who came up with the idea of the first Russian Post official emblem — a post horn and a double-headed eagle.
Cross the Msta River over the first arch bridge in Russia
The steel bridge in Borovichi town that connects two banks of the Msta river was built at the beginning of the 20th century. The project of the bridge was created by Nikolay Belelyubsky, engineer and professor of St. Petersburg State Transport University. This is the first arch bridge in Russia.
In 1995, it was included in the national cultural heritage register. More than 100 bridges across Russia were developed by Belelyubsky, but only this one is named after him.
Cast a virtual bell
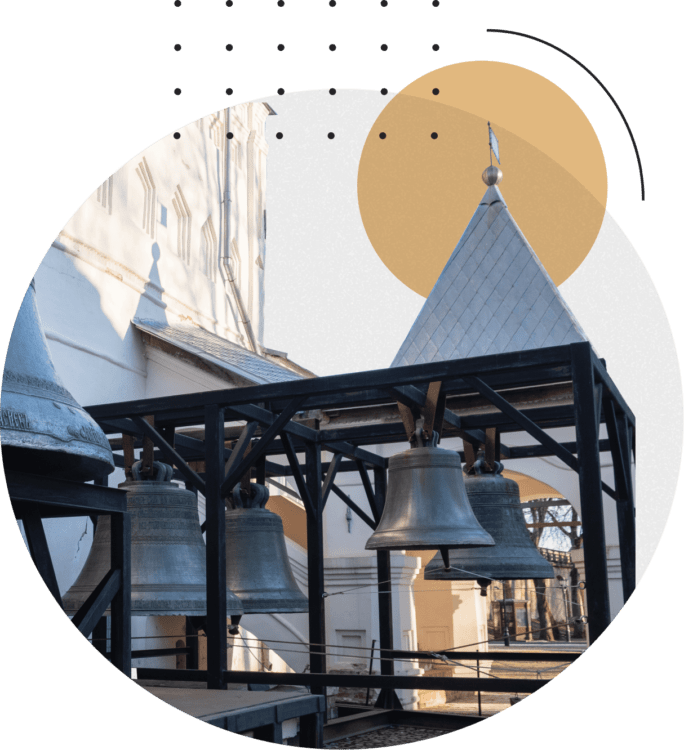
When in the Novgorod region, you’ll definitely hear bells ring and learn about the Novgorod Veche Bell. During the siege of the city, tsar Ivan III ordered to remove this bell from the bell tower and send it to Moscow. Legend says that the bell didn’t accept his fate, fell to the ground near the border of the Novgorod region and broke to pieces against the stones.
In the biggest Museum Bell Centre in Russia located in the Valday town, you can see bells from across the world and learn why Novgorod bells are unique. The museum’s collection represents bells from different countries and ages, some of them dating back to the 3rd century BC. You’ll learn about the history of casting and modern bell-making technologies and also play games on a touch table. For example, harness virtual ‘troika’ (three) horses with bells or cast a virtual bell.
Spot the pigeon on the cross of St. Sophia Cathedral
St. Sophia Cathedral was built in Novrogod between 1045 and 1050 by Kievan and Byzantine masters. It was conceived as the main cathedral of the city, and during its first years it was the only stone building in Novgorod. So where does the pigeon on the cross of the cathedral’s biggest dome come from?
Legend says that while tsar Ivan the Terrible and his Oprichniki were cruelly killing peaceful city folk in 1570, a pigeon suddenly sat down to the cross of the city’s main cathedral. It looked down, saw the massacre, and was literally petrified with horror. Since then the pigeon has been considered the defender of the city. People believe that as soon as the pigeon flies away from the cross, Novgorod will come to an end.

Visit a monastery, that was founded by Patriarch Nikon
The Valday Iver Monastery is situated on the island in the middle of the Valday lake. It is considered to be one of the most important and picturesque orthodox shrines.
The monastery was founded in 1653 by the initiative of Nikon who had just been elected Patriarch. Nikon wanted the monastery to look like the Iviron Monastery on Mount Athos, including the architectural style and monk’s clothes. Legend says that Nikon saw the spot for the monastery in a dream.

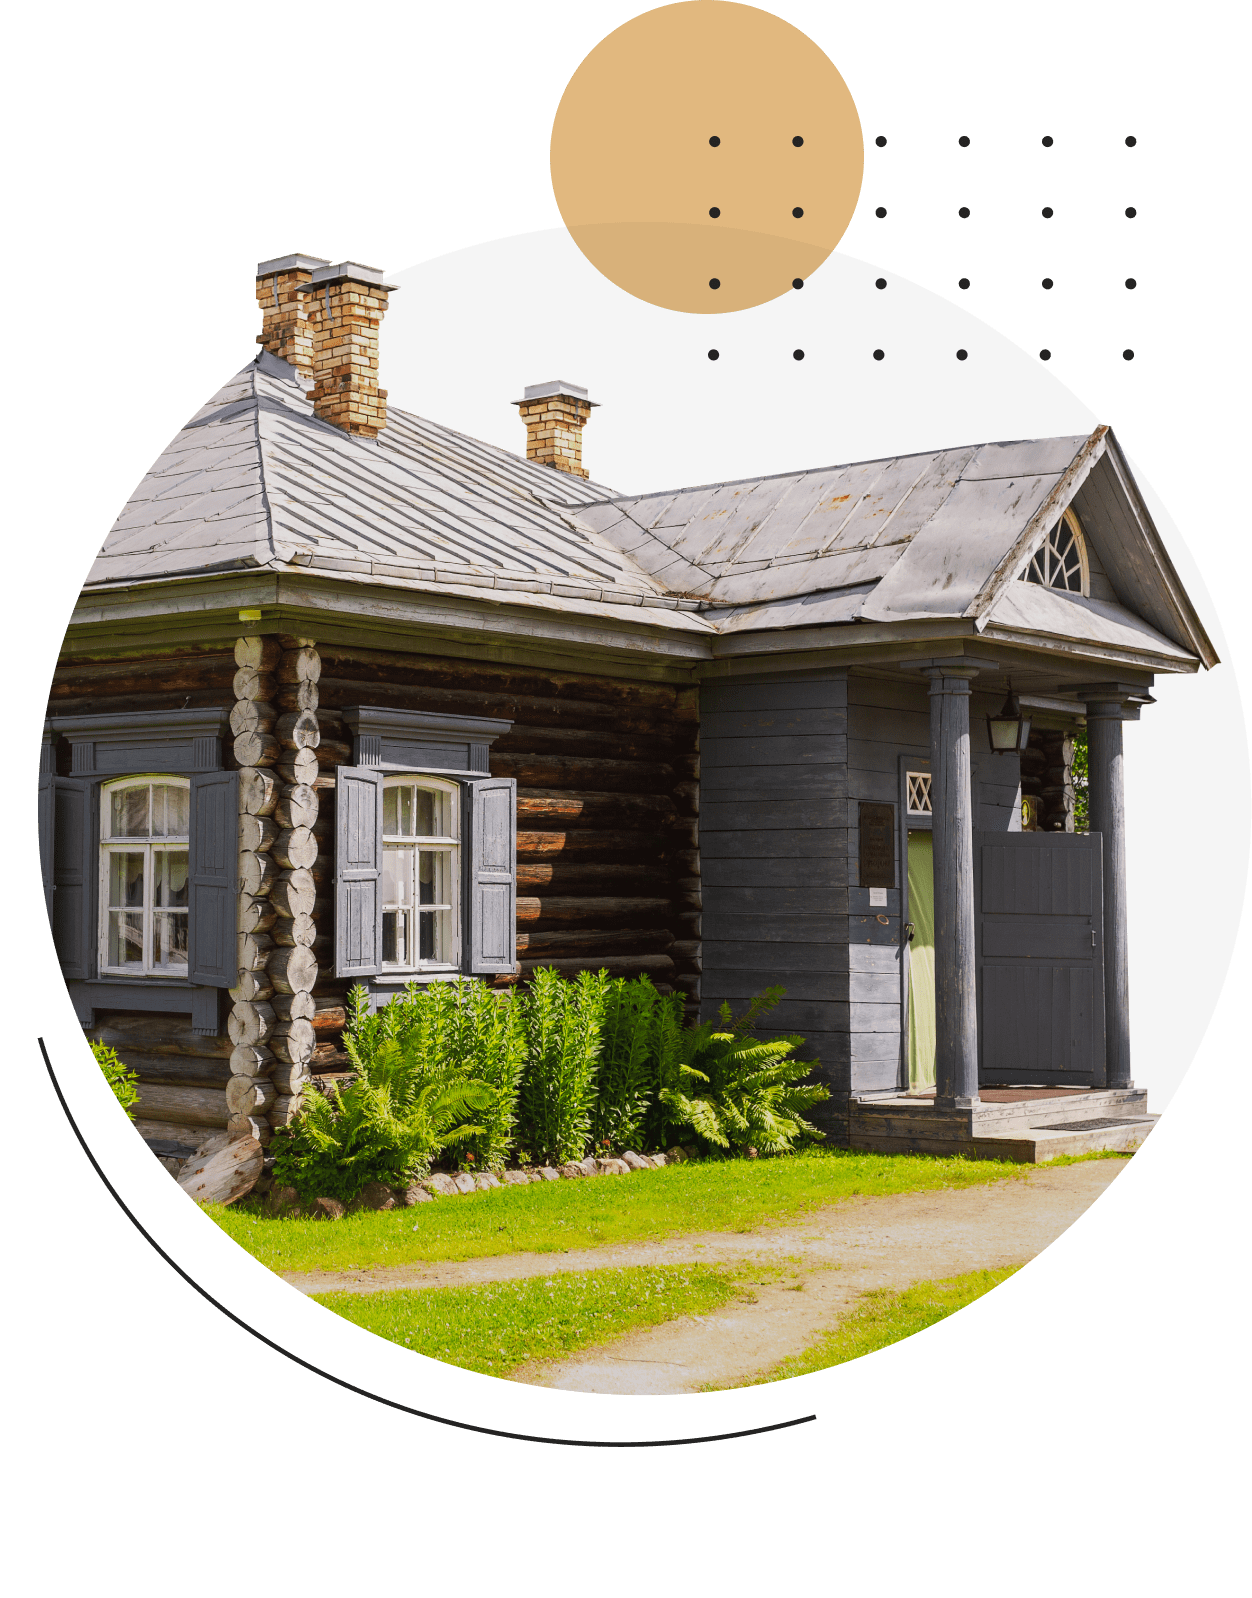
Check out Fyodor Dostoevsky’s country house
Fyodor Dostoevsky, a famous Russian writer, first visited Staraya Russa town in 1872 during a summer trip with his family. They liked it so much that the next year they rented a house near the Pererytitsa River’s embankment and spent every summer here ever since.
Dostoevsky loved this house, called it ‘his nest’ and considered it the perfect place to work and to be alone. In Staraya Russa he wrote his novels ‘The Adolescent’, ‘The Brothers Karamazov’ and ‘Demons’. Today, this place is a museum where you can explore what Dostoevsky’s house looked like and see his family’s personal belongings, photos and letters.

Visit an authentic Russian ‘izba’ (wooden house)
If you want to really enjoy the atmosphere of the old Novgorod, you should come to the Vitoslavlitsy Museum of folk wooden architecture that is located on the Myachino lake not far away from Veliky Novgorod. In this open-air museum you’ll see the best examples of Russian wooden architecture, including authentic old ‘izbas’ (wooden houses), rural chapels and churches.
During the year, the museum hosts fairs of crafts and folklore, christmastides, and even an international bell ringing festival.
Learn what Brick Gothic looks like
The Episcopal Chamber of the Novgorod Kremlin is the only non-religious German Gothic building of the 15th century preserved in Russia. You can have a good look at the facets of the gothic cross-domed vaults inside the chamber. This is why this building is also called ‘Faceted Chamber’ or ‘Chamber of Facets’.
The chamber was part of Vladychny Dvor, the place where all important city events took place: court hearings, gatherings of the Council of Lords of the Novgorod Republic, ambassador’s receptions and feasts. The seals of the city’s lords were kept here. The decree of tsar Ivan III on merging the Novgorod Republic with the Moscow State was first announced in 1478 in Episcopal Chamber. This is when the name of the new state, Russia, was first pronounced.
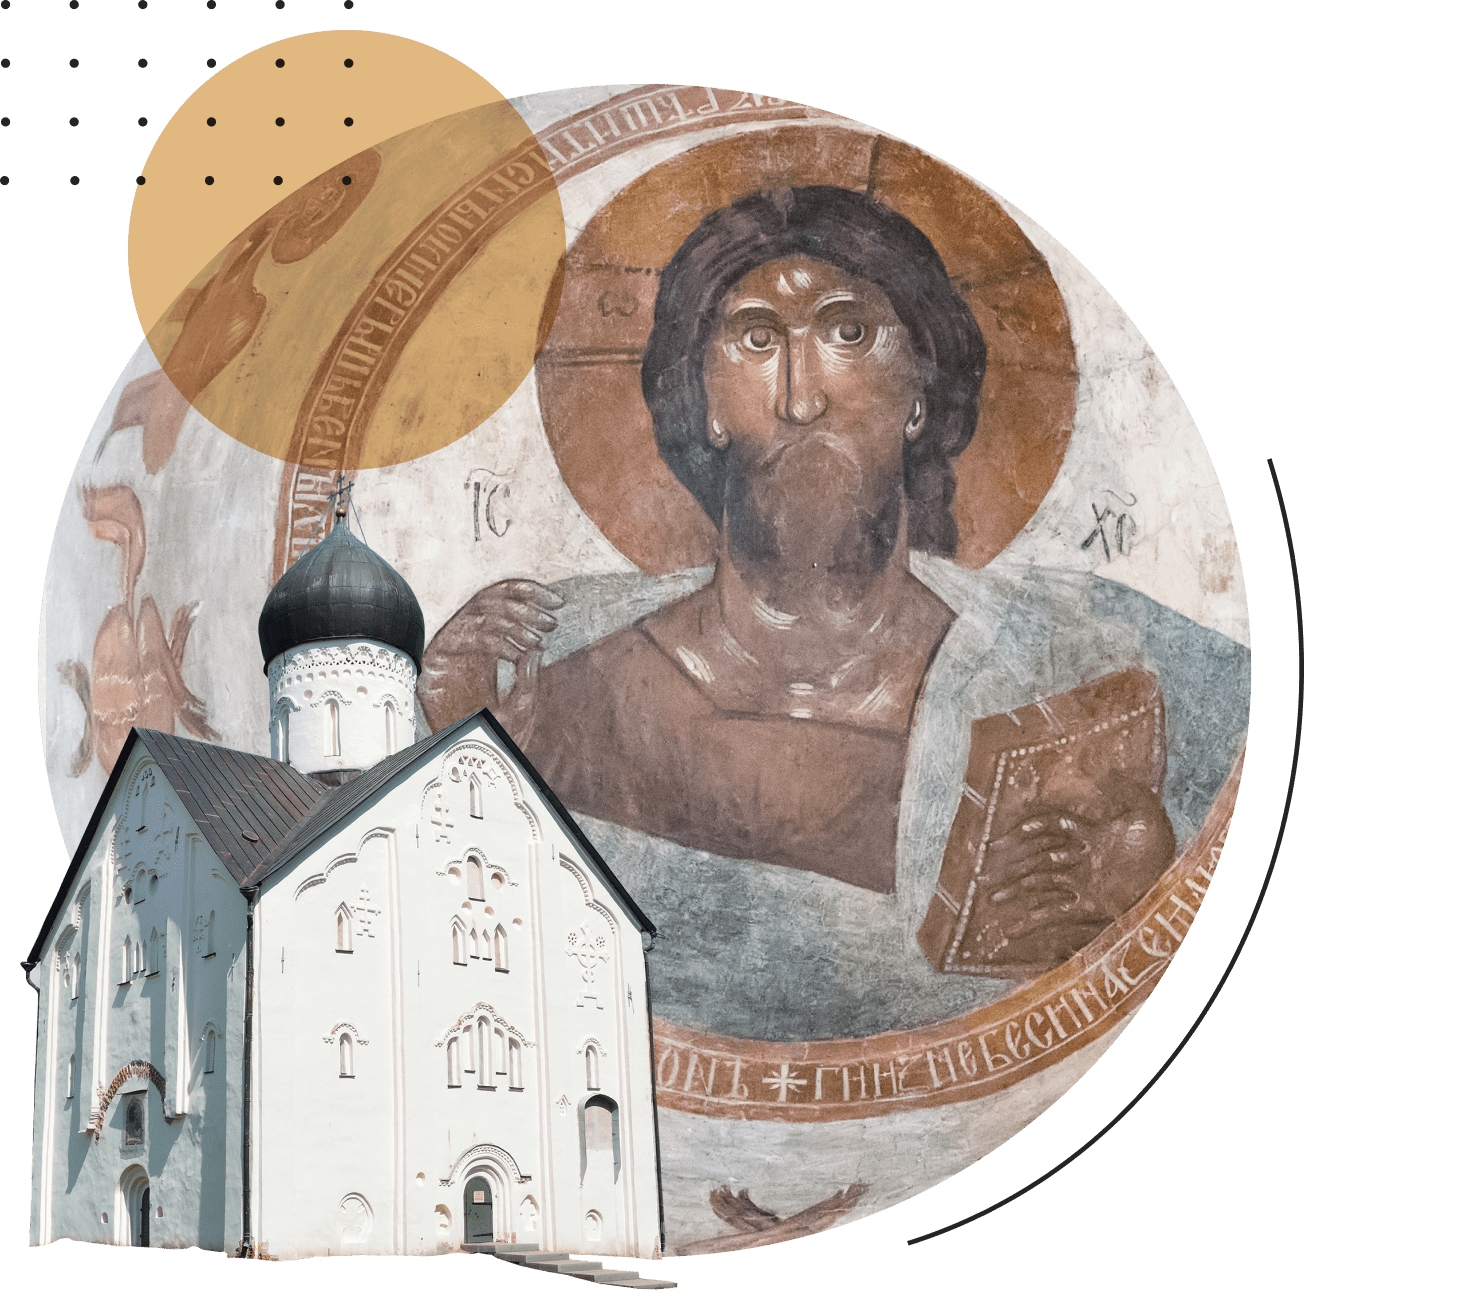
See the murals by Theophanes the Greek
The Byzantine Empire had a huge impact on the development of the Russian culture. Many works of art and architecture in ancient Russia were created by Byzantine artists and masters. Theophanes the Greek was one of them. He was born in Byzantine and created icons and murals in Constantinople and Caffa (modern Feodosia). After that he moved to Novgorod where he was commissioned to paint the walls of the Church of the Transfiguration of the Savior on Ilyina Street. You can enjoy his unique and expressive style if you look at the murals inside the dome of the church and the Trinity side chapel.
The most recognizable and the only monumental work of Theophanes the Greek that is preserved today is the chest-high portrait of the Savior the Almighty in the dome of the Church of the Transfiguration of the Savior.
Take a photo with an ancient Novgorod citizen who is learning how to read and write
In 1951, a letter written on birch bark dating back to the 14–15th centuries was found in Veliky Novgorod. Many decades later, in 2019, a sculpture designed by Novgorod artist and sculptor Sergey Gaev appeared on this exact site.
The sculpture portrays an 8–year old boy sitting on a stool and holding a piece of birch bark. At this age children in Novgorod started to learn how to read and write. During archaeological excavations in Novgorod, scientists often found ancient handwriting practice books and children’s drawings on birch bark sheets.
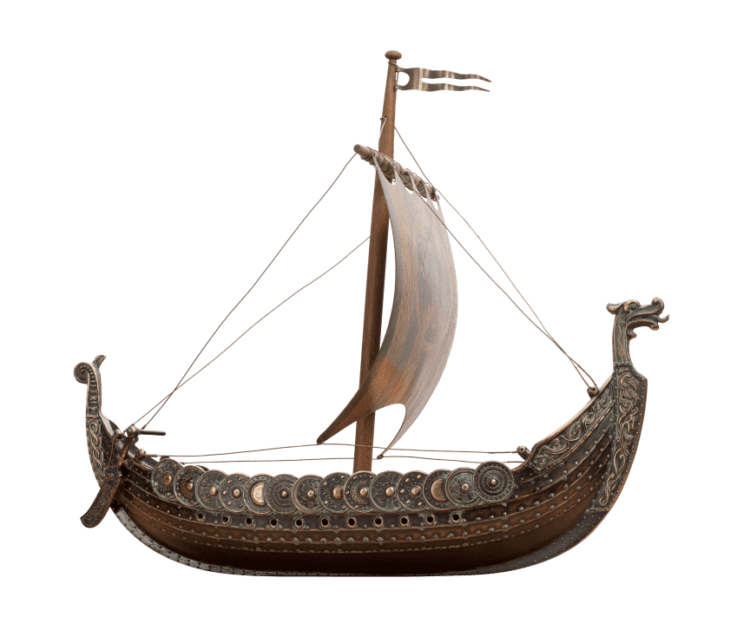
Feel like an ancient viking or prince Rurik’s guest
Novgorod is one of the waypoints of the famous trade route from the Varangians to the Greeks. The route passed through the Volkhov river. In the 9–10th centuries there was a fortified settlement of the Viking Age here.
Some scientists believe that Novgorod is named after this area which was called ‘Stary Gorod’ (‘Old City’) at that time. Some historians and archeologists consider this place to be the residence of Prince Rurik who was asked to rule the city in 862. That’s why this ancient settlement is called ‘Rurikovo Gorodische’ (‘Ruruk’s Old City’).
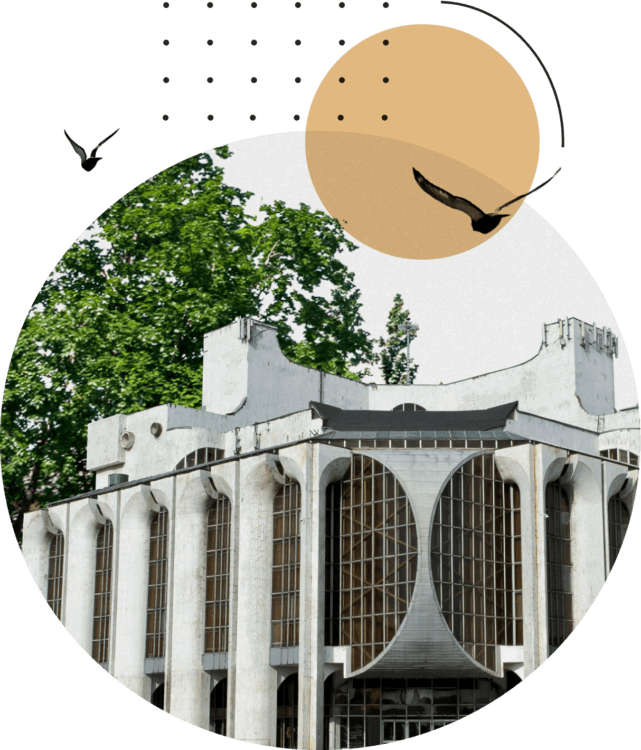
Learn more about the Soviet modernist architecture
On the bank of the Volkhov river near the Novgorod Kremlin, there is an incredible building that looks like a spaceship and contrasts strongly with the ancient buildings of the city.
This is the Fyodor Dostoevsky Theater of Dramatic Art that was built in 1987. It is one of the most striking examples of the Soviet modernist architecture. The theater was built for 10 years according to the project of architect Vladimir Somov.
See what an everyday life of Old Believers looks like
The Krestsy town in the Novgorod region has always been considered to be the center of the Novgorod Old Belief community, and it still is. Before the Soviet revolution there were three Old Believers churches here.
The Lyakova village, which is located not far from the town, used to be inhabited completely by Old Believers. You can learn more about their lifestyle in the local interactive museum. You’ll be introduced to Old Believers’ traditional crafts and ceremonies, drink tea with healing herbs and learn how to chop wood and use an old spinning wheel.

Buy a traditional embroidered tablecloth
A unique embroidery style that is now famous all over the world was born in the Staroye Rakhino village in the Novgorod province. By the middle of the 19th century, it had become a folk craft. Since then, linen tablecloths, towels and clothing items decorated with unusual ornaments have been popular not only among the locals, but also travellers.
In 1929, the first cooperative partnership of embroidery masters was created in Kresttsy. Later it turned into a factory that still operates today. The factory has a museum where embroidery traditions are preserved and new ornaments and technologies are created.

Find yourself in the Middle Ages
In the Middle Ages, Staraya Russa town could be called ‘the salt cellar of Russia’. That’s because salt making was the main trade here up to the 19th century. A few years ago, the old craft was brought back to life, and construction of salt works began. Later, an interactive museum was launched based on the results of archaeological findings.
This museum recreates a typical medieval manor of Staraya Russa of the 12th century with living rooms, a bathhouse, workshops, a livestock pen and traditional peasant household items. In this museum, you can also buy salt which is made in the same way as 1000 years ago.

See the place where Suvorov started his Italian campaign
Alexander Suvorov’s manor in the Konchanskoe village, which has now become the museum of the great commander, was originally the place of his exile. Suvovor openly disagreed with the reform of Russian’s army based on the Prussian model, and Emperor Paul the First didn’t appreciate such behaviour. He first fired Suvorov and then sent him away to his family estate.
However, the exile lasted for only two years. The great commander started the military campaign straight from his house in the Konchanskoe. During this legendary expedition, he crossed the Alps and defeated the French army.
Become a real hiker
If you dream of having a hike in the Novgorod region, but at the same time you are afraid that a tourist’s life may be too hard, you should try the Big Valday trail. This is a five-day 59-kilometer walking route. Its central part goes right through the Valday National Park’s territory.
You won’t have to cope with difficulties and inconveniences of camping life here. The route is marked with signs, and there are camping sites where you can find everything you need for an overnight stay from shelters and places for a fire to toilets. The trail finishes at the Dunayevshchina village where you can take a bus back to Valday. To take the trail, you have to fill out a special form and register on the Ministry of Emergency Situations of the Russian Federation website.
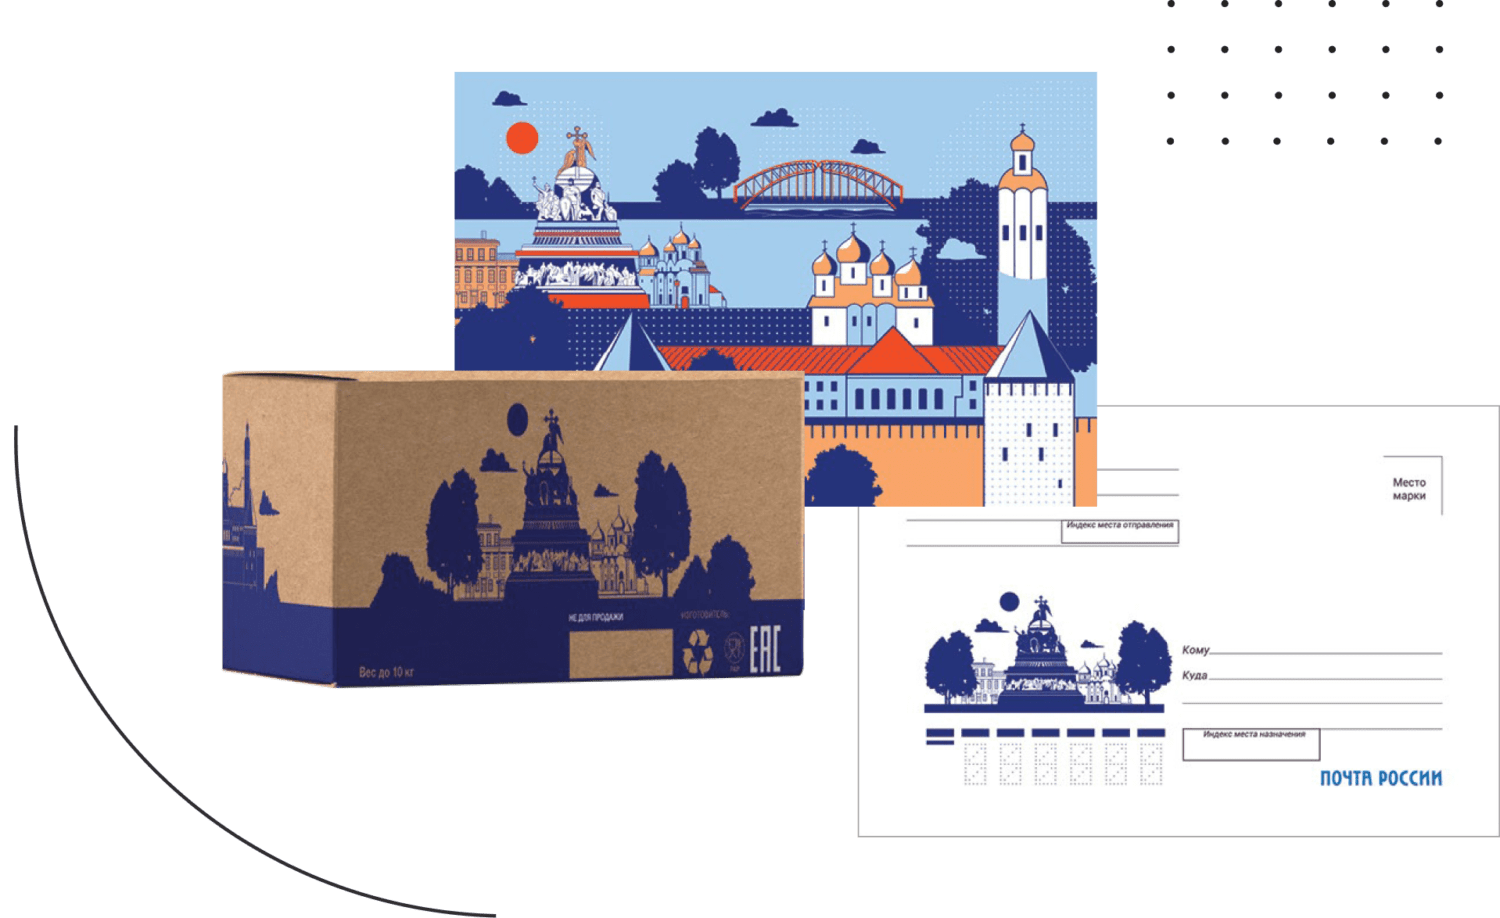
Russian Post has launched a limited series of products dedicated to the cultural heritage of the Novgorod region.
In autumn 2020, Russian Post announced an open contest to create the design for its limited series dedicated to Novgorod region. The project was supported by the Government of the Novgorod region, ‘Russ Novgorodskaya’ (Novgorod Russia) project, the State Novgorod Museum-reservation and Yandex.
Stamps and envelopes are traditionally used to spread information about historic dates and figures and famous landmarks. Now we can also use parcel boxes, packaging tape and postcards. The limited series products will travel around the world, introducing the most popular Russian attractions to six million Russian Post clients daily.
The participants were to create the design for the limited series featuring three iconic attractions of the Novgorod region, the Novgorod Kremlin, the Millennium Of Russia Monument and the Belelyubsky Bridge in Borovichi. Moscow designers and graduates of the Higher School of Economics’ Art and Design School Alena Akmatova and Svetlana Ilyushina won the contest. Their project was chosen via an open vote and by the expert jury.
IMAGES
COMMENTS
Note: You can't access the storage room until you reach chapter 13-4 and beyond.
This is the chest with the key card for the locked door. While this SiRN door appears in Chapter 8, you won't be able to unlock it until Chapter 13, where you will need to find a treasure chest ...
SiRN Building - Storage Area (Chest 1) You first need a key card from the fourth-floor Server Room. Follow the same path from the seventh floor, going down the stairs on your right. However ...
These include valuable items, from money through to supplements and everything in between. On this page, as part of our Street Fighter 6 guide, we're going to list all SiRN chest locations. 1 ...
This World Tour clothing guide provides a comprehensive breakdown of the unique clothing and accessory items you can find in SiRN Chests or unlock via missions within Street Fighter 6, including ...
updated Jun 4, 2023. Meeting at the SiRN Building is a main mission in Street Fighter 6 that will become available in Chapter 8 after you've completed Big in Japan. This SF6 World Tour Walkthrough ...
updated Jun 5, 2023. A Most Beautiful Mess is a main mission in Street Fighter 6 that will become available in Chapter 13 after you've completed Back to Metro City. This SF6 World Tour Walkthrough ...
Chapter 13 - 4: A Most Beautiful Mess Walkthrough. To complete "A Most Beautiful Mess," players will need to make their way up to the top of the SiRN Building just as they did in Chapter 8. Once ...
With seven main story missions and a few optional Masters, Chapter 8 of World Tour mode has the potential to keep Street Fighter 6 players busy for quite some time. Unlike one or two of the ...
JVGS Site https://jasonsvideogamessource.com/ Street Fighter 6 - World Tour 13-4 Head To The Roof of the SiRN Building Keycard Level 4 Location JVGS Discord ...
Despite the somewhat daunting and convoluted equation that you're expected to work out, the answer to the SiRn puzzle is remarkably simple. To solve the equation, you first need to open up the keycode section of your Messages app. Once there, type in 123456, and hit OK. That is the solution to the puzzle. Click to enlarge.
Scraping the Sky is a main mission in Street Fighter 6 that will become available in Chapter 8 after you've completed Meeting at the SiRN Building. This SF6 World Tour Walkthrough guide will ...
SiRN Storage Room. On Chapter 8-6 about to leave the building via fast travel but still don't have access to the storage room. First room on the left after you arrive there from riding the shipping container. Is there a way to access this or does it unlock later in the game. Just read online I won't have access until chapter 13.
Step 1: Get Into The SiRN Building. First, head to your hangout and wait until Night time. Then, you can enter the Night Shift area of the construction site that leads to the SiRN offices. Here are the step-by-step instructions: Enter the construction site and turn right to enter the Night Shift area .
In order to find Rashid in World Tour, you'll first need to travel to Old Nayshall. If you search to the right of the Hangout area during night time, you'll spot Azam hanging around, who begins a ...
The most convenient way of travel to Velikiy Novgorod is to travel by train and the fastest route is now offered by the Lastochka train departing from Saint Petersburg twice a day: in the early morning (07:36 a.m.) and at 7:32 p.m. (the timetable is the matter of change, so you should check it before planning a trip.
Street Fighter 6 includes World Tour Mode, a single-player story mode in which you'll create your own avatar. This Street Fighter 6 World Tour walkthrough details everything you'll need to know ...
A visit to the Rurik's Gorodishche (Settlement) is not to be missed. D.S. Likhachev used to call it one of the most wonderful places in the world, and it is directly linked with the sources of Russian statehood. Prince Rurik stood here with his druzhina (troops) in the 9th century after being called in by the Slavs to rule.
The main exhibitions of Novgorod Museum are located in a two-storied building of Public Offices Chambers on the territory of the Kremlin. The most interesting parts of the exhibition are the collection of Russian icons of the 11th - 19th centuries, birch bark manuscripts, handicrafts, military equipment and other artefacts from ancient times till the end of the 17th century.
From One Friend to Another is a main mission in Street Fighter 6 that will become available in Chapter 14 after you've completed A Most Beautiful Mess.This SF6 World Tour Walkthrough guide will ...
The Episcopal Chamber of the Novgorod Kremlin is the only non-religious German Gothic building of the 15th century preserved in Russia. You can have a good look at the facets of the gothic cross-domed vaults inside the chamber. This is why this building is also called 'Faceted Chamber' or 'Chamber of Facets'.
High-Flying Man is a main mission in Street Fighter 6 that will become available in Chapter 8 after you've completed Scraping the Sky. This SF6 World Tour Walkthrough guide will detail the rewards ...