God of War The Black Rune Walkthrough Guide – Tyr’s Vault, Boss Tips
Our God of War The Black Rune Walkthrough Guide will guide you through the entire The Black Rune chapter of God of War in a step-by-step manner so that you can easily move on with the story.
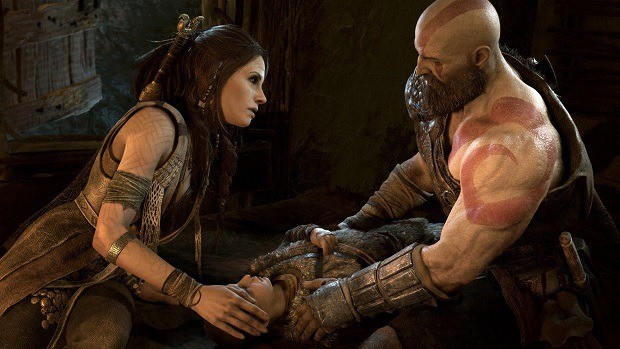
The Black Rune carries Kratos’ story forward and has a lot of different battles for you to fight. By this time, you will have looted whatever gear you needed to from Freya’s realm and you will be able to continue on with your fight. However, the chapter is very complex and you will need this God of War The Black Rune Walkthrough Guide .
This God of War The Black Rune Walkthrough Guide will give you all the help that you need to sail past the 11th chapter of the game.
We would like to mention here that this walkthrough would strictly focus on the main story progression. There are many collectibles , hidden chambers , and chests found in each chapter but we have different guides especially focusing on each of these collectibles and side missions. You can visit our site and check out all other guides related to God of War posted there.

God of War The Black Rune Walkthrough
In this chapter, your search for the Jotunheim travel rune will continue. The Black Rune is hidden behind a plethora of puzzles, enemies, traps, and defenses. You will also be facing 2 Grendels during this chapter and will have to traverse the entire Tyr’s Vault.
Let’s go ahead and see how to find the Black Rune. First, you will have to get back to your boat and make your way to Tyr’s Vault. That should not be difficult for you to do by now. You have to go to the flag marked as temple boat dock in Lake of Nine.
Tyr’s Vault
First of all, you need to deactivate all of the defenses which surround the vault. You will need to use the wind to do that. For the outer ring of the defenses, get to the open side passage near the stalk towards the center of the chamber.
Look at the rings and capture the Hel energy before sprinting down the passage and transferring them to the trap on the stalk. A crank wheel will replace it and you will need to turn it to deactivate the outer defense.
The outer ring will open up two new paths. The one straight ahead will go to the deactivation chamber. Do not go there, for now, take the other path and make your way to the coffin. Pass the coffin and keep on moving forward so that you can access the second chamber. You need to use the side passage when you are near the sets of spinning blades.
You can spring past the first two sets of blades if you want and then toss Leviathan at the gear disc on one of the wheels of the third set to freeze that wheel, then recall it when the wheels are aligned so that you pass the wheels easily.
Once you are in the second chamber, you will need to deactivate the middle ring. Lift the gate which has the diamond in the center and then defeat all of the Draugrs that make your way towards you.
After that, go near the chamber gate and capture the winds of Hel before sprinting to the second chamber and using them on the stalk to bring up another crank wheel which you can use to disable the defenses.
Here, you will have the option to get a third Nornir Chest before you head on to the next chamber. Refer to our God of War Collectibles Guide for further information on how to get that chest. Once you have that chest, you can move on to the third chamber. Go to the other passage and then move in until you see a blue-lit alcove.
Throw your axe at the gear wheel to freeze the block and use it to walk to the wall on the other side. Transfer the winds to the outer ring from the inner ring when you get to the main hall (you need to get to the yellow section of the wall). Defeat the Draugr patrol here and then find a rune message on the wall.
Now, you will be able to deactivate the third ring of the defenses. Kick the anchor chain down and get to the main floor. Transfer the energy from the trap to the stalk and turn the crank wheel that pops up.
When this happens, Atreus will let you know that the Black Rune will be lowering slowly. However, you will be trapped before it is lowered and the crank wheel will start sinking.
Now, you will need to escape the trap that you are in by solving a puzzle. You will see three symbols with three pull chains. The order is sun, moon and then Midgard. Simply put, pull the center chain first, then the left, then the middle, then the right, then the left, then the middle and finally the one on the right to solve the puzzle.
You will find out that solving this puzzle still did not deactivate the trap that you were in. You will still be bound to the wheel and the chain will start pulling the platform towards the spiked plate, surely a terrible death!
However, escaping it is not difficult as all you need to do is to press square when the prompt appears on your screen. This will cause Atreus to thrust his knife into the mechanism and jam the chain to free you for good.
After this, you need to get to the exit gate and break it open. You will find yourself on the balcony of the main hall. Here, you will notice the ring mechanism fall to the floor and free the Black Rune for you to get. That will be your last objective of the chapter.
Climb down using the chain and get to the center of the platform. Kratos will give Atreus a gift and grab the Black Rune. Once you do that, 2 Grendels will wake up in order to defend the rune and you will need to defeat them. Check out our God of War Bosses Guide to figure out how to defeat both of the Grendels easily.
When you have finally defeated the Grendels, all you need to do is to escape the place and get back up to the bridge. Exit the main hall and make your way to the sand bowl.
Atreus will need to write in the bowl in order to raise the platform back to where it was. Finally, use the elevator to get to the level of the bridge and walk towards it to end the chapter.
That is all we have for our God of War The Black Rune Walkthrough Guide. Let us know if we missed something using the comments section below!
- " class="share-link facebook">
- " class="share-link twitter">
- &title= " class="share-link redit">
- &title= " class="share-link linkdin">
Began writing a year and a half ago so that he could fill his library with every Steam game that exists. Loves to play all sorts of FPS, Sim Racers, and FIFA. Spends his time ...
Selphie1999Gaming
Video Game Guides, Walkthroughs. 100% Gaming

God Of War (2018) – Moon, Midgard, Sun Trap (The Black Rune – Puzzle Solution) Guide
As you continue your journey through Midgard you will inevitably come across various riddles and puzzles that you will need to solve in order to progress the story.
One of which occurs during the The Black Rune mission , where you need to solve a puzzle involving the moon, midgard and the sun

- MAIN STORY OBJECTIVE: Deactivate the vault’s defences (The Black Rune)
- LOCATION: Tyr’s Temple
- Whilst you are trying to find the secret Jotunheim travel rune from Tyr’s vault, you will inevitably get caught in some rather thick tree vines
- This will then trigger a puzzle that you will need to solve involving the moon, sun and midgard. You will need to rearrange these symbols into the correct order
- Thankfully Atreus will tell you what order these symbols need to be in, that leaves us with only one real issue here and that is they are all currently out of order and mixed up hmmm..
- Okay start off by moving the middle lever

- Followed then by the left lever , this will cause the moon symbol to be lowered and no longer part of the sequence
- Now switch back to the middle lever once again to get the symbols to move right

- Then select the right lever to lower the sun symbol
- Now give the left lever some work, this will raise the moon symbol once again.

- Going back to the middle lever now, this will cause both the moon and midgard symbols to join up and head left.
- Finally turn to the right lever in order to complete the puzzle

- We should now have successfully lined up and put the correct symbols in the correct order from moon, midgard and sun
- God Of War (2018) – Guides Playlist (Videos)
- God Of War (2018) – Guides Playlist (Written)
- God Of War (2018) – Our Game Review
- Latest Posts
- How To Enter Ruins of Unte In Elden Ring Shadow Of The Erdtree - 25th June 2024
- How To Reach East Shadow Keep In Shadow Of The Erdtree - 24th June 2024
- Where To Find The Solitude Armor & Sword Set In Elden Ring DLC - 21st June 2024
Share this:
More popular pages, leave a reply cancel reply.
Your email address will not be published. Required fields are marked *
Save my name, email, and website in this browser for the next time I comment.
Notify me of new posts by email.
Javascript not detected. Javascript required for this site to function. Please enable it in your browser settings and refresh this page.
God of War - A Path to Jotunheim, Tyr's Secret Chamber and the Hall of Tyr
How to complete A Path to Jotunheim.
A Path to Jotunheim, Tyr's Secret Chamber and the Hall of Tyr come towards the end of God of War PS4's main story.
Here on this page, we'll take you through everything you need to know about this section of your quest, including how to solve any puzzles, take down any bosses and find any useful loot along the way. For guides to specific collectibles we also have pages on Valkyrie locations and how to open Hidden Chambers , Lost and Found locations and Faces of Magic locations , too.
This page follows on from Escape from Helheim, Helheim Landing, Helheim Ship and Skies of Helheim .

Otherwise, you can always cycle back to our main God of War walkthrough and guide hub, too.
A Path to Jotunheim, Tyr's Secret Chamber
In the Realm Travel Room, select Midheim and exit to Brok's Shop, showing him all that stuff you learned about Tyr's key plans.
After a touching moment with his brother Sindri, they make it - Tyr's Key to a mysterious door...
Locate Tur's mysterious door
Head outside, following your waypoint down the side of Tyr's temple, and you'll soon approac a locked door in the side of the temple with a triangular handle on the front.
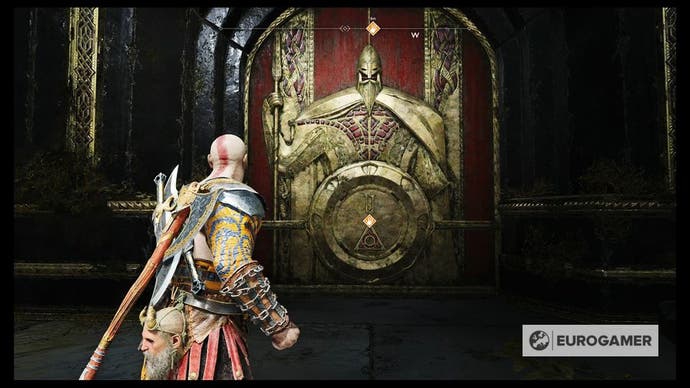
Insert the key and enter Tyr's hidden chamber.
Explore Tyr's hidden chamber
Head up the steps and shoot the light crystal ahead, and go up the ramp into the next room - the Realm Travel Room! - only it's different. You're actually under the regular version, and up above you to one side is the glowing shape of the thing you need to progress to Jotunheim.
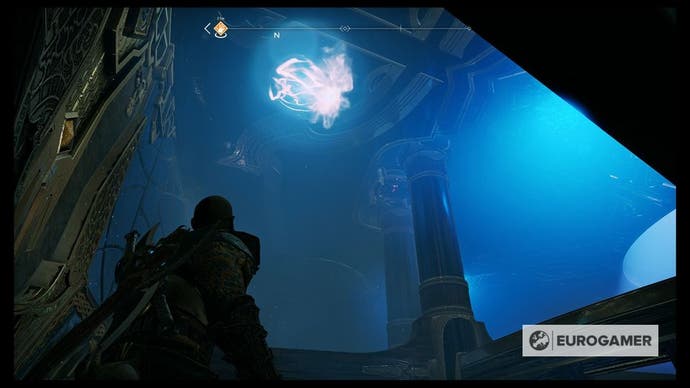
Interact with Boy for a bit of dialogue and then work your way round to the south to another door outside, across another light bridge, where you can follow a corridor to a room called the Hall of Tyr.
The Hall of Tyr
Ahead of you are two lovely statues, and in the middle of the room is yet another sand bowl. Puzzle time!

Look to the East to see a rune in the wall - and above it that white glowing thing from the Realm Travel Room.
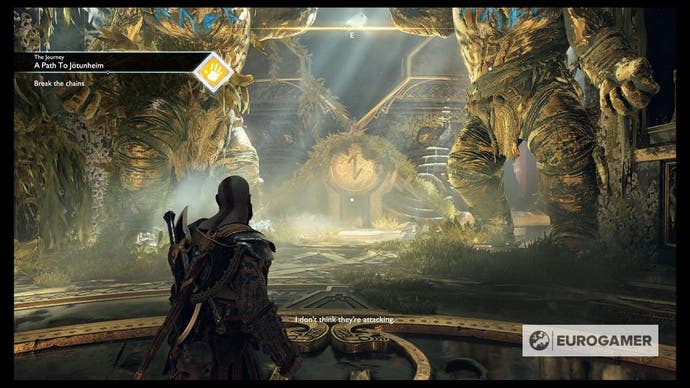
Walk towards it and interact when prompted - you need to flip the entire Realm Travel Room on its head!
Only, you can't - there are chains, one on either side of it, that hold it in place. So, your next job is the break the chains, then flip the room.
Break the chains
Go back to the sand bowl, and it's been replaced with a lever. Turn it and you'll be lowered down to another level. Look to the West for another Shrine to read.
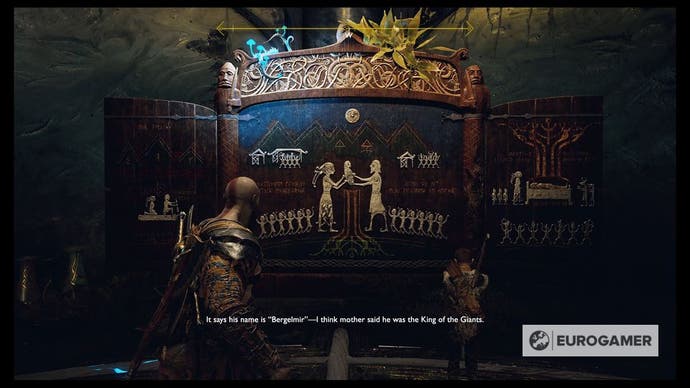
There are now two directions to go on - one for each chain - and they're both broadly the same. Left or right, you're going to need to go through a corridor full of traps, then fight a gauntlet of enemies in a chamber at the end, and then repeat it for the other side. Let's go left first.
In the left (Norther) corridor, there are a load of twirling, spinning discs rotating around the room. You need to freeze them, on at a time, until they all line up, then when they're spinning around together there'll be room for you to dash by on one side.
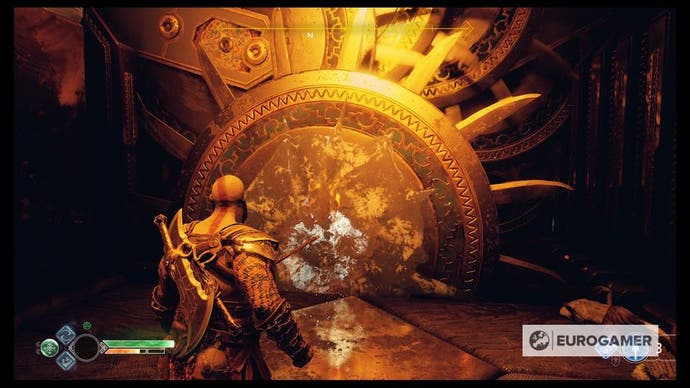
Start by hitting the first disc's cog for a bit, just until it's well clear of the second, then hit the second disc's little marked cog, and wait until it lines up behind the first one exactly, then recall your axe.
Then repeat for the one behind that, and so on. Eventually they'll all be lined up behind one another, or at least roughly so, and you can run through.
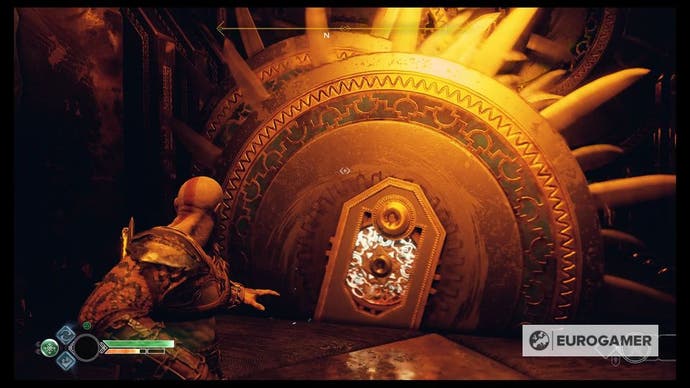
Out the other end, it's time for another puzzle, this time involving Winds of Hel. Before solving the corridor puzzle though, nab the wind from one of the spinning discs and put it in the trap just to the left, where there's already some wind next to it, to open a lock to a Legendary Chest. If you're having trouble, get the wind from the locked door and put it in the trap on the right of the corridor to get the blades spinning.
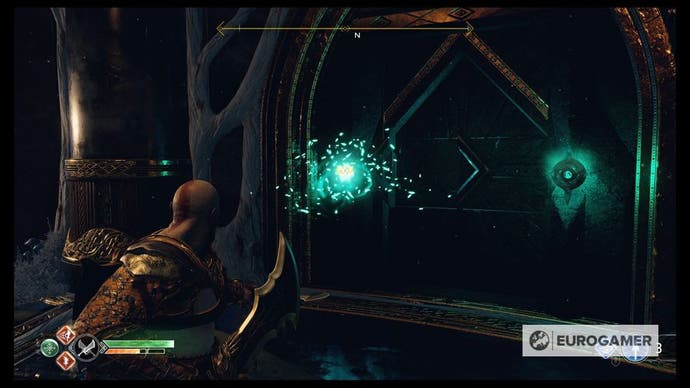
Now, the corridor. Take the winds from that locked door to the trap on the right of the corridor, and the other one to the central blade to get everything moving.
Take the wind out of the first blade when it's pulled back to the right, to allow you through.
When the top blade is moving, wait for it to go to the top position and then take the wind out of that.
Then dash through the two side-blades when they open together - if the timing's a bit tight, take the wind out of one and then put it back in when the line up timing-wise so that they open together at once.

On the far side of the chamber is another Cypher chest for Niflheim. Then hang to the open end of the room and pull at the chain to set it free.
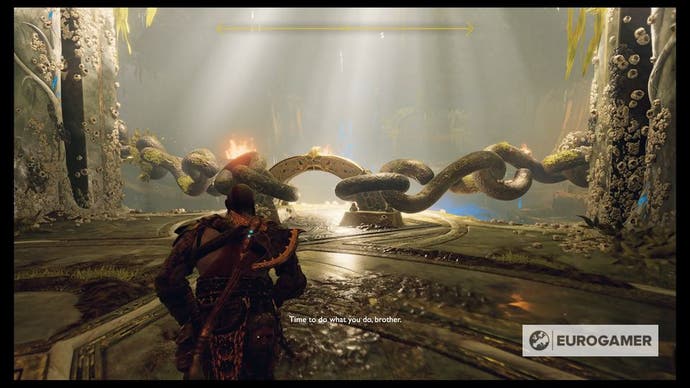
Now, it's battle time.
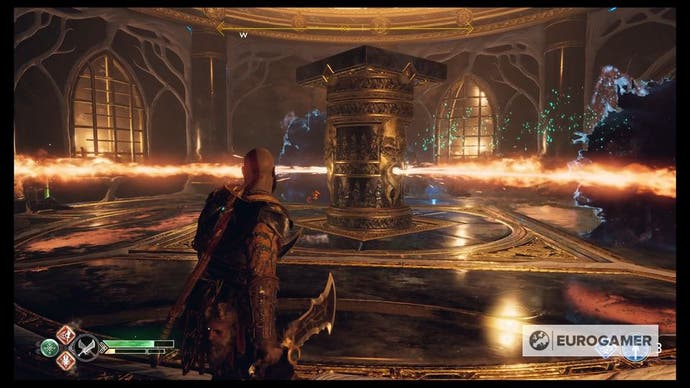
The middle of the room will feature a nice spinning podium that spits fire out in a couple of directions, whilst enemies attack. In this case, they're Draugr and an Orgre.

When those enemies are done, run through the corridor to the previous chamber and deal with the same enemy-and-fire situation again, then return to the central room.
Now, rinse and repeat for the other side of the chain! This time they're vertical masher traps in the corridor.
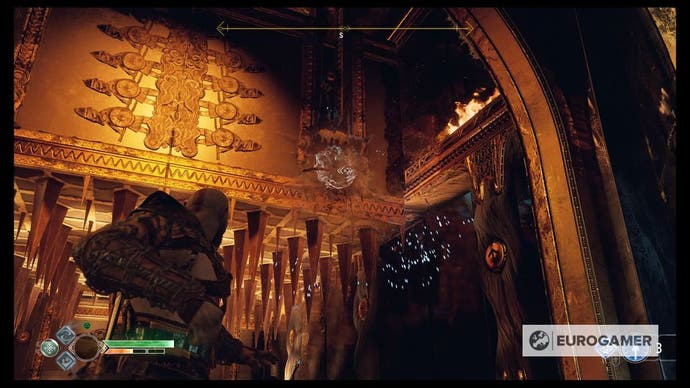
Freeze the first one as soon as it slams down, then as soon as the second one slams down, recall your axe. That leaves the first two lined up so that, when they raise up, you can run under them both and then under the third one before the first two slam back down.
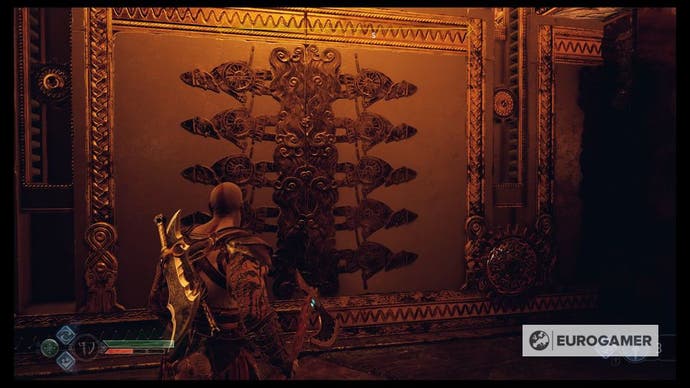
There's a coffin with some Legendary armour in the next room, then it's on to the next corridor's puzzle.
This one is more vertical mashers, only they don't raise very far. You need to throw some red crystal (there's a stump on the South side of the room) at the red sap on the floor under the first masher, then have Atreus shoot it to make the floor explode.
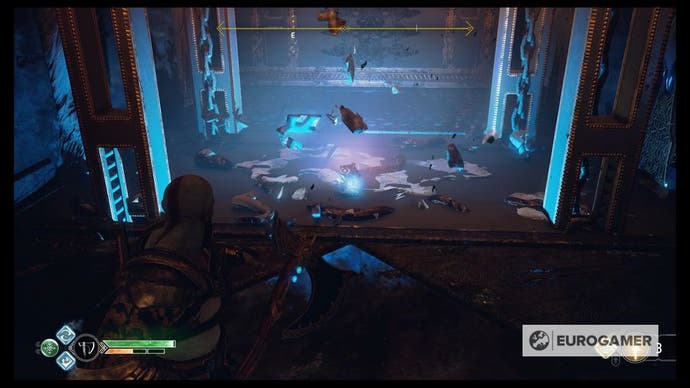
That lets the first one drop all the way down, and then wait for the next one to be down and you can run straight through, dropping down as you go, to the final chamber.
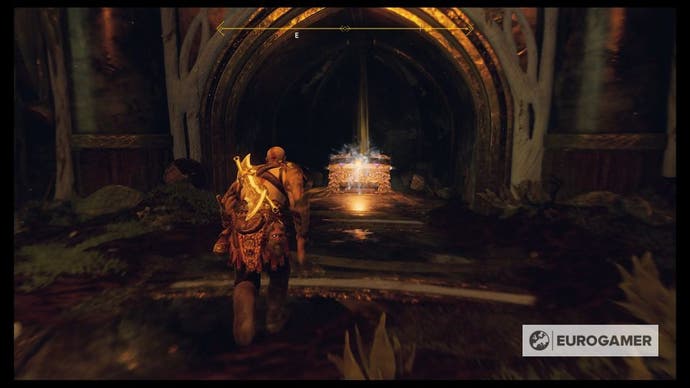
There's another Niflheim Cipher to grab from the chest ahead, and then you can set the second chain free - and all you have to do now is beat the two Travelers that attack you at once - easy!
It's not that easy let's be honest. Focus on the first one that attacks you - the shielded one - and most importantly remember to hit that glowing skull out of its hand when it raises it above its head to charge a huge attack.

The other handy tip to know is that the red-tinged one can be frozen with a heavy throw of your axe. And frozen enemies can be kicked off ledges, which we did to great satisfaction here.
When you've beaten them both, go back the way you came, to one last room of enemies - Hel-Reavers with shields and ranged attacks, in a room of more hectic spinning fire.
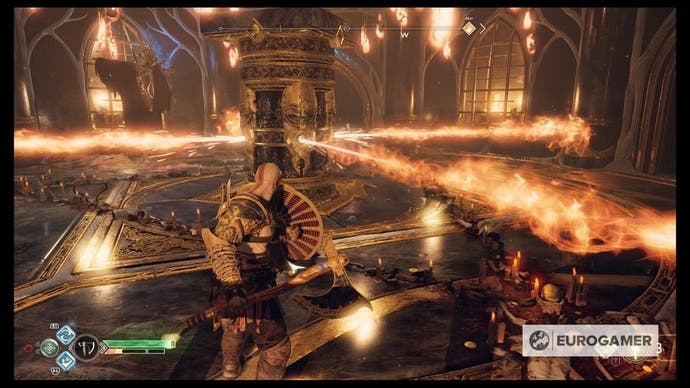
There's no easy solution here. Just keep moving, rotating with the flames to stay in the safe zones between them, and remember to use your chains rather than your axe, which'll be useless.
When they're down, go back to the starting central room and take the platform back up the way you came by using the central lever.

Now you can go flip the entire Realm Travel Room from that same spot where you tried it before, by mashing Circle as hard as you can, and there's a gold-marked spot on the left for you to climb.
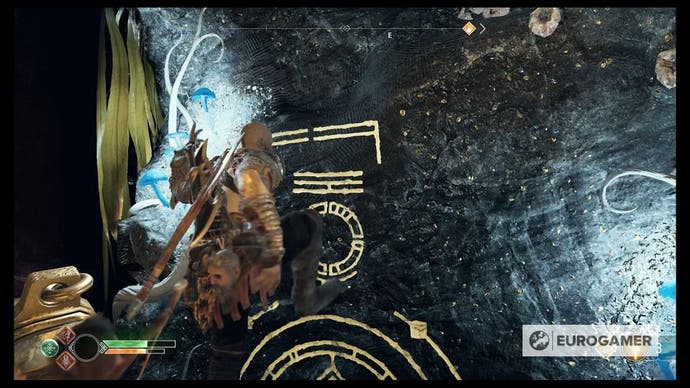
Return to Tyr's Travel Room
Climb up the wall and pull apart the extravagant doors, and now to grab that weird object.
Collect Tyr's Mysterious Object
Run over and interact with the glowing white orb, and you'll get "some kind of travel stone"...
Mimir knows what it all means. It's time to go to the Realm Between Realms...
Next up: God of War - Between the Realms, Gauntlet of Realms
- Trombone Champ is bringing its acclaimed tooting action to VR this autumn
- Try Nintendo's Emio - The Smiling Man: Famicom Detective Club for free next week
- A "high number" of Destiny 2 players have had their usernames reset by an overzealous moderation tool
- GTA: San Andreas VR "on hold indefinitely" Meta confirms, nearly three years after it was announced
- The Elder Scrolls: Castles mobile game launches next month, pre-registration now open
- Tango Gameworks acquisition will transfer around 50 out of original 100 staff
- Call of Duty: Modern Warfare Remastered mod H2M shuts down after cease and desist demand
- Today’s Connections hint and answer on 17th August for 433
- Today's Wordle hint and answer on Saturday 17th August for 1155
- Pokémon World Championships 2024 research tasks, rewards and bonuses in Pokémon Go
- Genshin Impact 5.0 release date, 5.0 Banners and events
- Today’s Connections hint and answer on 16th August for 432
- Today's Wordle hint and answer on Friday 16th August for 1154
- Today's Wordle hint and answer on Thursday 15th August for 1153
- Video game actors call for better transparency around "disgusting" mocap work not disclosed in advance 42
- Warhammer 40K: Space Marine 2 - a technologically ambitious sequel that can look stunning 9
- Here are the UK's richest developers and players 9
- Login / Sign Up
- PlayStation
God of War guide: Return to the Summit walkthrough and collectibles
“Whatever.” — Atreus (constantly)
by Jeffrey Parkin

God of War ’s “Return to the Summit” Journey begins after you retrieve the Black Rune of Jotunheim during “ Black Rune .” You’ll be free to explore. There’s lots to do around the Lake of Nine , so you don’t have to rush straight to the next goal.
When you’re ready to progress the story, you’re going to head back to the Mountain’s summit, so you’re going to retrace your path through a couple places you’ve visited before. But, with Kratos and Atreus’ new toys, you’ll be able to get to new areas you’ve had to skip over before.
A note on God of War spoilers
God of War is full of surprises, and that makes guides particularly tricky to write. We want to help you with the game. We don’t want to spoil it. So we want you to know that we’ve written every guide with spoilers in mind.
If our guide doesn’t appear to get you every item (a chest, for example), there’s a reason for that. Rather than spoil that reason, our tables of contents and a big image in the guide indicating spoilers ahead will tell you when and why you find yourself in that situation — in the least spoilery way possible.
Table of contents
The foothills, the mountain.

Items in this area: Realm Tear, coffin (Sigil of the Weapon), Legendary chest (Blast of Hephaestus), coffin (hardened Svartalfheim steel), wooden chest, coffin (solid Svartalfheim steel, Sharp Relic of Shadows)
Tyr’s Bridge
Items in this area: Realm Tear

Get back to the top side of Tyr’s Bridge — just walk up the stairs if you’re coming directly from the Vault, or boat back to the Temple from wherever you’ve wandered. Run along it to the doors of Vanaheim Tower just like you’ve done a couple times before. If you want a challenge you can try to close the Realm Tear just inside the tower, but remember, there are two level 6 revenants waiting for you on the other side — it might be better saved for later.
Continue along the familiar path to get to the courtyard area with Sindri’s shop where you’ll have to suffer through Atreus instantly becoming a surly teenager. Before you do any shopping, head to the right and onto the trails to trigger some enemies.
There’s a level three Ogre, a level three Wulver and a handful of Nightmares to deal with. Try to drain the Ogre first so you can use it to beat up everything else.
Near Sindri’s shop
Items in this area: coffin (Sigil of the Weapon), Legendary chest (Blast of Hephaestus)

The Sky Mover is busted (again), so you’ll be taking the long way up. Before you return the to the trails, head over to the Sky Mover anyway. Turn right toward the cliffs and look for a scorn pole-protected alcove. Use your axe to freeze the first pole and head inside — you picked up a coffin here earlier. On your left, there’s another coffin protected by a Hel bramble-enclosed scorn pole. Burn off the bramble, then freeze the scorn pole. Open the coffin to pick up the Sigil of the Weapon legendary enchantment .
Head back to the path and follow your compass along the route to the mountain. At the top of the cliff, continue past the first scorn pole alcove until you fight a pair of Hel-walkers. Take them out, then backtrack to the scorn pole. Freeze the one outside of the alcove, then head inside. There’s a Wind trap behind some Hel bramble on the wall ahead of you. Burn the bramble, then grab the Wind.
Run back to the path and watch along the ledge on your left for another trap. Stash the Wind here for a second (you can also stash it here if the Hel-walkers jump you when you’re carrying it), then grab it again. Continue through the tunnel and take the next right. Keep spinning to find a tomb with a Wind trap on the front. Toss the Wind into the lock to open it and reveal a Legendary chest with the Blast of Hephaestus light runic attack inside.
Near the Hidden Chamber Door
Items in this area: coffin (hardened Svartalfheim steel), wooden chest, coffin (solid Svartalfheim steel, Sharp Relic of Shadows)

If you continue along that path on the right, you’ll get back to the Hidden Chamber door you found the first time you visited here. Behind the lock, you’ll find the Valkyrie Gierdriful . You’re welcome to visit the inside and at least unlock the Mystic Gateway — that way you can get back here easier later.
Take the path on the left to continue toward the mountain. At the top of the cliff, you’ll come to the arena where you fought your first Ogre. This time, there’s some Realm Tear-like portals that produce a crowd of level four Brood. Try not to get swarmed, and just keep hacking away until they’re all gone.
Continue along to the doors and go through. On the other side, you’ll get attacked by some Nightmares. As you fight them off, watch along the right side of the path for some Hel bramble growing around a coffin . Burn it away and open the coffin for some hardened Svartalfheim steel .
Continue along the path and up the stairs. Take the next right you can and watch along your right again for more Hel bramble and a wooden chest .
Keep climbing the stairs. As you approach the top, watch for a shatter crystal . Have the boy shoot it to free a coffin — you’ll be passing it in just a second. Follow the path around to the left, then jump the gap to get to the coffin you just freed. This one will get you some solid Svartalfheim steel and a Sharp Relic of Shadows .
Climb the cliff, then follow the path to the left. Push through the doors to get back inside the Mountain.
Items in this area: Lore Marker, artifact (Bottoms Up), coffin (solid Svartalfheim steel, Sharp Sigil of Providence), wooden chest, Legendary chest (Hyperion Slam), treasure map (The Last Place They’d Look), Frost Ancient drops (solid Svartalfheim steel, Ancient’s Rubble, Ancient’s Heart, Frost Sigil of Focus), coffin (Mythic War Belt of Clarity), coffin (hardened Svartalfheim steel, Sharp Relic of Fortune), artifact (Bottoms Up), coffin (Mythic Pauldrons of Clarity)
Just like with the Foothills, being back at (in) the mountain with your new abilities means you can pick up some stuff you missed earlier and access some new pathways.
Into the Mountain

Through the doors, you’ll be back in the deer god’s throne room where you’ll watch a brief, troubling cutscene. When you get to continue, you’ll be able to skip a lot of the steps to getting through the mountain.
Take the left hallway and follow it around to the right. Have the boy blast the sap wall and then handle the three Tatzelwurms on the other side.
Run back to the throne room and grab one of the Light Crystals . Carry it back into the hallway you just opened and socket it next to the Lore Marker in the alcove on your right to give the boy something to read.
Climb up the ledges and then the wall at the end of the hallway. When you land on the ledge to your right, follow the path to the left. You’ll have to fight a couple Draugr here as well as Atreus’ newfound sense of self-importance.
Use the switch on the left of the gate to open it and enter the next area.

(Skipping) The first room
Items in this area: artifact (Bottoms Up), coffin (solid Svartalfheim steel, Sharp Sigil of Providence)

This is where you caught your first lift up the mountain last time you were here. We get to skip that this time, though.
When you first walk in, fight off the Wulvers and Draugr. Then, head back to where you started and take the first left. There’s a sap wall you had to skip earlier under the platform on your left. Have the boy shoot it to reveal a room. Pick up the Bottoms Up artifact 5 on your right and open the coffin on your left for some solid Svartalfheim steel and a Sharp Sigil of Providence .
Head to the far right corner of this room (southeast on your compass). Climb up onto the platform, then burn away the Hel bramble to reveal a new elevator to use.
It’s a long ride. At the top, fight off the Draugr and Nightmares that attack you.
After the elevator
Items in this area: wooden chest, Legendary chest (Hyperion Slam)

Once they’re handled, head along the path ahead of the elevator a bit. Have the boy shoot the shatter crystal to the left of the broken wooden door to reveal another hidden room. This one has a wooden chest and a Winds of Hel trap inside.
Ignore the trap for a minute and burn through the Hel bramble on the left when you walk out. There’s a portable Wind trap in here. Pick it up and carry it back to the elevator area.
Set it down next to the raised area behind the elevator. Face the ledge and look to the right for an area you can boost Atreus up. Do so, and have him kick down the chain.
At the top of the chain, turn to the left. Have the boy read the runes on the doors and then back up. A very angry level 6 ogre, a pair of nightmares and some draugr will come crashing through the door in a second.
Collect all the drops, then head back down the chain. Run back to the first room you opened and grab the Wind. Bring the Wind back to the portable trap at the base of the chain and stash it. Climb back up top and grab the Wind from the portable trap. Turn to the right and run it over to the room the ogre burst out of. Throw the Wind into the trap to reveal a Legendary chest holding the Hyperion Slam heavy runic attack .
Frost Ancient
Items in this area: treasure map (The Last Place They’d Look), Frost Ancient drops (solid Svartalfheim steel, Ancient’s Rubble, Ancient’s Heart, Frost Sigil of Focus)

Now you can follow the path along the edge of the cliff. Just past the shatter crystals, there’ll be a fire-throwing draugr waiting for you. Pick up anything he drops and the loose hacksilver out on his perch.
Head into the hallway on the right. Just inside, have the surly boy pick up the The Last Place They’d Look treasure map . (Check out our The Last Place They’d Look treasure map guide for the details.) Duck under the low rocks, then climb the ledge. You’ll have to face a Frost Ancient in the next room. Handle it like the rest of the Ancients you’ve fought. Don’t worry about using the Blades of Chaos just for the fire damage, though — just focus on hitting the Ancient’s weak spot with your axe from a distance.
When it’s defeated, grab all its loot — some hacksilver, solid Svartalfheim steel, Ancient’s Rubble , an Ancient’s Heart and a Frost Sigil of Focus enchantment .
Frost Ancient’s room
Items in this area: coffin (Mythic War Belt of Clarity), coffin (hardened Svartalfheim steel, Sharp Relic of Fortune)

Look in the middle of the room under the wooden structure for some crystalized sap. Grab a piece, then turn left — there’s a sap wall behind you. Blow it up, then grab the cart the sap wall was blocking. Pull the cart as far back as it will go. Check the room where the cart was for a few thousand hacksilver, then climb on top of the cart and up to the next ledge. Open the coffin up there for the Mythic War Belt of Clarity .
Drop back down to the ground, grab another chunk of sap and follow the wall on your right. Use the sap to free the coffin you find on your right a little way down. Open it for some hardened Svartalfheim steel and a Sharp Relic of Fortune .
Sindri’s Shop
Items in this area: artifact (Bottoms Up), coffin (Mythic Pauldrons of Clarity)

Continue into the hallway at the back of the room and follow it around to the right. Climb up onto the ledge, then have the boy read the lore on the ground while you pick up Bottoms Up artifact 6 — completing the set.
Cross the narrow ledge on your right. On the other side, burn away the Hel bramble on your right to free a coffin . Open it for the Mythic Pauldrons of Clarity .
Continue along the path until you come to Sindri’s shop. Take care of any shopping or upgrading while you’re here.
When you’re done, head through the doors on your left.
Items in this area: Realm Tear, Legendary chest (Niflheim cipher)

As soon as you walk out, there’s a Realm Tear to deal with. One level six and one level seven Hel-walker will come out along with a few Nightmares. Close it and collect your Dust of Realms . Open the Legendary chest nearby for a piece of the Niflheim cipher .
Turn right and head up the short path to find a color-changing stone.
Head back down to the path on the left. Burn away the Hel bramble and climb the cliffs.
At the top, you’ll be back on the ridge right before the top of the mountain. Walk right up to the structure, then burn away some more brambles. Climb up to the top to (finally) return to the Jotunheim arch.
Have the boy carve the rune and use your magic chisel to open the gateway. Watch the cutscene as everything goes exactly as planned. We’ll meet you on the other side.
Most Popular
- Twisters, Netflix’s The Union, and every movie new to streaming this week
- Black Myth: Wukong is an epic saga that’s both confounding and spectacular to behold
- Why did the ending of The Umbrella Academy suck so much?
- Wolverine’s live-action mask had to contend with VFX and the fandom
- Fateforge: Chronicles of Kaan is an explosive app-driven fantasy board game
Patch Notes
The best of Polygon in your inbox, every Friday.
This is the title for the native ad
More in PlayStation

The Latest ⚡️
- PlayStation 3
- PlayStation 4
- PlayStation 5
- Xbox Series
- More Systems
A Path to Jotunheim
God of war — guide and walkthrough (ps4).

Guide and Walkthrough (PS4) by GfaqCodebreak
Version: 2.02 | Updated: 04/10/2020
- Previous: Escape from Helheim
Table of Contents
- Next: Realm Between Realms
- Introduction
- The GameFAQs
- Combat Tactics
The Journey
- The Marked Trees
- Path to the Mountain
- A Realm Beyond
- The Light of Alfheim
- Inside the Mountain
- A New Destination
- The Magic Chisel
- Behind the Lock
- The Sickness
- The Black Rune
- Return to the Summit
- Escape from Helheim
- Realm Between Realms
- Jotunheim In Reach
- Mother's Ashes
- Leviathan Axe
- Blades of Chaos
- Guardian Shield
- Enchantments
- Wayward Spirits
- Free Dragons
- The Realm of Fire
- The Realm of Mist
- Treasure Maps
- Special Items
First players should head to the new marker to start the quest. This marker will be located on the side of Tyr's Temple on one of the lower decks. If you begin running across the circular platform you may encounter the first door that we went to during the "Black Rune" quest. If players continue onward past that door they will reach the marker and the secret area of Tyr. In this section, there aren't many puzzles solving, but there will be obstacles to overcome. Mainly spiked traps. There will also be a few really tough enemy waves. One of them is skippable the other is not.
Explore Tyr's Hidden Chamber
First players should look up near Atreus and use the Square button to prompt some dialogue. There is an odd white cloud above our heads that seems to hold some sort of Artifact or object. The problem is that the temple is completely upside down and we must actually flip the temple to reach the object. Kratos will notice two chains on both sides of the platform of the temple. We must break apart the chains on both sides, to then flip the temple to finally acquire the Artifact of Tyr.
With the knowledge from the latter, we can take the nearest elevator down using the mechanism. This will bring us to the room where we can perceptually flip the temple. However, we must first break the chains loose on the right side. To do this we will have to go through various traps and fight a few waves of enemies. Let's start with the chains on the West or Right side of the map.
Break the Chains #1
First, we must complete the spiked puzzle in this room. It seems really tough at first, but all you want to do is run through the thing as fast as possible. However, that is after we freeze the mechanisms so they go up in an orderly fashion. Players will want to freeze the first mechanism and have that one match up with the other two. You may die a few times in the process but it is nothing that will hinder your playthrough too long. After the set of spike traps, we will be in another circular room, continue onwards towards the chain after solving the next spiked wall puzzle which is a bit easier. For this one we can stand on top of the first spiked wall and then run across, making this one easier than the first.
Battle Tactics
After we remove the first set of chains we will be swarmed by Hel-Walkers! The good thing is that we can lead the first wave into the Spiked Walls. These spiked walls can come crashing down on the Hel-Walkers defeating them very quickly. The problem at first glance is that there are three waves of Hel-Walkers with two Hel-Vikens at the end. If you want the XP or need some Labors to complete, then, by all means, have fun killing them. It is a tough three waves and there are no checkpoints. The game will bring you right back to where we pulled the chains.
With the latter being stated, I was a bit confused at the huge scale in difficulty at this point. The enemies also won't spawn until after each wave. Furthermore, they do not spawn unless you run past the first spiked trap section and don't forget about the Fire-breathing Totems! Luckily enough for us, those totems don't do much damage to Kratos even on Give me God of War Mode. They can also deal nice damage to the enemies they come into contact with.
The trick to getting through this segment without fighting is to simply run back to the opposite side of the room where we started. There is nothing of interest in this area as the next Legendary Treasure Chest is located by the 2nd group of chains. In this case, we can just Run Through the spike traps again. It could be tough and may cause a death or two, but it will be far less painful than three full waves of Hel-Walkers, with Two Hel-Vikens at the end to top it off in fire-breathing style!
Break the Chains #2
Now we must head to the opposite side and break the chains on that side. So once again head through the western or left side of Tyr's temple and make your way through another spike puzzle. This spike puzzle has about six rotational blades of doom! They can kill Kratos and other enemies pretty easily. The solution here is to Freeze one at a time, and each time let them line up so they are "stacked" together. If they are all stacked together and move as one, so to speak. Players can simply run past them and then use them as a baited trap to kill the Dragur later.
Go through to the next room and you might notice some hel's wind energy. Players can unlock the door which contains another Legendary Treasure Chest with a Heavy Runic attack for the Blades of Chaos. To do this take the Hel's energy from the 2nd wall in the room over to the right of the gray wall. Use that energy on the first Hel's Wind Object . Next, use the other hel's energy station and pump the energy into the left hel's wind object. This should open the door. This will also save us from having to fight too many foes of Dragur in the waves after breaking the chains.
A fierce ogre will be our next troublesome encounter along with tons of Dragur. The fierce ogre's boulder toss is nearly a one-shot kill if not generally. Be sure to dodge that attack at all cost. However, I found a bigger problem to be a Dual Wielding Dragur that also seems to have speed capabilities. It starts out at level 5 and can transform to level 6 on give me god of war mode. This dragur is tough and I would consider it the high priority target. Defeat the speed/dual wielding dragur and then go for the Fierce Ogre.
As mentioned earlier, we will have two more waves of Dragur to deal with. However, now that we already collected the Legendary Treasure Chest. Players can lead the dragur into the spiked traps from before and kill them off one by one or even more! This will save us tons of time and trouble and we can then head back to the platform room. Now Kratos can flip the entire temple. Once this is down, climb up the wall right near us on the left side, just as Atreus states. Make your way to the rune/artifact.
Tyr's Unity Stone
The artifact turns out to be Tyr's Unity stone. This will allow us free travel throughout the realms! it also helps us make our way to the Realm Between Realms safely. The Realm between Realms will be our next goal, so says Mimir the smartest man alive! Congratulations on a rather tough segment, we are almost done with the story, so if you are still enjoying the game, take a break! We will have much more to come, or you can even check out all the other exploration and side-quests in this FAQ/Strategy Guide!

IMAGES
COMMENTS
God of War ’s “The Black Rune” begins after “ The Sickness ,” and the next step along God of War ’s main story Journey is finding the travel rune for Jotunheim. It’s a quick trip to get back to...
God of War Series Gameplay Part 21 The Black Rune (Find The Secret Jotunheim Travel Rune In Tyr's Vault) Walkthrough.
God of War - Tyr's Vault, The Black Rune | Full Quest. Give Me God of War Difficulty. Now that Atreus is well, the journey to Jotunheim continues. The search for the Black Rune will lead to...
Pass by the sand bowl to the foot of the upside door and note the Rune for Jotunheim. Interact below the rune to find that the entire temple is on an axle - and its possible to flip the...
God of War The Black Rune Walkthrough. In this chapter, your search for the Jotunheim travel rune will continue. The Black Rune is hidden behind a plethora of puzzles, enemies, traps, and...
As you unlock the Black Rune and learn its secrets, two guardians will awake to do battle. These foes look like Trolls in that they use a giant pillar to fight with - and it stands to reason...
LOCATION: Tyr’s Temple. GUIDE: Whilst you are trying to find the secret Jotunheim travel rune from Tyr’s vault, you will inevitably get caught in some rather thick tree vines. This will then trigger a puzzle that you will need to solve involving the moon, sun and midgard.
Look to the East to see a rune in the wall - and above it that white glowing thing from the Realm Travel Room. Walk towards it and interact when prompted - you need to flip the entire Realm...
Climb up to the top to (finally) return to the Jotunheim arch. Have the boy carve the rune and use your magic chisel to open the gateway. Watch the cutscene as everything goes exactly as...
Go through to the next room and you might notice some hel's wind energy. Players can unlock the door which contains another Legendary Treasure Chest with a Heavy Runic attack for the Blades of...