
Complete: Apple Notes Beginner’s User Guide (iPad)
Apple Notes is a free handwriting note-taking app that is excellent for quick and rough notes. Apple has improved it so much over the years that now it is suitable for serious note-taking. If you want to get more done with Apple Notes, then this is the perfect user guide for you, whether you’re a beginner or a seasoned Apple Notes user. You can also watch the video course for Apple Notes , and for more courses on different note-taking apps, we recommend checking out our YouTube channel, Paperless Humans . This user guide focuses on the iPad version of Apple Notes.
Orientation
Apple Notes is a minimalist app; its homepage is also its workspace. It is divided into three columns. Starting from the left, you have a column for your folders, notebooks, and notes. Tapping the sidebar icon (top left corner above the first column) toggles your folders column. That means it hides or shows it.
Tapping the two-arrow icon toggles the notebooks column, which gives you more room to write your notes. When all three columns are visible, the two-arrow icon can hide all the columns, but it only brings up the notebooks column. Folders in Apple Notes can go to two main locations: iCloud or On My iPad . All the folders (and their notebooks) in iCloud sync across all your Apple devices that are using the same Apple ID. You can, therefore, see the notes on your iPhone and Mac as well. Notes under On My iPad are local; they don’t sync across devices.
Under each location, you can then have your folders. When you tap a folder, the notebooks it contains show up in the notebooks column in front of the folders column. You can see the name of the opened folder at the top of the notebooks column. To open and see the notes, tap on them, and they will appear in the notes section. This is where you write and edit your notes in Apple Notes.
New folders
Before you can take notes, you must first create folders for your notebooks. Tap the new folder icon (bottom left corner) below the folders column and choose the location for your new folder: On My iPad or iCloud . You can then name the folder and tap Done to save it.
New notebooks
Choose the folder you want to add a new notebook to, then tap the new notebook icon (top right corner), and you can start taking notes. To change the paper template for your notebook, go to the three-dots icon (far right corner), then Lines & Grids , and choose the template you want. Apple Notes has three line-spacing options for your lined and squared paper.
Typing notes
Apple Notes can add body text directly to the page. Body text does not mix with any other items in your notes. Structure your notes by tapping the Aa icon at the top or on the keyboard toolbar. You can add a Title , Heading , or Subheading . You can also convert these back to Body , or Monospaced text. Format your text to make it bold, italic, underline, or strikeout.
Apple Notes supports numbered and unnumbered lists. You can convert a paragraph to a list or create a new list from scratch. Levels in your list are easy to create using the indentation tools (under the text tool or the keyboard one). They are also easy to understand because bullet points change as you add levels to your list. For this, Apple Notes uses three bullet point types. Dash bullets don’t change when you add hierarchies, though. They are, therefore, ideal for taking basic notes. Numbered lists have one type of numbering; they don’t change with levels.
Interactive checklists add simple to-dos to your notes. Like your numbered lists, levels don’t change the checkbox type. As you check off completed tasks, they move to the bottom of the list. You can turn off this animation if you don’t like it (go to your iPad Settings > Notes > Sort Ticked Items > and choose to do it Manually ).
To create a table in Apple Notes, tap the table icon on the top toolbar. This adds a 2×2 table to your notes. You can tap the three-dots icons on your rows and columns to add or delete them. The three-dots icon appears on the row or column where your cursor is. Once you have added some information to your table, you can tap the three-dots icon to select a row or column. Then, go to Format to make your text bold, italic, underlined, or strikeout for the whole row or column. You can also do this for individual text.
You can select multiple rows or columns; simply drag the dots on the selection. Then, you can rearrange them (long-press the three-dots icon until the row or column lifts off the page, then drag it where you want it). The table icon , when editing a table, has options to Copy Table for pasting in other apps or Share Table to other apps. You can also Convert to Text to remove the table but keep the text. You will need to organise the text, though. Lastly, you can just Delete Table .
Writing tools
The toolbar.
In Apple Notes, the toolbar with your handwriting tools is mobile. You can move it around the four sides of your screen or minimise it by swiping it to a corner. You can turn on Auto-minimise (under the three-dots icon ) if you want it to automatically tuck away when you tap any part of your screen.
Apple Notes has three pen types: one pencil and a watercolour brush. The first two pen tools are both ballpoint pens. Though they look different, they write exactly the same way. The third pen is a calligraphy pen. Customisation options are the same for all the writing tools in the app. They all have five fixed thicknesses and an opacity option that ranges from 0 to 100%. The percentage opacity of each tool is shown as a number on the toolbar.
You can’t change the five default colours on the toolbar. To use custom colours, you must add them to the secondary colour palette. Go to the sixth colour circle (the one with multiple colours) on the toolbar and choose the colour you want from the Grid , Spectrum , Sliders , or colour picker. The colour picker is the easiest to use when the colour you want is already in your notes. Tap the plus icon on your toolbar to add the new colour. On this secondary colour palette, you can add as many colours as you like. Long-press to Delete a colour.
You can then write your notes using the Apple Pencil (for accurate handwriting representation) or use a finger by turning on Draw with Finger (under the three-dots icon ). The handwriting experience in Apple Notes is amazing. There is no lag, it feels natural, and palm rejection is perfect. Apple Notes uses raster ink, which loses its resolution when zoomed in if you share the notes out of the app. It means the notes you write in the app best stay in the app.
Highlighter
The highlighter tool in Apple Notes goes behind your ink. Even at 100% opacity or when layered, it does not dim your notes. It also has five sizes and the same colour palette as the pen tool. The Pixel Eraser has five fixed sizes and erases per pixel, while the Object Eraser erases per stroke, no matter how big the stroke is.
Pages in Apple Notes
Pages in Apple Notes are vertically infinite, but with fixed widths. They continue extending downward as you write, without you needing to add any new pages. Your handwritten notes and the typed body text do not mix in Apple Notes.
Adding items to your notes (intermediate)
In Apple Notes, you can freely draw your shapes or use the shapes tool in your handwritten section. For hand-drawn shapes, you can use any writing tool. Once you’ve drawn your shape, keep your Apple Pencil pressed on the screen until it transforms. The app supports only nine regular shapes: circles, ellipses, squares, rectangles, triangles, stars, hearts, pentagons, and speech bubbles. It also supports straight lines, curves, and arrows. Once you have drawn a shape this way, you can’t modify it in any way except move it around the page (using the lasso tool).
Using the shapes tool on the toolbar, you can add the shapes listed under it. You can adjust these shapes once you have added them to your notes. To modify a shape, tap on it to bring up a customisation menu on the toolbar, which allows you to change the following: border colour, opacity, and width. You can also add a fill colour and adjust its opacity. Apple Notes can resize and rotate shapes. The shapes added with the shapes tool remain editable after you’ve added them.
The green dot (on some shapes) changes the curves, number of sides, or looks (depending on the shape). On arrows, it can change their curvature. Arrows also have options to modify their line thickness or where the arrowhead goes. You can remove it and add it to one end or both ends of the line. With all the shapes, you can change the opacity of the whole shape, which includes its border and fill colour. To draw irregular shapes, you must use the ruler tool on the toolbar. Use two fingers to rotate it while drawing the different sides of your shape.
Photos and videos
When adding photos to your notes in Apple Notes, you can either add one from your library ( camera icon > Choose Photo or Video ), drag and drop from any app, or take it with your iPad camera ( camera icon > Take Photo or Video > Use Photo ). You can Retake photos you don’t like.
Images have different options depending on where you place them. Body text images go above or below your text in a block of their own that does not mix with the text. Long-pressing the image gives you options to display Small Images or Large Images. This affects all the images in your notes, not just the one you make the changes on. Tapping an image opens a separate window for markup. You can annotate the image with handwriting tools. Or, add Description (under the plus icon on the toolbar), Text , Signature , and shapes. Tap Done to save the changes and exit the markup window.
Apple Notes has a tendency to add photos to body text, blocked away from your handwriting. You can simply drag it to the handwritten section. Long-press to lift the image off the page and move it to your handwritten notes. To ensure your images go to the handwritten section, drag and drop them over some handwritten notes, then move them afterwards. You can resize and rotate your images.
For videos, you can record them in the app or add one from your Photos library. They only go to the body text section, and they are blocked as well, meaning they don’t mix with anything else. You can play the video in full screen, rewind or fast-forward 10 seconds, and adjust the Playback Speed (under the circled three-dots icon ).
When in full-screen mode, you can stop your video to extract any text or handwriting from the screen using Live Text. Simply tap the Live Text icon (next to the playback speed icon ) for the app to highlight all the notes in your video. You can then select some sections to Copy for pasting in your notes, Translate , Look Up the meaning of words, and Search Web to Google the word on the internet.
To mix handwriting with text, you can use text boxes in the app. On the toolbar with your writing tools, tap the plus icon > Add Text . The app adds a text box, and you can start typing. Drag the dots on the text box to rearrange the text in it. You can also move the text box around the page.
Select some text to edit it by either going to the text icon on the far right corner of the keyboard toolbar. You can then change the font, and text boxes in Apple Notes have more text options than body text. They even support custom fonts. The font size ranges from 5 to 300 points. You can align your text left, centre, right, or justify. Formatting makes the text bold, italic, underlined, or strikeout. You can also change the colour and use the two-finger gesture; you can rotate the text box.
Under the plus icon, you can also Add Signature > Add or Remove Signature . Tap the plus icon at the top left corner of the popup window to add a new signature. You can then write your signature with the Apple Pencil or finger.
Go to New Signature (middle top of the popup window) to describe the type of your signature. Clear (below the signature); if you’re not happy with the signature, rewrite it. Tap Done to save it to the app. Once added to your notes, you can change the pen thickness and colour of your signature. You can also resize and rotate it. Apple Notes doesn’t let you edit a signature you’ve already saved; you can only delete it.
The lasso tool in Apple Notes picks everything on the page so you can move it around to rearrange your notes. Tapping on the selection brings up a popup menu that lets you change the colour of your text, handwriting, and shapes in that selection. You can also Cut , Copy , Delete , and Duplicate .
You can Insert Space Above the selection, adjust it using the tag on the left side of your screen. You can also create space between sections by simply tapping an empty space on your page, then Insert Space . This not only creates space, but it can also remove it (which is helpful when you have too much space). The easiest way to create space in your notes is to just draw a line where you want some space using the lasso tool. You can then drag the line (on the left side of the screen) to create as much space as you need.
When you don’t want to move everything together, simply tap on the items you want to move. You can tap your image, text box, and shapes you have drawn with the shapes tool and signatures. Tapping on hand-drawn shapes doesn’t work, though. For that, you have to use the lasso tool to select the shape and then move it.
You can also use the selection tool on your handwritten notes. When different items are close together, selecting your handwriting alone can be challenging. In such cases, it is better to use smart selection. By long-pressing your handwriting, you can select it as though it were text. This only works on your handwriting and nothing else on the page; it can’t even pick up highlighters.
Each item on your page has some unique functions that pop up when you select them. You can Share ( three-dots icon on selection) your shapes, signatures, text boxes, and images out of the app (as images). You can also Straighten (tap selection to bring up the popup menu > forward arrow > Straighten ) your handwriting.
Quick notes
On a locked screen.
The fastest way to start taking notes on your iPad in Apple Notes without unlocking it is to simply tap on the screen with your Apple Pencil. The app creates a new notebook using the default paper you have set for your notebooks in the app settings. To type notes instead of handwriting them, tap an empty space with your finger to bring up the keyboard. If the gesture is not working, it’s probably turned off. Go to your iPad Settings , look for Notes (on the sidebar), and scroll all the way to the bottom to turn on Access Notes from Lock Screen .
Quick notes from other apps
You can create quick notes while using any app on your iPad. By default, swipe diagonally on the bottom right corner of your screen to open a Quick Note . You can either type or handwrite on it with all the tools you get for creating your notes in Apple Notes. Using the pinching gesture, you can resize the quick note window. You can also move it (touch the empty space on the top toolbar) to any of the four corners of the screen. Tap Done to save your quick notes.
Sometimes you don’t want to create a new quick note but rather continue working on an old one. Simply scroll left or right to look for the notes you want. The three-dots icon gives you the option to Add Screenshot , which automatically takes a screenshot of your screen and adds it to your quick note. You can also Share the quick note or Delete it. The new note icon creates a new notebook, and the four-square icon takes you to your Quick Notes folder in Apple Notes.
Quick notes make it easier to drag and drop items into your notes. They are best used for rough notes, though, unless you’re typing them. That is because the notes you handwrite in a quick note look massive and exaggerated when you open them as a normal notebook in Apple Notes. For that reason, we recommend typing the notes if you want to use them later on. You can minimise your quick notes if you’re not using them (swipe the note to the edge of the screen) and bring them back just as easily (tap the arrow where your quick note is tucked).
When browsing in Safari, you can create a New Quick Note by selecting something on a webpage. Go to the forward arrow if you can’t see the option on the popup menu. Apple Notes creates a quick note with a link to the website as well as the information you took from it. When you return to the web page, its quick note appears on the bottom right corner, so you can pick up where you left off. You can also bring it up using the normal gesture and then scroll through to find the quick note you’re looking for. Quick notes make it easy to get notes from webpages. All you have to do is long-press to pick up the information you want, and then drag it to the quick note.
Setting options
Sometimes you don’t want to create a new quick note but prefer to continue your notes on the last quick note you worked on. To change that, go to the iPad Settings , then Notes . Under the QUICK NOTES section, turn on Resume Last Quick Note . Now, each time you bring up the quick note, Apple Notes will open the one you last worked on. You can also change the quick note gesture by going to Corner Gestures and choosing to create a quick note by swiping the left corner instead. To do that, go to Left Corner Swipe and choose Quick Note . You can swipe either corner to bring up the quick note. We don’t recommend this because it is better to use the left corner for taking screenshots. If you want to bring up the quick note using your finger, you can turn on Allow Finger to Swipe From Corner . We also don’t recommend turning this on because it disables the multitasking gesture for bringing up the App Switcher .
OCR/Handwriting conversion
Apple Notes has a unique approach to Optical Character Recognition (OCR), or handwriting recognition. You can search through your handwriting for all your notes in the app. The app is supposed to highlight the results for your handwritten notes. But it’s not working on my iPad at the moment; it is finding the terms, though. It’s probably a bug. We encountered the same issue when searching through images and scans in the app.
OCR in Apple Notes also creates notebook titles from your handwritten notes. The app picks up the first few words you write to use as a title. You can Edit the title of the notebook and tap Done to save the changes. Apple Notes does not convert your handwriting to text. But it can copy and paste it as text in other apps. Using your lasso tool or the long-pressing gesture, select some notes and bring up the popup menu. Go to Copy as Text , and then paste it where you want. In this case, we’re pasting it in Noteful. You can also translate the selection ( forward arrow > Translate ).
Collaboration
Collaboration lets you work on notes with your colleagues in real time. To get started, go to the share icon (top right corner) on your top toolbar. Collaborate is the default option for sharing notes out of Apple Notes, so you might not need to change it. You can choose permissions for your notebook to determine who can access your document: Only invited people or Anyone with the link . You can also control who can edit the document: Can make changes allows everyone you invite to make changes to your document. View only will let them view the notes without making any changes to them. Lastly, you can Allow others to invite people to the collaboration. But if you want to control who is invited, then we suggest you turn this off. This option is only available if you’re only sharing with selected people, and they can make changes to your documents.
The best way to share a collaboration document is via Messages. It is the only way to share documents you’re working on with invited people. Once you start collaborating, Apple Notes displays a cursor showing who is typing and where. By default, Participant Cursors is turned on, but you can turn it off by going to the collaboration icon to manage the collaboration. Look for Participant Cursors and turn it off.
The collaboration icon houses some options for your collaboration. Tapping message , starts a conversation on the notes you’re collaborating on. Messages then automatically creates a thread under the document. You can also start a FaceTime video or audio call with everyone you’re collaborating with. Everyone is automatically added to the call. Below your communication options, the app displays a summary of the Latest Updates made to the notes in your absence. You can tap Show Updates , to expand the summary and see all the activity on the document. You will get a list of all the changes that have been made. You can also access it by going to Show All Activity a bit further down. Apple Notes tells you who did what and when they did it. Tapping on the changes highlights them. This, however, only works on typed notes, not on handwritten ones. You can see the participants who are currently online. Show Highlights displays who made what changes on the left side of the screen. You can bring this up by swiping to the right and hide it by swiping to the left from anywhere on your screen.
Manage Shared Note (at the bottom of the popup window under the collaboration icon ) opens a popup window that lists everyone collaborating on your document. Tapping on a person’s name gives you options to control each participant’s permissions. You can choose if they Can make changes or not ( View only ). You can also decide if they Can add people to the collaboration. When you no longer want to work with them, you can Remove Access to block them from the notes. Back (top left corner) at the main window, you can Share With More People to invite more people to collaborate on your notes. Highlight All Changes if you want any changes to be highlighted. It makes them easier to spot. Turning this off removes the permanent highlighter that tracks all the changes in the document. The app still highlights the changes when you tap on them. When you turn off Hide Alerts , you will not receive any notifications when someone makes changes. Alerts come to Messages and Notification Centre when you’re collaborating. Share Options controls all the permissions for everyone, exactly like you get when you’re first sharing the notes. You can Copy Link to share it with more people, or Stop Sharing with everyone to stop collaborating on your notes.
When someone invites you to collaborate on a document via Messages, tap on the notebook to retrieve its contents, then go to Open to start collaborating on it. When you don’t have permission to make changes, you will only view the document. Tapping on the screen won’t bring up the keyboard, and all the editing tools on the toolbar will be unavailable. So you can’t handwrite or type anything. Your options under the collaboration icon remain the same, regardless of whether or not you can make changes to the notes. As a participant, under Manage Shared Note , you will be able to turn on or off Highlight All Changes and Hide Alerts . You also have the option to Copy Link .
Search tool
Apple Notes searches all your notes in the app. You can access the search bar from the notebooks column. You can search through All Accounts or only the Current Account (where your currently selected folder is located). Accounts in Apple Notes are simply where your notes are located. They can either be in iCloud or On My iPad . The app displays your results in three sections: Top Hits , Notes , and Attachments . Tapping on a notebook opens the notes. The results are highlighted in the notebook if they are text, but for some reason the app is not highlighting handwritten notes in iPadOS 17. The app can also search through PDFs, scans, and images. It’s also not highlighting any text in all of those.
You can fine-tune your search to focus only on Shared Notes , Locked Notes , Notes with Checklists , Notes with Tags , Notes with Drawing , Notes with Scanned Documents , or Notes with Attachments .
You can also choose to search a single notebook by going to the three-dots icon , then Find in Note . This gives better search results for handwritten notes. The app tells you how many terms have been found, and you can navigate through them. The term you’re on is yellow, while all the other terms are white. To fine-tune what you’re searching, tap the search icon on the search bar to focus on Whole Words (which searches complete words only and not part of them). You can also choose to Match Case . For single notebooks, you can Find & Replace text (under the search icon ). You can Replace one word at a time or all of them at once (long-press, then go to Replace All ). To only search without replacing, switch to Find .
iPadOS support
Apple Notes supports all the features in iPadOS that are essential for boosting your productivity in the app. These include dark mode , scanning documents , data detection , multitasking , and widgets .
Organisation
Apple Notes organises your notes with folders, smart folders, and tags.
On the folders column, you can create new folders (bottom left corner) that you can store locally on your iPad ( on My iPad) or in the cloud ( iCloud ) . You can name your folder and tap Done to save it. To create levels for your folders, drag and drop one folder into a parent one. You can also open a folder, add a new folder to it by going to the three-dots icon (top right corner of the folder name in the notebooks column), and then Add Folder. Apple Notes supports five levels of folders within folders. The app warns you when you try to create a sixth level.
The Notes folder is a default folder where Apple Notes keeps all the notes you don’t save in specific folders. It is available for both your local and iCloud folders, but it does not support any levels, so you can’t add any subfolders to it. You can also move subfolders between parent folders by dragging them from one folder and dropping them into another. Alternatively, go to the three-dots icon and Move This Folder , then choose where you want it to go. You can also long-press the folder you want to move and go to Move .
Under the three-dots icon , you can Rename the folder (long-pressing it also works). Select Notes lets you select multiple notebooks so you can Move them to other folders, Tag , or Delete them. All these options appear at the bottom of the notebooks column. You can also sort your notebooks (go to Sort By ) by Date Edited , Date Created , or Title ; starting with Newest First or Oldest First . You can also Group By Date if you want your notes to be grouped according to dates in the folder. It makes it easier to find what you’re looking for, so we recommend leaving it on. View Attachments shows you all the attachments in the app, not just the ones in the open folder. To delete a folder, long-press it to bring up the popup menu and Delete . This deletes all the notes and subfolders in that folder.
To organise the notebooks in your folder, long-press to bring up a popup menu, then Pin Note at the top of the folder. It makes the notebook easier to find. You can also Lock Note if it does not have any attachments or tags and if you’re not collaborating on it. You can either Use iPad Passcode , which is less secure but also easier to remember. Or Create Password for more security, but there is no way to recover a password if you forget. With both, the app gives you the option to Enable FaceID or TouchID . We recommend you enable it to make it easier to unlock your notes. To lock your notebook, tap the lock icon on the toolbar. Tap it again or go to View Note (middle of the note page) to unlock it. The option you choose for locking your notebook applies to all the notebooks in the app. To remove the lock, long-press your notebook and Remove Lock . You can also Move the notebook to a different folder.
Apple Notes supports universal tags that work in all your notes in the app. They can either be typed or handwritten. Typing # gives you recommendations for tags you can use. To create a new tag, or when you have no tag in the app, simply type the full tag. Tap the space or return keys to save the tag. When handwriting a tag, the app recognises it when you stop using the Apple Pencil by deselecting the pen icon on the toolbar. Apple Notes then underlines the tag so you can interact with it. Simply tap on the tag and Convert to tag . Only then will Apple Notes add the tag to your other tags in the app.
Your tags group under Tags at the bottom of the folders column. Tapping on a tag will display the notebooks that are using it. You can view notebooks with two or more tags. Next to the Tags title, you can choose to show All Selected if you want notebooks with all the tags you just selected. Any Selected will display all the notebooks with at least one of the selected tags. Long-pressing a tag gives you the option to Rename Tag and the app updates all the tags in the app. You can also Delete Tag . If you don’t like folders, universal tags are a great alternative for organising your notes.
Smart folders
Smart folders automatically organise your notes according to a criteria you set. You can create them from scratch when creating new folders by tapping Make Into Smart Folder . Your smart folder can include notes matching all or any of the filters you add. You have eleven (11) filters that you can use for your smart folder, and each has unique options. A smart folder can group notes with specific tags. It can contain Any Tag or Any Selected Tag in which case you must pick the specific tags you want. All Selected Tags will be grouped into only the notebooks containing all the tags you pick. Your smart folder can also not have tags ( No Tags) .
You can also group notes that were Created or Edited during a certain period of time. The app has a few presets for the time period, but you can customise this by going to Custom , where you have more options to fine-tune the notes you’re grouping in your smart folder. Relative Range can be In The Past Hour(s) , Day(s) , Week(s) , Month(s) , or Year(s) . Specified Range lets you set a fixed period of time with fixed dates. On a Date groups notes for that one date. You can also group notes you Created or Edited Before/After a Date you set.
Apple Notes also lets you group Shared notebooks that you have shared With Anyone , With Specific People or with no one ( Not Shared ). Mentions groups notebooks where Anyone , you (labelled Me ), or Specific People have been mentioned in a notebook you’re collaborating on . Checklists adds notes to your smart folder according to the criteria you set. You can choose to group Any checklists, or specific ones ( Unchecked or Checked) . You can also add notes with Any Attachments , or specific ones ( Photos & Videos , Scans , Drawings , Maps , Websites , Audio , or Documents ). When you want to group two or three different attachments, the only setting for that is to use Any , which will also include other attachments you don’t want. So, the best way is to use other criteria in addition to your Attachments option.
For the Folders criteria, you can Include/Exclude Selected and the app will give you a list of folders in your iCloud account. It does not support folders On My iPad account. You can also Include or Exclude Quick Notes , Pinned Notes , Locked folders, and notes in your smart folder. Your smart folders can have any number of filters you want. When you’re happy with the filters you have chosen, tap Done to save your smart folder. Apple Notes has three default smart folders in the app: Quick Notes , Maths Notes , and Shared . Lastly, to edit these options, go to three-dots icon , Edit Smart Folder and then Manage Smart Folder .
Toolbar customisation
You can customise the middle toolbar in Apple Notes. To get started, go to the three-dots icon and then Customise Toolbar . You can then drag and drop icons to and from the toolbar. Tap Done to save the changes.
PDF Reading
To add a PDF to your notes in Apple Notes, you must split view your screen to drag and drop the document from its location on your iPad. The app creates a thumbnail of the PDF that can display as Small , Medium , or Large . By default, in iPadOS 17, they display as large. To change the size of the document, go to the down-facing arrow on the document name, go to View As , and choose the size you want. You can also resize the PDF reading window by simply zooming in and out with your fingers. To view the PDF in full screen, in the markup window, go to Quick Look under the down-facing arrow .
For inline PDF-reading, the PDF scrolls horizontally, and you can use the pen tools in Apple Notes to annotate the PDF. For faster navigation, the app recognises and can open hyperlinks. Simply tap on them. You can annotate your PDFs using all the tools you can use for writing notes. That also includes adding stickers, text, signatures, and shapes, but its a hit and miss.
To edit the pages in your PDF, go to Show Thumbnails (top right corner). The app displays all the pages in your PDF that you can quickly scroll through. You can also rearrange the pages in your document by long-pressing to pick up the page, then dragging and dropping where you want it. Tapping on a page brings up a three-dots icon , and when you tap on it, it gives you the option to do several things. You can Copy the page and paste it anywhere you want. You can Rotate Left or Rotate Right . You can Insert Blank Page to add a new, empty page with a plain page template. This is useful when you have a lot of notes you want to add to your PDF. You can also Insert from File to add a PDF to the document. Scan Pages will add scanned PDFs to your document. Lastly, you can Delete Page .
The annotation tools for inline and fullscreen (or markup) PDF reading are the same. However, in markup, you also get autofill for PDF forms in Apple Notes. It recognises text fields that you need to fill out. The feature can also add signatures and create text fields in your forms. The feature is still very basic, as it can’t interact with any other features in PDF forms.
The settings for Apple Notes are in the system settings for your device. Go to your iPad settings and look for Apps (bottom of the left sidebar), then Notes (under N). Go to Language to choose your default language. If you don’t set this, the app will just use the first language listed under Language & Region in your General settings.
Notes Accounts lists all the accounts on your iPad that have access to Apple Notes. Not all accounts support Apple Notes. To see if an account supports Apple Notes, tap on it and turn on Notes . The notes you create under your Gmail account in Apple Notes are sent to your email as a thread.
You can then choose your Default Account from the ones you have signed in. In the event you don’t pick a folder, the notebook you create goes into the default account you choose in the Notes folder. Under Password , you can lock the notes in your iCloud and On My iPad accounts. You can turn on “On My iPad” Account if you want to keep some notes on your device without syncing them.
Turn on Mention Notifications if you want to receive notifications when you’re mentioned in a document you’re collaborating on. Under the VIEWING section, you can Sort Notes By Date Edited , Date Created or Title . We recommend sorting them by Date Edited to make it easier to find the notes you’re currently working on. You can turn on Group Notes By Date if you want them grouped according to the date you are sorting them by. New Notes Start With either a Title , Heading , Subheading or Body . For your checklists in the app, you can Sort Ticked Items Manually or Automatically . We recommend choosing automatically if you want the ticked items to be moved to the bottom of the list when you mark them as complete. Lines & Grids lets you set the default page template for your new notebooks and quick notes.
App links and the rest
For the best experience with links in quick notes, we suggest turning on both Suggest App Link when Composing Quick Note and Suggest Notes with App Links . This will help you get relevant link popups when you’re taking quick notes. You can also turn on Auto Convert to Tag to avoid the extra step of converting your tags in Apple Notes. When turned on, all you have to do is type # to create a new tag. Turn on Save to Photos if you want to save photos you take in Apple Notes to the Photos Library. If you only want to use the photos in the Apple Notes app, then you can turn this off. Lastly, turn on Access Notes from Lock Screen if you want to create quick notes on the locked iPad screen.
iPadOS 17 updates (public beta)
Linking your notes .
Links in iPadOS 17 only work on your body text in Apple Notes . To add a link, tap a blank space as though you want to start typing some notes. Bring up the popup menu on the cursor > Add Link > start typing to search for your notes in the app. You can choose to use the note title for your link by turning on the option ( Use Note Title as Name ), or you can turn it off to write your own name for it, then tap Done to save your link.
You can also add links to already-existing body text in your notes. Select the text you want to add a link to > Add Link > tap Done to save. With the URL option, you can link to notes outside of Apple Notes. For example, I can link to notes from Goodnotes by simply copying the link for the notes and pasting it into Apple Notes. This can also let you link to websites.
To open the links, simply tap on them to go to your other notes in Apple Notes. With notes from other apps, you’re taken to them directly. For web links, you go to the website you’re linking to. Long-pressing links brings up a popup menu to Open , Copy , or Share the link. To edit a link, select the linked text > Edit Link > make the changes you need, and tap Done to save them. To remove a link, select the linked text and Remove Link .
Toolbar updates
The ruler tool in the app is now darker than before. There is a new writing tool: a crayon (between the pencil tool and calligraphy pen). Like all the other writing tools in Apple Notes, it has five fixed thicknesses and opacity options. The crayon can do everything that other writing tools can, including drawing shapes.
The toolbar now has a plus icon for adding different items to your notes: text boxes , signatures , and shapes . Apple Notes now supports stickers, a system-wide iPadOS 17 feature (that we’ll cover in a different video). To add a sticker, tap the plus icon on the toolbar > Add Sticker > choose a sticker for your collection (tap to add it to your notes). You can then resize or rotate the sticker. The three-dots icon lets you Cut , Copy , Duplicate , or Delete the sticker.
iPadOS 18 updates (developer beta)
Attachments.
In iPadOS 18, Apple Notes has a new icon to centralise how we add items to body text in the app . Go to the attachment icon on the toolbar and choose what you want to add to your notes. You can Scan Text instead of typing it. Scan Documents lets you scan notes using the native iPad scanning technology . You can then add the scans as a PDF. You can also take photos and videos ( Take Photo or Video ) with your iPad camera or add them from your Photos library ( Choose Photo or Video ). Attach File takes you to the Files app, where you can add any file or document that is supported in the app: PDFs, images, audio, videos, etc. The app can only add one attachment at a time. The fastest way to add files from the Files app is by long-pressing where you want to attach it to bring up the popup menu and go to Attach File .
You can also record audio in Apple Notes under the attachment icon . Go to Record Audio , and the app takes you to a new recording window away from your notes. Tap the record icon (bottom left of the screen) to start recording. It changes to a pause icon , which you tap to pause the recording. You can RESUME at any time to record more. The last step for recording your audio is naming it. Go to the three-dots icon (top right corner) and Rename . Apple Notes gives you the option to save your recording to the Files app ( three-dots icon > Save Audio to Files ). You can also Share Audio outside of Apple Notes to other apps and Delete the audio if you no longer need it. To save the recording to Apple Notes tap Done (bottom right corner).
Tapping an audio recording in your notes opens it up in the same window. Your audio playback options are simple. Tap the play icon to start listening to the audio. You have 15-second fast-forward and rewind icons for your playback. You can go through your audio faster using your finger or Apple Pencil on the audio timeline. At the end of your timeline, the recording icon becomes activated, and you can record some more. Tap Done to exit the playback window and go back to your notes. There are still some features that are not working at the moment and some that aren’t available, but we’ll cover them as Apple releases them.
Text highlighter
In the iPadOS 18 version of Apple Notes, we have new ways to format our body text. Select the text and go to the Aa icon on the main toolbar. Tap the highlighter tool (looks like a pen tool with a straight line under it) to change your font and background colour. Apple Notes has changed both, and they are the same colour. Next to the highlighter tool is a dot icon for changing the highlighter colour. Apple Notes has five colours for highlighting your body text: Purple , Pink , Orange , Mint , and Blue . You can’t change these colours or use custom ones. To remove the highlighter, select the highlighted text and then the highlighter tool.
Collapsible notes
The app automatically creates collapsible headers using the titles, headings, and subheadings in that hierarchy order. To make a section collapsible, you can create a new heading or subheading or convert some existing text into one. This makes everything under that heading collapsible, and it includes both body text and handwriting sections that come after that heading. A down-facing arrow appears on its left side when you put your cursor on it, indicating that it is now collapsible. Tap on it to collapse the notes. To show your notes, tap the forward-facing arrow next to the heading. There are some interesting ideas about how your notes are collapsed. A title collapses all the sections below it, including headings and subheadings. A heading can only collapse subheaded sections and subheadings, paragraphs (also known as body), and handwritten sections only.
Smart script
Smart script brings a lot of interesting features to iPadOS 18, but unfortunately, it is not available for some iPad models. The models that support its technology are:
- M-series iPad Pros (starting from the 5th generation for the bigger version and 3rd of the smaller one)
- iPad Air, starting from the 4th generation.
- iPad (10th generation)
- iPad mini (6th generation).
Smart Script automatically refines your handwriting when you write in Apple Notes. The option is turned on by default, but you can turn it off if you like. Bring up the handwriting toolbar in the app, go to the three-dots icon , and turn off Auto-refine Handwriting . Your handwriting won’t be refined anymore.
Spell check picks up wrong spellings in your handwritten notes. The app underlines them like we are typically used to seeing for text, and tapping on it brings up the spelling suggestions. Tap on the correct one to replace the wrong spelling in your notes. Apple Notes replaces your handwriting with handwriting that closely resembles yours (at least, that’s the idea).
You can now add space between words in your sentences. Long press your Apple Pencil until an orange cursor appears, without lifting off your Apple Pencil, move it to create space where your cursor is. You can now add the notes you want in this new space.
Text-to-handwriting copies text and pastes it as handwriting in your notes. To paste your copied text, long-press your Apple Pencil to bring up the orange cursor . When it appears, lift off your Apple Pencil to bring up a popup option to Paste the text. Tap on Paste , and Apple Notes will paste that text with handwriting that closely resembles yours. At the moment, though, the text can only be pasted in black ink. Once it has been pasted, the handwriting will now behave like any other handwriting you’ve written in the app. You can erase it, change its colour, etc.
You can now scribble over your handwritten notes to erase them. The gesture works like hand-drawing shapes in Apple Notes. When you scribble, hold for a second until your notes are erased.

Related Posts

GoodNotes 5 User Guide for the iPad

CollaNote user guide for the iPad

Nebo user guide for the iPad
Leave a comment cancel reply.
You must be logged in to post a comment.
Notes app for iPhone and iPad: The ultimate guide
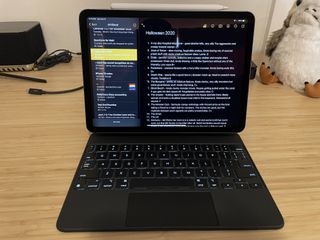
How to sync Notes
- How to share and collaborate with others
How to create, edit, and delete Notes
How to lock notes with password or touch/face id, how to format notes.
- How to add photos, sketches, links, locations, and more
How to sketch in Notes
How to take notes with siri, how to use quick note on ipad.
We've all been in that situation — there's important information that we need to jot down, but we don't have pen or paper on us. I mean, who still carries pen and paper with them nowadays, right? Thankfully, your favorite iPhone and iPad come equipped with a native Notes app, which acts as a great scratchpad, allowing you to write down anything that you may need to reference later.
But did you know that the Notes app can do more than just basic text notes? You can even do things like add photos and video, files, sketches, links, and so much more. Here's everything you need to know about how to use the Notes app on your best iPhone and iPad.
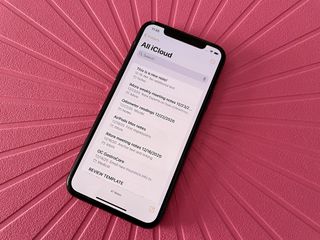
To get the most out of Notes, you'll want to make sure to sync your Notes with iCloud so that everything is available across all of your devices, including the best iPhone and iPad and your favorite Mac .
While iCloud syncing is the way to go if you want the most versatility with embeds, attachments, and formatting; you can also sync notes with your Google or Microsoft Exchange accounts as well. Keep in mind that doing it this way only supports plain text notes.
How to share and collaborate with others in Notes
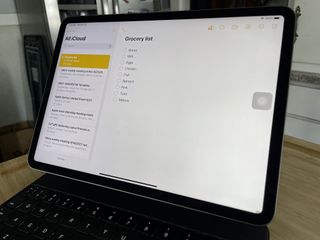
The Notes app also lets you share and collaborate with others in Notes . This is perfect when you need to share checklists with your significant other or when you need to work together with a coworker on project notes. New features in iOS 15 and iPadOS 15 allow you to even do things like mention specific users to get their attention, as well as a new Activity view that lets you see all edits and changes at a glance.
Now that you have set up your Notes app to sync with your preferred service, it's time to get started with creating notes ! It's a rather simple affair, and once a note is created, it's just as easy to edit, delete, or move them to another folder too! And if you accidentally deleted a note but changed your mind, it's actually possible to recover it before it's permanently deleted.
Sometimes you may have sensitive information in the Notes app that you don't want others to be able to access. This can include stuff like credit card info, passwords, medical data, or other personal information. For situations like that, it's best to lock your note with a password or even use Touch ID or Face ID, depending on the model of iPhone or iPad you have.
Master your iPhone in minutes
iMore offers spot-on advice and guidance from our team of experts, with decades of Apple device experience to lean on. Learn more with iMore!
Unfortunately, there is no way to lock down an entire folder or the Notes app itself, so you'll need to selectively choose which notes to lock. But once you create your Notes password , it becomes your global Notes password — this means it works on your iOS devices as well as on the Mac version of Notes. So any note that you lock will require this single password to unlock. For faster access, we recommend adding Touch ID or Face ID .
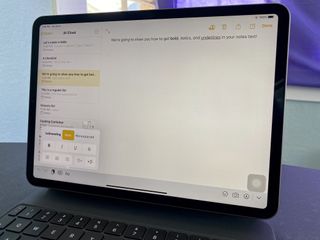
You can add a little pizazz to your notes by adding rich formatting to the text in Notes . Formatting includes titles and headings, bold/italicize/underline/strikethrough, checklists, and even tables. However, as I mentioned earlier, to get the benefit out of all of these formatting options, you'll want to make sure that you're using iCloud for syncing. Otherwise, Google and Microsoft Exchange accounts only support plain text with no formatting.
How to add photos, sketches, links, locations, and more to Notes
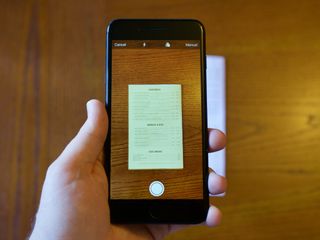
The Notes app on iPhone and iPad can do so much more than just text, too. In fact, you can add photos, videos, document scans, and sketches in a single note. Additionally, you can also add other attachments like web links, Maps locations, and even snippets of text from mobile Safari or your web browser of choice to Notes.
With the ability to add all kinds of attachments to Notes, it's your one-stop shop for remembering pretty much anything you need.
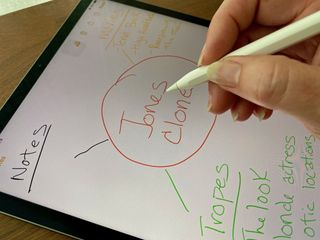
Earlier I mentioned that you can add sketches right in Notes. But you may be wondering, "How can I sketch in a text-based Note app?" Not a problem! Once you find the sketch pad in the Notes app , you may find it better to use than just typing your notes out. After all, some people are more visual, and sketching out diagrams and doodles is more productive for them. This is just another layer of flexibility to making Notes work for you!
Sometimes you may be too busy to pull out your iPhone or iPad to take a note down. Fortunately, you can also use Siri to take down a note , which is especially handy if you have the best Apple Watch too.
With Siri, she can help you take down a new note, and you can even find and view certain notes. So no matter what life throws at you, the Notes app is always there for you, ready to help you write things down for later!
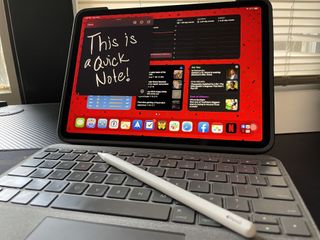
A new feature in iPadOS 15 is Quick Note . This feature allows you to invoke a Notes' scratchpad at any time, while you're in any app (or no app), on your best iPad . This is a very useful new tool, because you can jot down little bits of information while working in other apps, and even drag-and-drop text, images, and web links in to your note too.
Quick Note works best with a stylus like an Apple Pencil , but you can also use your finger if you don't have one.
Jot everything down!
As you can see, the Notes app on your iPhone and iPad is one of the most useful apps around, and it's already installed on your device. It can save not only text but pretty much any kind of attachment you need. And if you have an iPad, the Quick Note feature is incredibly handy as you work and multitask in other apps.
Updated February 2022: With new updates for iOS 15 and iPadOS 15.
Christine Romero-Chan was formerly a Senior Editor for iMore. She has been writing about technology, specifically Apple, for over a decade at a variety of websites. She is currently part of the Digital Trends team, and has been using Apple’s smartphone since the original iPhone back in 2007. While her main speciality is the iPhone, she also covers Apple Watch, iPad, and Mac when needed. When she isn’t writing about Apple, Christine can often be found at Disneyland in Anaheim, California, as she is a passholder and obsessed with all things Disney, especially Star Wars. Christine also enjoys coffee, food, photography, mechanical keyboards, and spending as much time with her new daughter as possible.
Snapchat finally comes to iPad in new update — 13 years after debuting on iPhone
My favorite macOS email app just added a huge feature for anyone stuck in meetings
The iPhone 16 Pro gold titanium color mystery continues as a new challenger enters the fray — and it's gorgeous
Most Popular
- 2 iPhone droppers rejoice, this Apple patent could put Touch ID & capacitive buttons on a case
- 3 Spotify says Apple stopped users from using the volume buttons to change level on Spotify Connect devices
- 4 September won't see a Vision Pro 2, but you will get all this new content for the headset
- 5 Here's how to add some flair to your messages with new iOS 18 text effects
How-To Geek
How to use quick note on ipad.

Your changes have been saved
Email is sent
Email has already been sent
Please verify your email address.
You’ve reached your account maximum for followed topics.
How to Wirelessly Transfer Files Between Windows, macOS, Linux, and Mobile
Mid-range android vs. old iphone: you should buy the iphone, the aquariums hobby is going high tech in awesome ways, quick links, create a quick note on ipad, add links to a quick note, see persistent highlights in safari, view your quick notes, use quick note actions.
Introduced with iPadOS 15 , Quick Note provides iPad users with a convenient way to capture notes from any screen or open app. Jot your note, add the links you visit, and access your iPad Quick Notes on iPhone and Mac.
Apple gives you a few simple ways to create a Quick Note on iPad.
- Use your finger or Apple Pencil to swipe up and in from the bottom-right corner of the screen.
- If you use a keyboard with your iPad, you can press Globe+Q.
- You can also tap the icon in your Control Center .
Add Quick Note to Control Center
To add the Quick Note icon to your Control Center, open your Settings and select "Control Center" on the left.
Tap the plus sign next to Quick Note in the More Controls section. This adds it to the top, which displays it in the Control Center. You can then drag it to any position you like.
You can take advantage of a variety of tools for jotting down a Quick Note. Use your Apple Pencil , a keyboard , or the tool palette within the Quick Note.
Adjust the Size and Position
With a Quick Note open, you can tap and drag it to any position on the screen you like. You can also resize it by pinching it with your fingers inward or outward.
When you create a Quick Note with an open app, such as Safari, it will detect an available link. You'll see this display in the Quick Note. Tap "Add Link," and the link will pop into your note.
If there's more than one link available, tap "Add Link," and select the one that you want to add.
Once you do this and revisit that website or app, you'll see a thumbnail appear for your Quick Note. This is a super handy way to view the note that you took for that item without having to put in any extra effort.
If you use Safari, not only can you add the links you visit to your Quick Note, but you can also add text and create persistent highlights, too.
Related: How to Quickly Add Links, Photos, and Media to Apple Notes on iPhone and iPad
For example, select text on a web page in Safari and tap "New Quick Note" in the shortcut menu.
This adds the text and the link to the note. When you revisit that web page in Safari, not only will you see the thumbnail for the Quick Note described earlier, but you'll also see that the text remains highlighted.
With a Quick Note open, you'll see dots along the bottom. This is similar to the screen selector on iPad. Here, it indicates the number of Quick Notes that you have. You can simply swipe to view each one.
In addition to the onscreen view of Quick Notes, you have a folder specifically for these in the Notes app. And you can access the Quick Notes folder when you open Notes on your iPhone and Mac as well. So, you can easily stay in sync on your other Apple devices.
Related: How to Sync Notes for iPhone and iPad
To give your Quick Note a title, swipe down in the body of the note. You'll see Suggested Title at the top. Tap "Edit" to give it a new name.
Enter the title and tap "Done" when you finish.
You'll also see a small toolbar at the top of a Quick Note. This allows you to take a few more actions with your note.
- Done : Tap "Done" to tuck the note away when you're finished.
- Grid Icon : Open the Quick Notes folder in the Notes app.
- Three Dots : Share or Delete your Quick Note.
- Pencil Icon : Start a new Quick Note.
Taking notes on iPad is faster than ever before with Quick Note!
- iPhone & iPad
iPadOS 15 is available today
Get More Done with Multitasking and Keyboard Shortcuts
Organize and Personalize iPad with Widgets and the App Library
Capture Thoughts with Quick Note and Organize with Tags
Enhancements for More Natural FaceTime Calls

Tools to Find Focus and a Fresh New Look for Notifications
On-Device Intelligence Powers New Photo Features and Advanced Spotlight Search

Translate Comes to iPad with New Ways to Communicate
More Privacy Controls
Additional iPadOS 15 Features
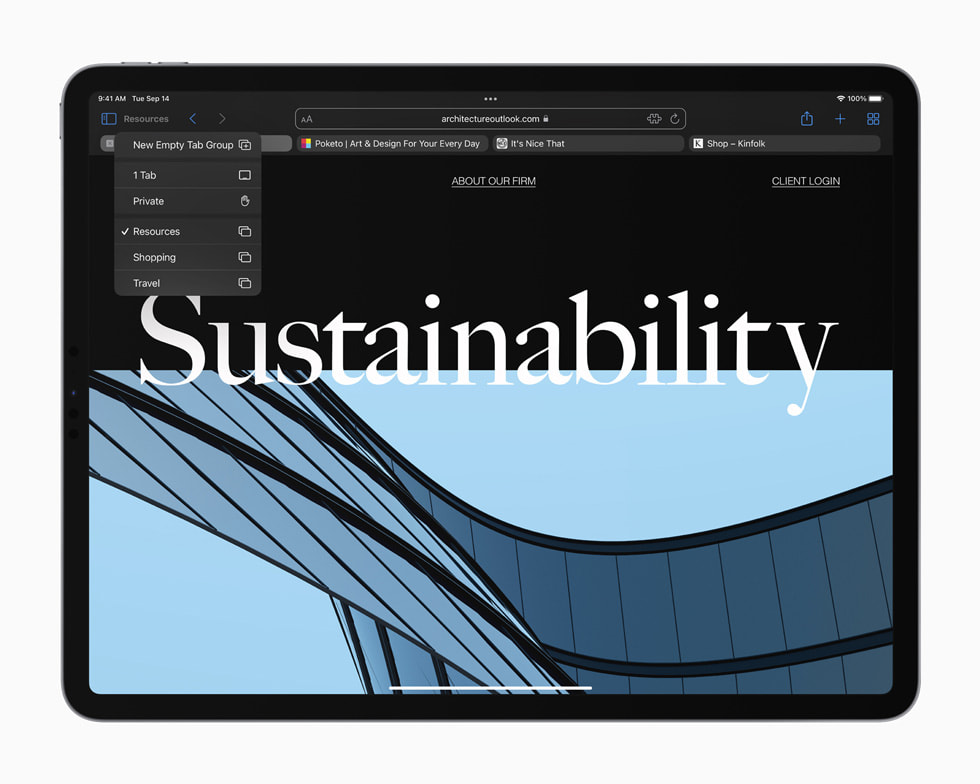
- Safari introduces new ways for users to personalize their browsing experience. Tab Groups allow users to organize tabs and easily access them at any time across iPhone, iPad, or Mac. A customizable start page and web extensions on iPadOS make Safari even more personal and powerful.
- Shared with You offers an all-new way to enjoy content sent by friends and family over Messages. Content like photos, articles, and music shared over Messages will automatically appear in a new Shared with You section in Photos, Safari, Apple News, Music, Apple Podcasts, and the Apple TV app.
- Photos includes the biggest update ever to Memories, with a fresh, new look; an immersive, interactive interface; and integration with Apple Music, which uses on-device intelligence to personalize song suggestions that bring memories to life.
- iCloud+ introduces new premium features, including Hide My Email, expanded HomeKit Secure Video support, and iCloud Private Relay 2 — an innovative new internet privacy service — at no additional cost. Current iCloud subscribers will be upgraded to iCloud+ automatically. All iCloud+ plans can be shared with people in the same Family Sharing group, so everyone can enjoy the new features, storage, and elevated experience that comes with the service.
- Maps delivers new ways to navigate and explore the world with significantly enhanced details in cities for neighborhoods, commercial districts, elevation, and buildings, as well as new road colors and labels, custom-designed landmarks, and a new night-time mode with a moonlit glow.
- Accessibility features are designed to work the way users do. The VoiceOver screen reader now uses on-device intelligence to explore objects within images, enabling users to discover more details about the people, text, table data, and other objects within images. Support for third-party eye-tracking hardware enables users to control iPad using only their eyes. Sound Actions lets users customize Switch Control to work with mouth sounds, and display and text size can now be customized on an app-by-app basis.
Text of this article
September 20, 2021
iPadOS 15 introduces new features that take the versatility of iPad even further, with a multitasking experience that is even more intuitive, new widget layouts for the Home Screen, the App Library, more ways to capture thoughts with Quick Note, and FaceTime updates for more natural video calls. iPadOS 15 is available today as a free software update.
iPadOS 15 makes working with multiple apps easier than ever. A new multitasking menu appears at the top of apps, making it easy to go into Split View or Slide Over with just a tap. Users now have quick access to the Home Screen when using Split View, and using the new shelf, they can also multitask with apps that have multiple windows like Safari and Pages.
All-new keyboard shortcuts and a redesigned menu bar allow users to get more done, including quickly setting up and switching between Split View and Slide Over right from their external keyboard.
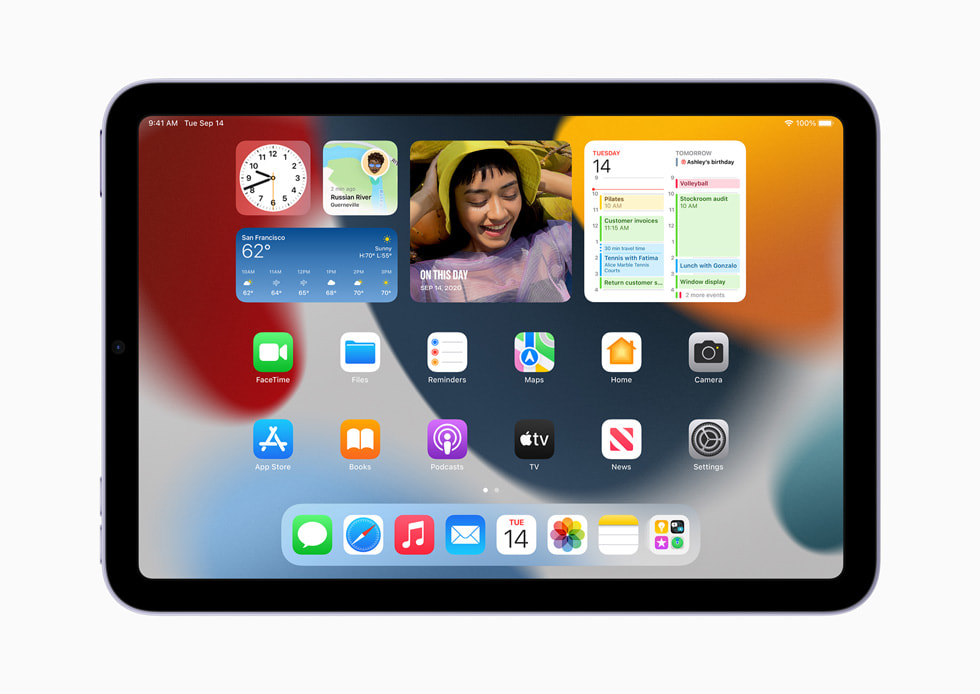
Widgets can now be placed among apps on the Home Screen, providing more information at a glance and offering a more personalized experience. A new larger widget size, designed specifically for the larger display of iPad, is perfect for showcasing videos, music, games, photos, and more.
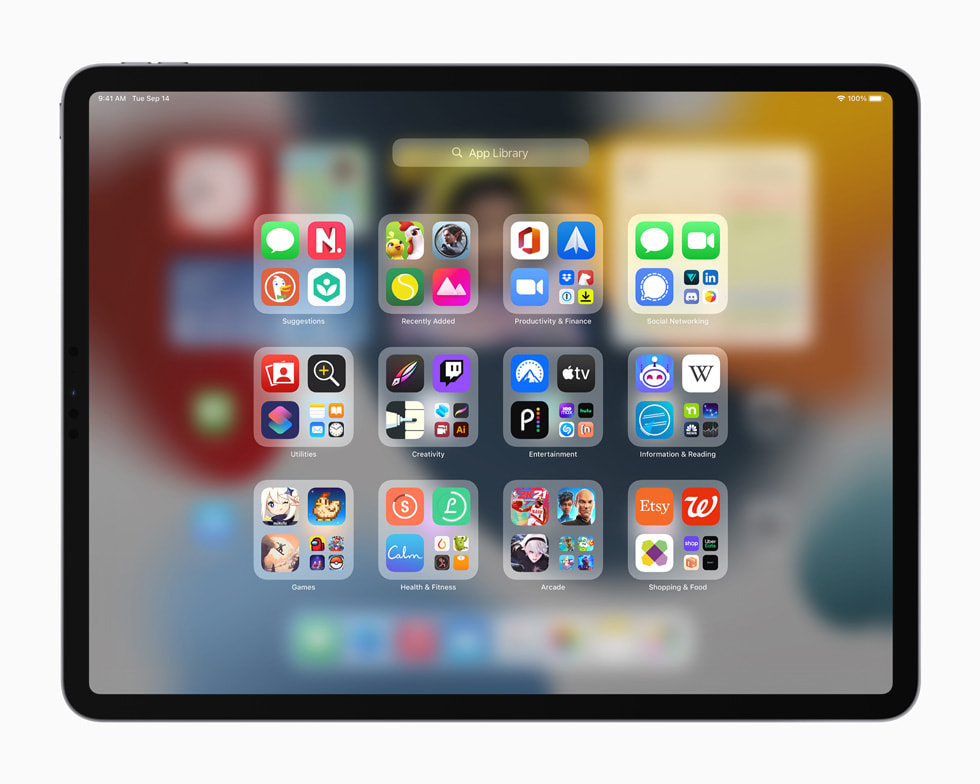
The App Library also comes to iPad, which automatically organizes all apps into helpful categories like Productivity, Games, and Recently Added, and is easily accessible right from the Dock.
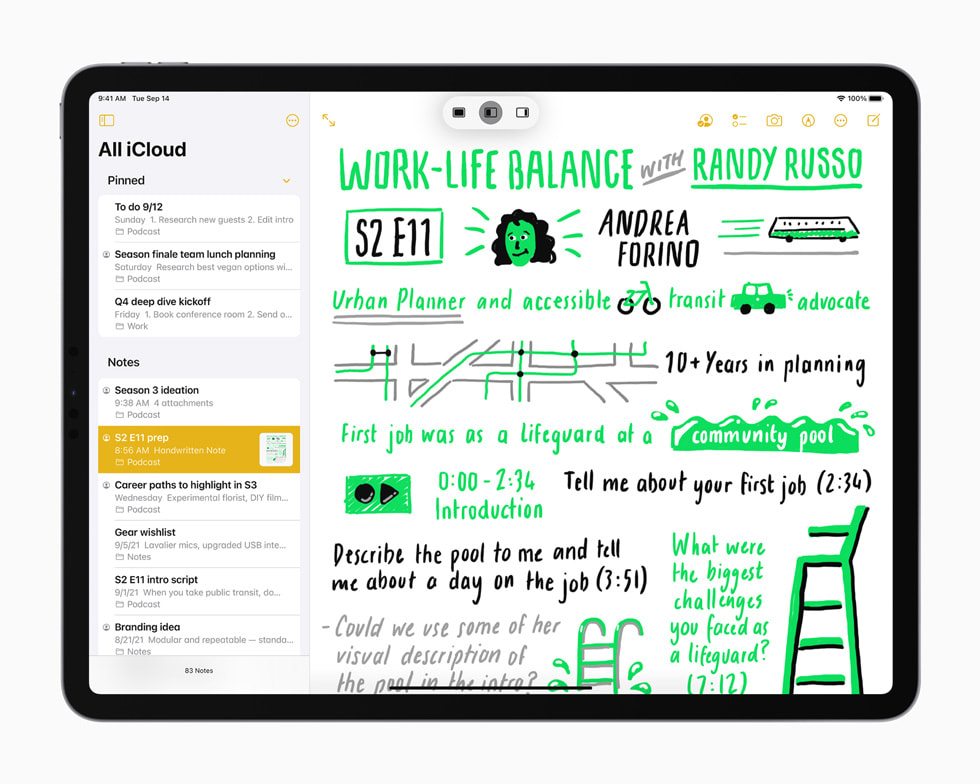
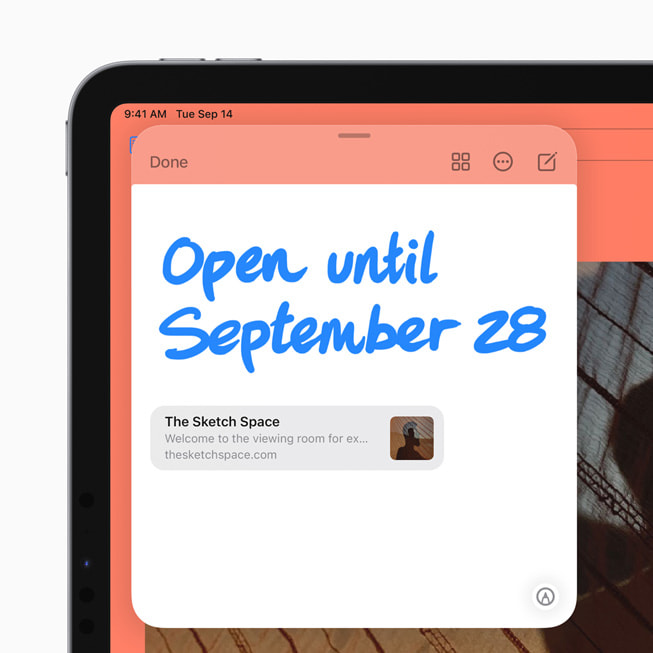
Notes goes systemwide with Quick Note, a fast way to take notes anywhere across iPadOS. Whether browsing in Safari or searching for a restaurant on Yelp, users can bring up Quick Note to jot down a thought and save links, providing an easy way to get back to exactly what they were viewing.
Notes also offers new ways to organize and collaborate. Tags make it easy to categorize notes and find them quickly with an all-new Tag Browser and tag-based Smart Folders. When working in shared notes, mentions allow members to notify one another and link them back to the note, and a new Activity view shows recent updates in the note.
Powerful updates to FaceTime audio and video make calls more natural and lifelike. With spatial audio, voices in a FaceTime call sound like they’re coming from the direction in which the person is positioned on the screen. Voice Isolation, a new microphone mode, uses machine learning to eliminate background noise and prioritize the user’s voice, while Wide Spectrum allows for every bit of background sound to come through.
Portrait mode in FaceTime blurs a user’s background and puts them in focus, and Group FaceTime now gives the option to display participants in same-size tiles in a new grid view, making it easier to have conversations with larger groups.
Also new in iPadOS 15, FaceTime calls can now extend to Android and Windows devices. Users can create a link from iPhone, iPad, or Mac, and share it through Messages, Calendar, Mail, or third-party apps, so anyone can join a FaceTime call from their web browser. FaceTime calls on the web remain end-to-end encrypted, so privacy is not compromised.
Later this fall, SharePlay will deliver a new way for users to share experiences with friends and family while on a FaceTime call, such as listening to songs together, watching a TV show or movie, completing a workout together, or sharing their screen to view apps. SharePlay will work with apps like Apple Music, Apple TV+, and Apple Fitness+, as well as Disney+, ESPN+, HBO Max, Hulu, MasterClass, Paramount+, Pluto TV, SoundCloud, TikTok, Twitch, and many others. SharePlay can be accessed through iPhone, iPad, and Mac, and with shared playback controls, anyone in a SharePlay session can play, pause, or jump ahead. SharePlay even extends to Apple TV, so users can watch shows or movies on a big screen.
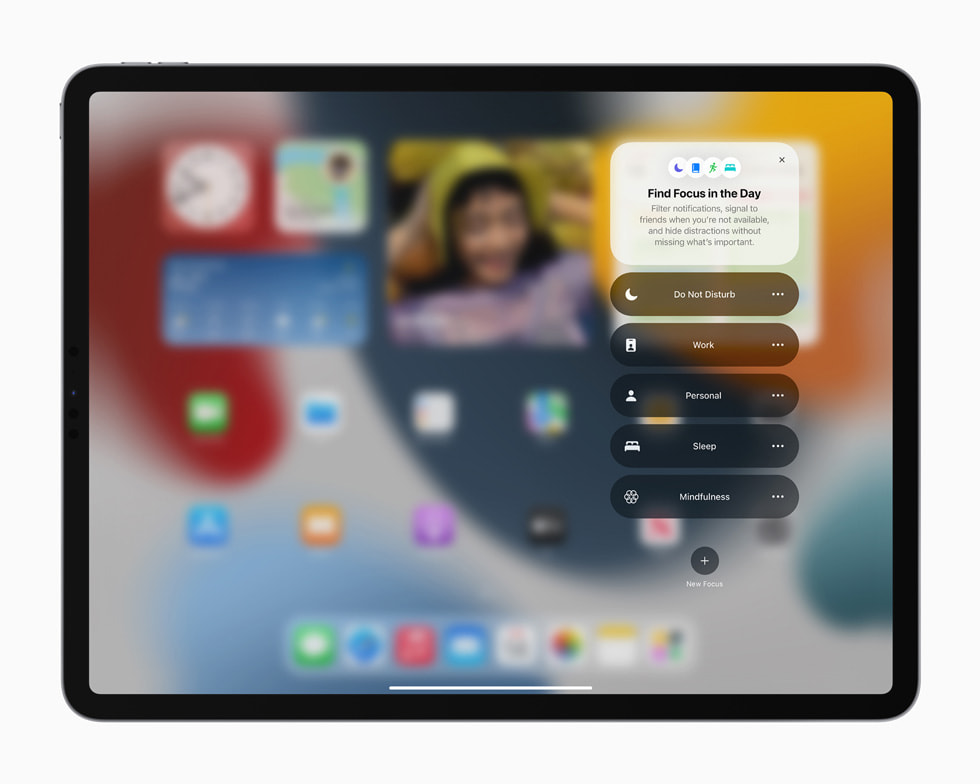
iPadOS 15 introduces Focus, a new way to help users reduce distraction by filtering notifications based on what they want to focus on in that moment. For example, the Work focus can be set during work hours to only allow notifications from coworkers and apps that are used for work, and the Personal focus can be used when taking a break with friends and family. To reduce temptation, dedicated Home Screen pages can be created with relevant apps and widgets to match a specific Focus. While using Focus, a status is automatically displayed to contacts in Messages and supported third-party communication apps like Slack, so others know not to interrupt.
Notifications have been redesigned, adding contact photos for people and larger icons for apps that make them even easier to identify. Users can now receive a notification summary — a helpful collection of notifications delivered daily — at scheduled times, like in the morning and evening, making it easy to catch up on the day’s activity at their convenience.
Using on-device intelligence, Live Text recognizes text in photos across the entire system including the web, and allows users to take action, such as copy and paste, look up information, and translate. Users can tap the image of a phone number to make a call, or the image of a web address to open a page in Safari. With Visual Look Up, users can learn more about popular art, landmarks, books, plants and flowers, and breeds of pets.
Spotlight now adds the ability to search the Photos app and web images, and has all-new rich results for contacts with context like recent conversations, shared photos, and their location if shared through Find My. Using Live Text, Spotlight can also find text and handwriting in photos.
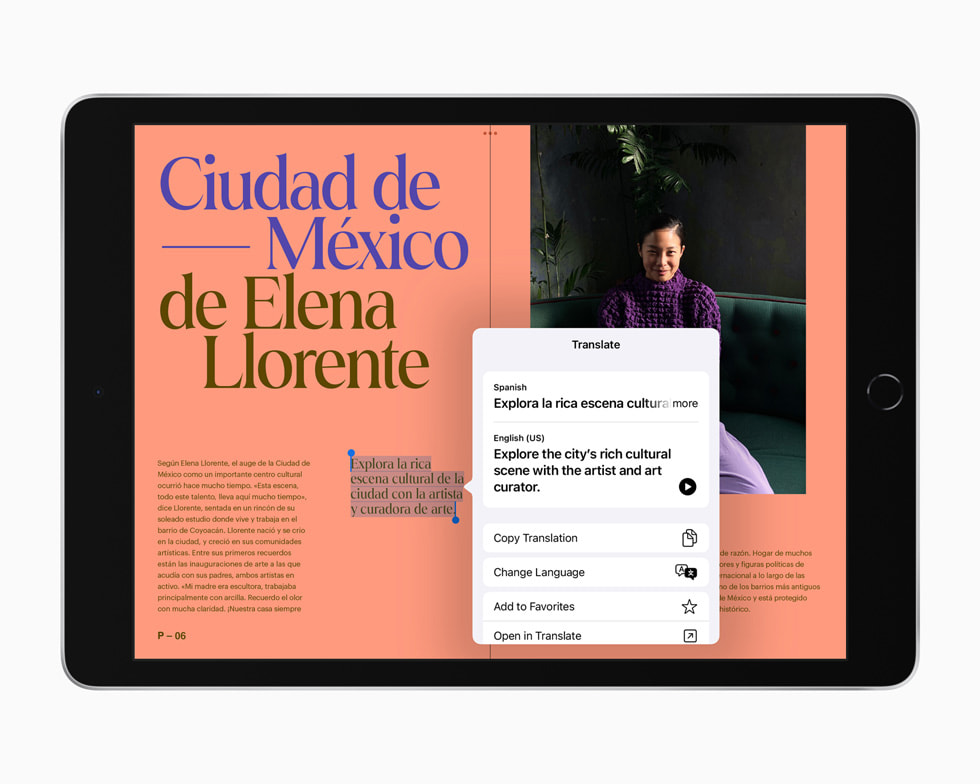
The Translate app comes to iPad with new features that make conversations easier and more natural. When using the Translate app, Auto Translate detects when someone is speaking, and in which language, so users can converse naturally without having to tap a microphone button. For even more personal conversations, face-to-face view allows two people to sit across from each other with iPad between them and see translations of the conversation from their own side. Text and handwriting can now be translated anywhere on iPad by selecting it and tapping Translate. And, in combination with Live Text, even text in photos can be translated.
New privacy features go even further to provide transparency and control over the data users provide to apps. Mail Privacy Protection prevents senders from learning whether an email has been opened, and hides IP addresses so senders cannot learn a user’s location or use it to build a profile on them. Siri’s protection of user privacy goes even further with on-device speech recognition, as audio requests are now processed entirely on device by default. 1 This also enables more personalization, offline requests, and faster performance.
Availability
iPadOS 15 is a free software update that is available starting today for iPad mini 4 and later, iPad Air 2 and later, iPad 5th generation and later, and all iPad Pro models. For more information, visit apple.com/ipados/ipados-15 . Some features may not be available in all regions or all languages.
- Available on iPhone and iPad with A12 Bionic and later. Requires download of speech models. Audio is sent to Apple servers if user opts in to improve Siri and Dictation.
- iCloud+ plans: 50GB with one HomeKit Secure Video camera ($0.99 per month), 200GB with up to five HomeKit Secure Video cameras ($2.99 per month), and 2TB with an unlimited number of HomeKit Secure Video cameras ($9.99 per month). iCloud Private Relay will initially be released as a public beta.
Press Contacts
Apple Media Helpline
Images in this article
How to Take Notes on iPad: Essential Tips and Tools for Efficient Note-Taking
Taking notes on an iPad is a fantastic way to combine the old-school charm of handwriting with modern technology. Whether you’re a student, professional, or just someone who loves jotting down ideas, you’ll find that the iPad offers a versatile and efficient platform for note-taking. This guide will show you the basics, from selecting the right apps to organizing your notes, and everything in between.
How to Take Notes on an iPad
This section will walk you through the steps to take notes on your iPad efficiently. Follow these steps, and you’ll be an iPad note-taking pro in no time.
Step 1: Choose the Right App
Pick a note-taking app from the App Store that suits your needs, like Notability or GoodNotes.
Finding the right app is crucial. Consider what features you need, like handwriting recognition, organizational tools, or cloud syncing. Each app offers unique benefits, so spend some time exploring options.
Step 2: Set Up Your Note-Taking Environment
Open the app and create a new notebook or note.
Getting your workspace ready will make it easier to dive into note-taking. Customize your notebook with different templates or styles to match your preferences. A well-organized setup can enhance your productivity.
Step 3: Use an Apple Pencil
Pair your Apple Pencil with the iPad for a smooth writing experience.
The Apple Pencil is a game-changer for digital note-taking. It offers precision and feels just like writing on paper. Make sure it’s fully charged and paired with your iPad to make the most of your note-taking sessions.
Step 4: Start Writing or Typing
Begin jotting down notes using the Apple Pencil or on-screen keyboard.
You can scribble away with the Apple Pencil or type out your notes, depending on what you find more comfortable. The flexibility to switch between writing styles can cater to different tasks, such as drawing diagrams or typing out lengthy text.
Step 5: Organize Your Notes
Use folders, tags, and search functions to keep your notes well-organized.
Good organization is key to finding your notes later. Most apps offer features like folders and tags to help you categorize. Use the search function to quickly locate specific notes. This way, you’ll never lose track of important information.
Once you’ve completed these steps, you’ll have a digital notebook that’s easy to navigate and filled with your thoughts, ideas, and important information.
Tips for Taking Notes on an iPad
- Choose the Right Stylus: While the Apple Pencil is highly recommended, other stylus options can also work well depending on your needs.
- Keep Your iPad Protected: Use a screen protector to prevent scratches from the stylus.
- Explore App Features: Many apps offer unique tools like audio recording or flashcard creation which can enhance your note-taking experience.
- Regularly Backup Your Notes: Sync your notes with iCloud or another cloud service to ensure they’re always safe.
- Practice Handwriting: If you’re new to using a stylus, spend some time practicing to improve your handwriting on the iPad.
Frequently Asked Questions
What is the best app for taking notes on an ipad.
There are several great apps, but Notability and GoodNotes are often recommended for their comprehensive features.

Can I use a non-Apple stylus?
Yes, there are many third-party styluses available, but the Apple Pencil generally offers the best experience.
How do I organize my notes?
Use folders, tags, and the search function within your note-taking app to keep things organized.
Is it possible to convert handwriting to text on an iPad?
Yes, many apps like GoodNotes offer handwriting recognition that can convert your written notes into typed text.
Do I need to back up my notes?
It’s always a good idea to back up your notes to a cloud service to prevent data loss.
- Choose the right app.
- Set up your note-taking environment.
- Use an Apple Pencil.
- Start writing or typing.
- Organize your notes.
Taking notes on an iPad is more than just a modern alternative to the traditional notebook—it’s a powerful tool that can transform your productivity. As you get accustomed to the digital note-taking environment, you’ll discover a range of features designed to streamline your work and keep your thoughts organized.
Beyond the basics, consider exploring additional apps and accessories to further enhance your experience. Whether you’re using it for school, work, or personal projects, the iPad offers a customizable and efficient way to keep track of your ideas and tasks. Embrace the flexibility and convenience of digital note-taking, and you’ll find that it can significantly improve how you capture and organize information.
So, why wait? Dive into the world of digital note-taking, and see how taking notes on an iPad can revolutionize your workflow. You’ve got the steps, the tips, and the answers to get started—now it’s time to make the most of your iPad!

Matthew Burleigh has been writing tech tutorials since 2008. His writing has appeared on dozens of different websites and been read over 50 million times.
After receiving his Bachelor’s and Master’s degrees in Computer Science he spent several years working in IT management for small businesses. However, he now works full time writing content online and creating websites.
His main writing topics include iPhones, Microsoft Office, Google Apps, Android, and Photoshop, but he has also written about many other tech topics as well.
Read his full bio here.
Share this:
Join our free newsletter.
Featured guides and deals
You may opt out at any time. Read our Privacy Policy
Related posts:
- How to Use a Stylus Pen on iPad: A Comprehensive Beginner’s Guide
- How to Connect Non-Apple Stylus Pen to iPad: A Step-by-Step Guide
- How to Use Stylus Pen on iPad: A Comprehensive Guide for Beginners
- How to Improve Handwriting on iPad: Top Tips and Essential Tools
- How to Connect Active Stylus Pen to iPad: A Comprehensive Guide
- How to Use Apple Pencil on iPad: A Comprehensive Guide for Beginners
- How to Connect Stylus Pen to iPad: A Step-by-Step Guide for Beginners
- How to Set Up iPad Pencil: A Step-by-Step Guide for Beginners
- How to Connect a Pencil to an iPad: A Step-by-Step Guide for Beginners
- How to Take Notes on an iPad: A Comprehensive Guide for Effective Note-Taking
- How to Pair Apple Pencil with iPad: A Step-by-Step Guide
- How to Write Neatly on iPad: Tips and Tools for Perfect Digital Handwriting
- How to Use Notes on iPad with Pencil: A Comprehensive Guide
- How to Connect Pencil to iPad: A Step-by-Step Guide for Seamless Use
- How to Turn on iPad Pencil: A Step-by-Step Guide for Beginners
- How to Connect Apple Pencil to iPad 9th Generation: A Step-by-Step Guide
- How to Take Notes on iPad with Apple Pencil: Your Ultimate Guide
- How to Connect 1st Gen Apple Pencil to iPad: A Step-by-Step Guide
- How to Charge iPad Pencil: A Step-by-Step Guide for All Models
- How to Connect Apple Pencil to iPad 10th Generation: A Step-by-Step Guide
How to save a Safari webpage or text to the Notes app on Mac, iPhone, and iPad
Learn how to save Safari webpages or text to your Mac, iPhone, and iPad Notes app for quick reference and organization.
There’s no easier way to capture a note from Safari than with the Notes app. Whether you’re doing research for school or work, planning a trip or event, or just want to make a note of an article, Apple’s integration makes it simple.
Save a Safari web page link to Notes
You can either bookmark a web page right in your browser or save it to Notes if that’s your jam.
You have two quick ways to add a Safari page to Notes on your Mac. So use whichever is most comfortable for you. And if you don’t see the Notes option, you may have to update your Mac Share Menu .
- Click File from the top menu bar and click Share > Notes .
- Click the Share button from the top right of the Safari toolbar and pick Notes .
You’ll see the link icon displayed in the note automatically. But you can type in more text above or below it if you like.
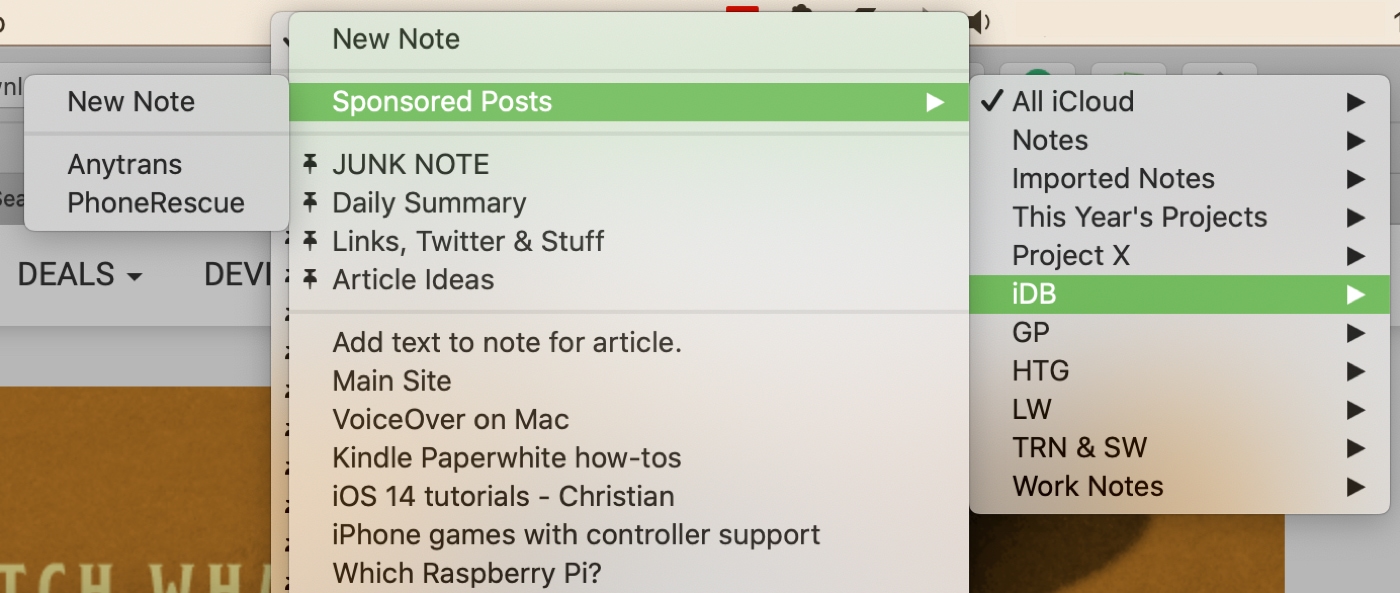
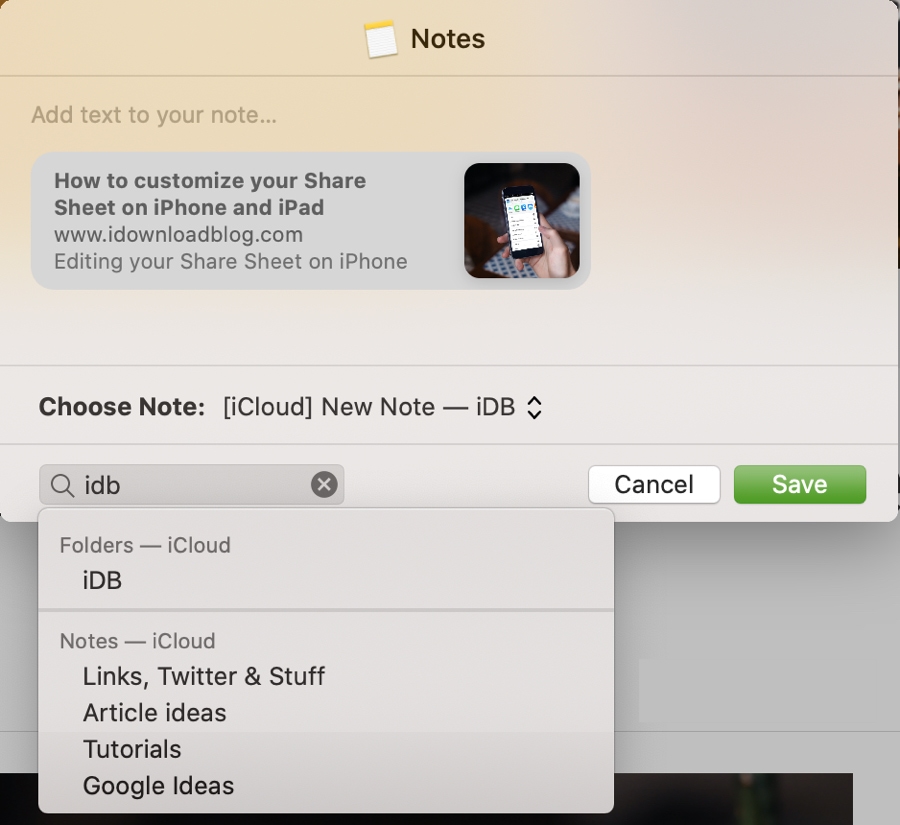
Next to Choose Note , you can select a spot for your note or add to an existing one.
- Below New Note , at the top of the pop-out, you can select one of your Folders . And from there, you can pick a subfolder if you like. Conveniently, each pop-out has the New Note option right at the top.
- Beneath Folders, you’ll see your Pinned notes indicated by the pin icon. So, adding to one of those is a breeze.
- Finally, you have the rest of your notes. You can add to a Shared note , and those have a contact symbol next to them.
- The only limitation you have is if you want to add to an existing Locked note. If you try, you’ll see that the note is grayed out and thus un-clickable.
But for the most part, no matter where you want the note, a folder or subfolder, new or added to an existing one, you’re covered.
If you have a lot of folders, subfolders, and notes, you can use the handy Search box to find one quickly.
On iPhone and iPad
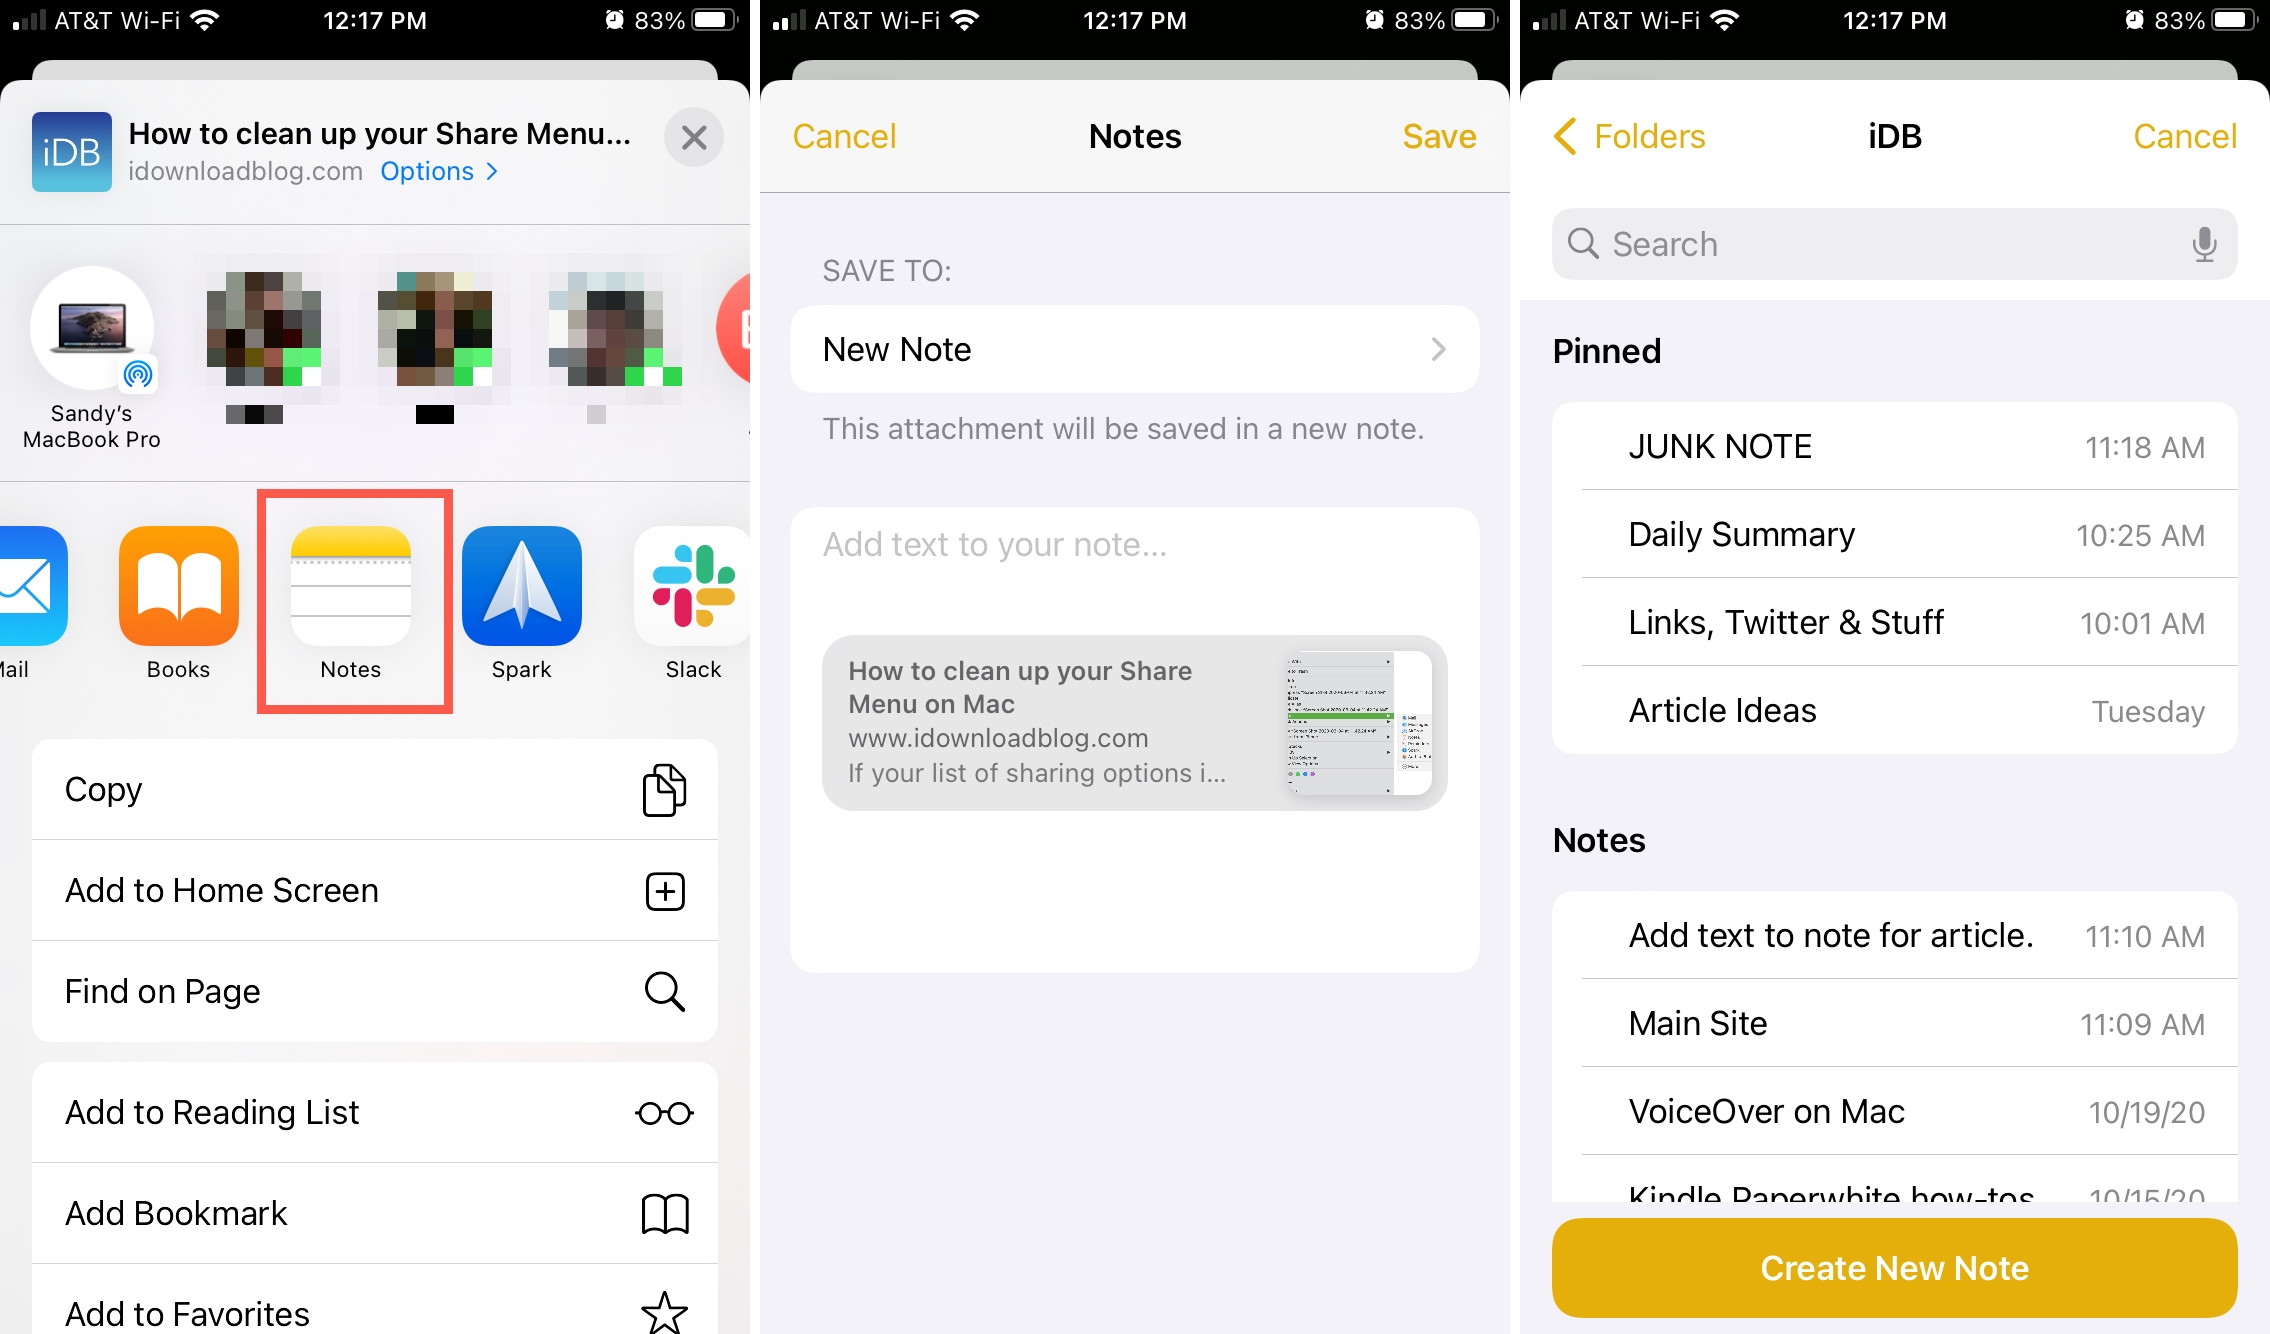
Sharing a page from Safari to Notes on your iPhone and iPad can be done as quickly and easily as on Mac. Tap the Share button and choose Notes in the second row of your Share Sheet. If you don’t see Notes, select More to add it, or check out our how-to for updating your Share Sheet on iOS .
You can do a quick Save to send the note to your default Notes account with the link icon. Or tap New Note and then find a folder or subfolder.
- Each folder and subfolder has your notes sorted with Pinned at the top and the remaining Notes at the bottom.
- Shared notes have the contact icon like on Mac, and Locked notes are grayed out and cannot be selected.
- The Create New Note button is at the bottom of each screen, and the Search box is at the top.
Save Safari web page text to Notes
If you’re going through a website in Safari and find some important text, here’s how to save that text to the Notes app.
- Select the text on the Safari web page and right-click .
- Choose Share and select the Notes app.
- You will see the actual selected text in the small window. It will be saved as a new note, but you can click the Choose Note option and add it to an existing note.
- Finally, click Save .

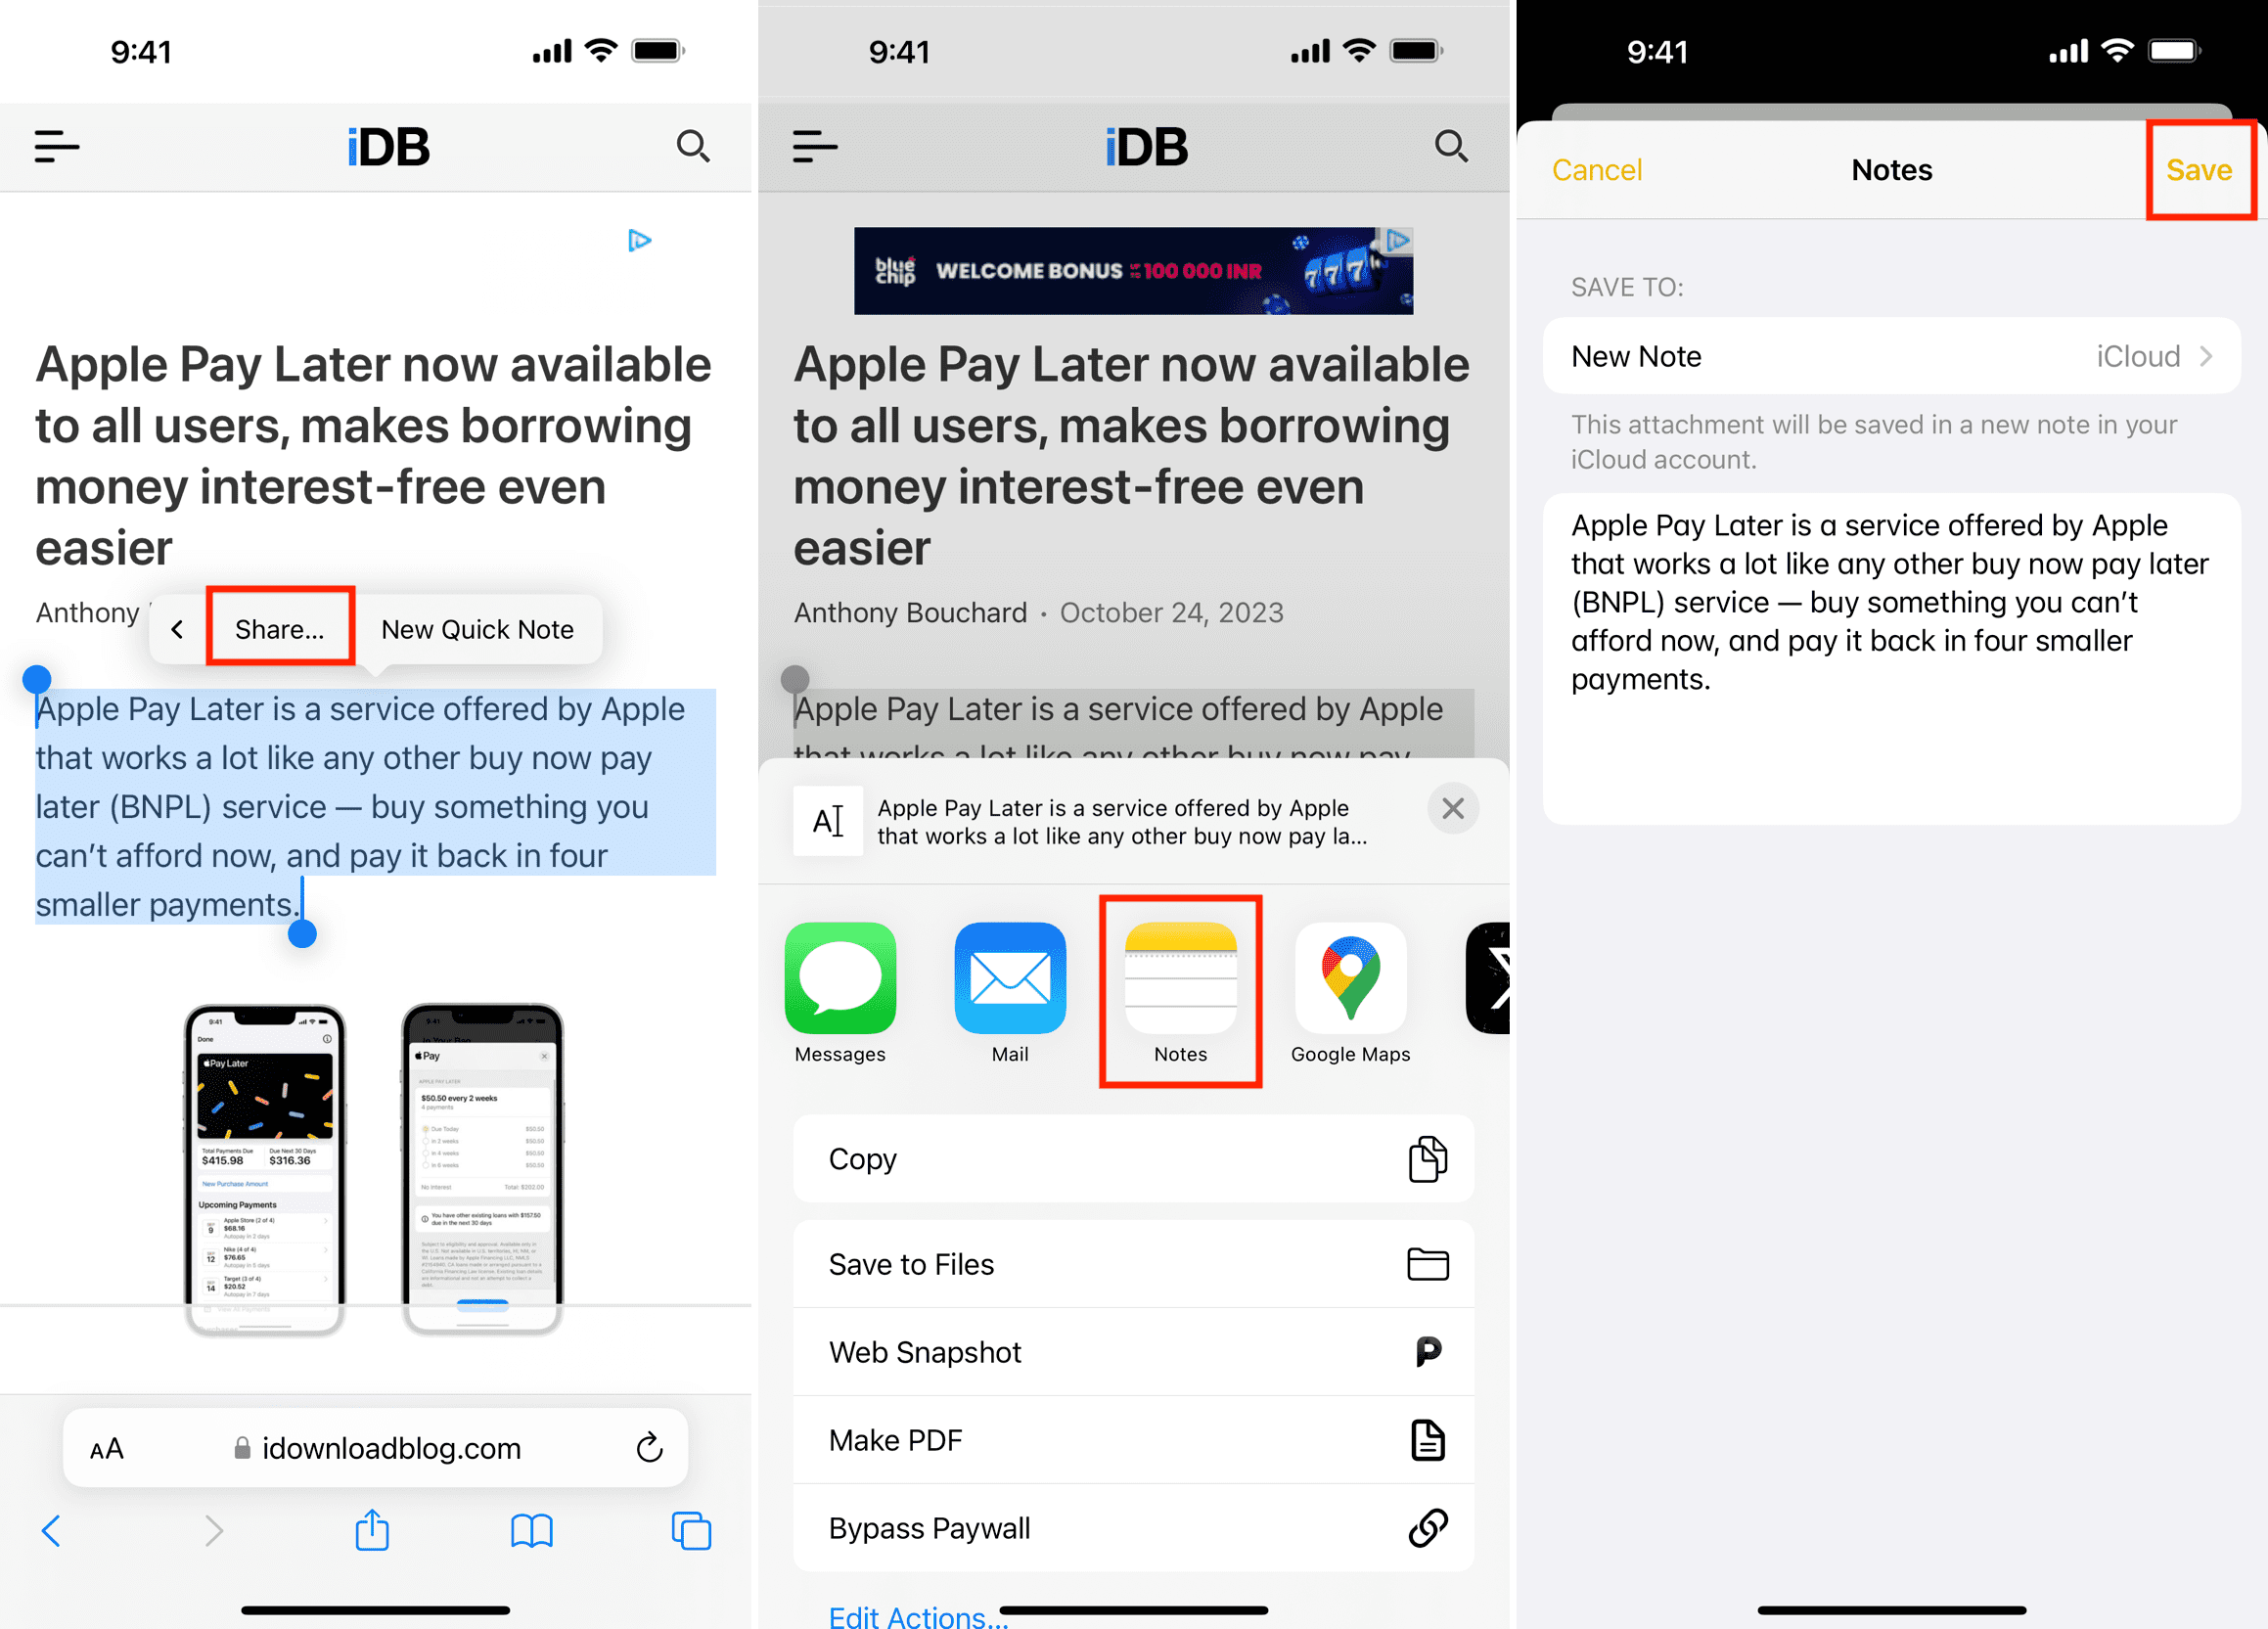
- Open Safari, visit the website, and select the text you want to add to a note.
- After selecting the text, a thin menu strip will pop out. Tap the arrow button here and then tap Share .
- Select the Notes app from the iOS Share Sheet.
- Optional : Tap New Note and choose an existing note or folder where you want to save this note.
- Finally, tap Save .
Check out next:
- How to convert an Apple Note into a Pages document on iPhone, iPad, and Mac
- How to turn Notes into Reminders on iPhone, iPad, and Mac
- How to link related notes in the Apple Notes app on iPhone, iPad, and Mac
🔥 Get our iOS 17 eBook for FREE!

How to use Quick Notes in iPad: A complete guide
Updated on:
Things to know before using Quick Notes on iPad :
- You can easily access Quick Notes on iPad by swiping from the bottom right corner.
- Quick Notes can also be invoked from Control Center.
- Press the global key (function key) + Q using the external keyboard to call Quick Note.
We never know when a random idea will pop up in our mind, and we need to be as quick as a flash to note it down. Quick Note is one of the most exciting feature of iPadOS, a nifty way to jot down something quickly without leaving the app you’re currently using. You can add handwriting, Safari highlights, etc.
It is perfect for jotting down phone numbers, a fleeting idea, a link you want to check out later, or anything else. To make the most of this feature, check out this comprehensive guide explaining how to use Quick Note on your iPad.
- What is Quick Note on iPadOS?
How to start a Quick Note on iPad
Open quick note with an external keyboard on ipad.
- How to enable Quick Notes on iPad Control Center
Save links, text, and images from Safari in Quick Note
- How to view your Quick Notes on iPad
- Move Quick Notes on iPad
Share your Quick Note on iPad
- How to delete your Quick Notes on iPad
What is Quick Note on iPadOS?
Quick Note makes the Notes app more accessible from anywhere on iPadOS. This feature can jot down something without leaving your current app. With iPadOS 16, it has received some more optimizations and improvements.
Suppose you were looking for some good book recommendations in Safari and came across some interesting recommendations. You can quickly note these recommendations by creating a Quick Note without leaving the browser.
Once created, Quick Notes can be accessed anywhere on your Apple devices and use any of the features available with the regular notes .
You can open Quick Note anytime and anywhere with a first or second-generation Apple Pencil. You can also choose any Apple Pencil alternative to use this gesture. Although Apple has said it works using your finger, it was mostly a hit-or-miss for me.
- Swipe from the bottom right corner of the iPad screen using any compatible stylus.
- A small grey box will appear.
- Keep holding your pencil until the box is fully expanded and opaque .
That’s it! Now you can write or draw in the box with your stylus. You can use the drawing at the bottom right corner to customize the pencil or use the keyboard and type. You may also see app-specific features and use them according to your choice.
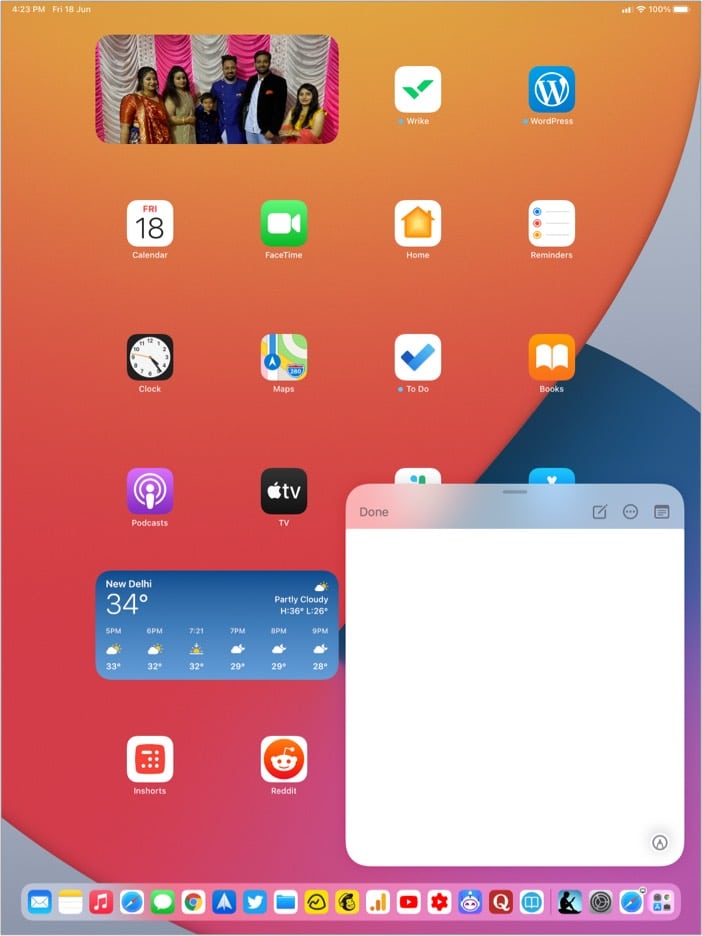
Change or turn off the corner gesture for Quick Notes
If you repeatedly invoke Quick Notes with that gesture accidentally, you can change or turn it off. Here’s how:
- Open Settings .
- Tap Notes .
- Select Corner Gesture under Quick Notes .
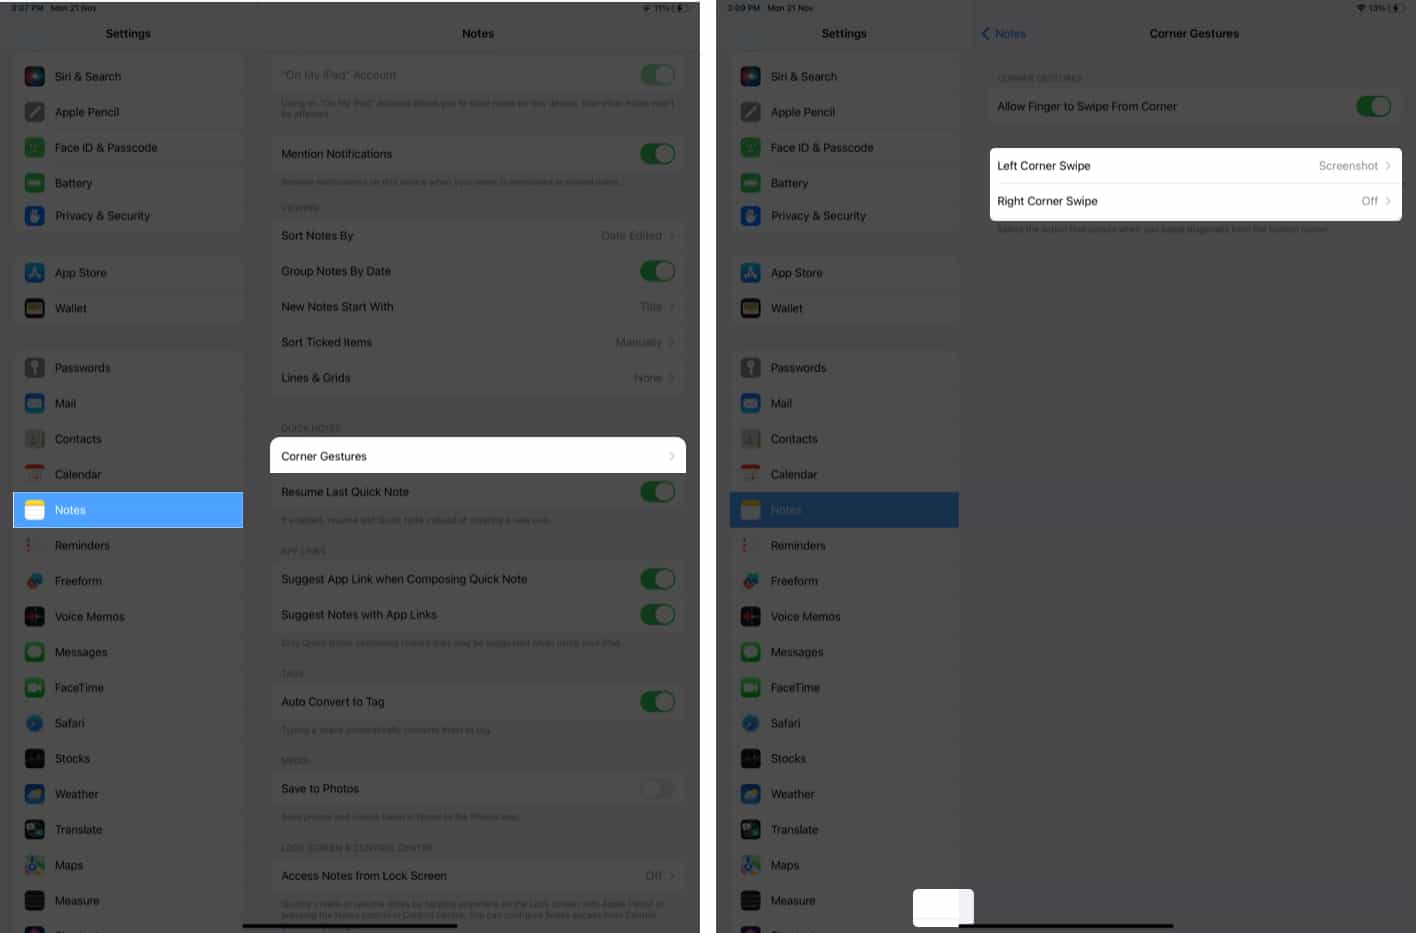
- Now, choose from Off, Quick Note, and Screenshot .
Besides a stylus, you can also use any keyboard compatible with your iPad to invoke Quick Note without touching the screen. You must press the globe key (Function key) and Q on the keyboard. And Voila! You have a Quick Note on your iPad screen.
How to enable Quick Notes from Control Center on iPad
Besides gestures and Keyboard shortcuts, you can also use the Control Center to access Quick Notes on iPad. But before that, you must ensure it’s enabled for the Control Center. Here’s how you can check that:
- Go to Settings → Control Center .
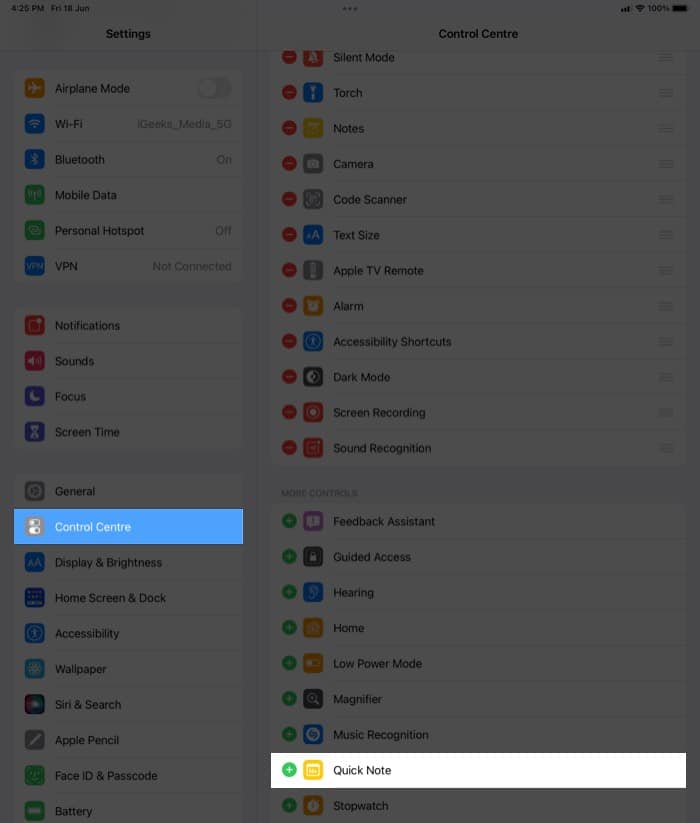
You have now successfully added Quick Note to Control Center. If you want to change its position, open Settings → Control Center under INCLUDED CONTROLS. You can touch and hold the three lines next to Quick Note and adjust them accordingly.
Now that you know how to add Quick Notes to your iPad’s Control Center, let’s look at how you can access it from there.
Access Quick Note from Control Center
- Swipe down to open the Control Center .
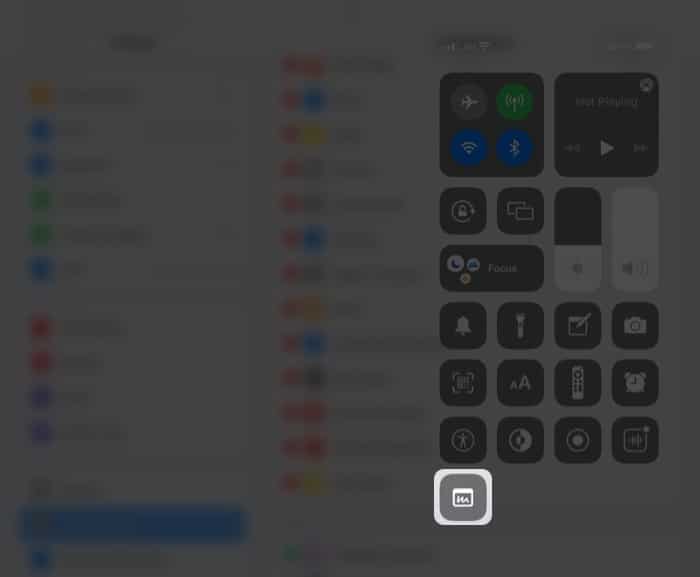
The Quick Note window will appear on your iPad’s screen, and you can go ahead with the activities you want to perform.
With Quick Notes in Safari, you can easily save links, text, and images from a webpage. Here’s how you can do it:
- Open Safari .
- Launch Quick Note .
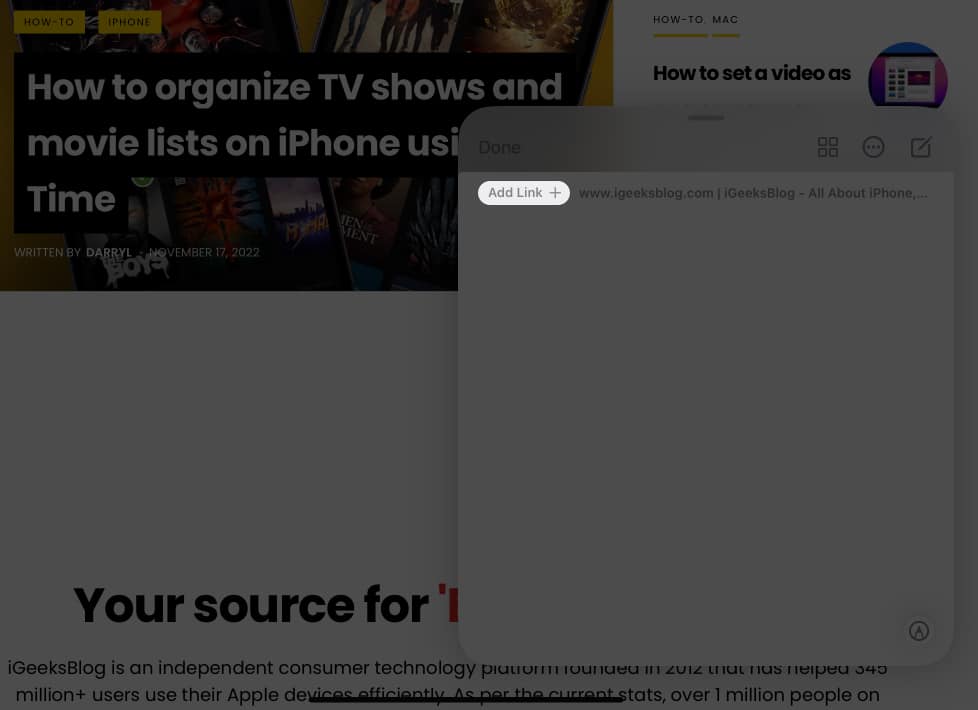
To add text or images:
- Tap and hold them with your stylus or finger.
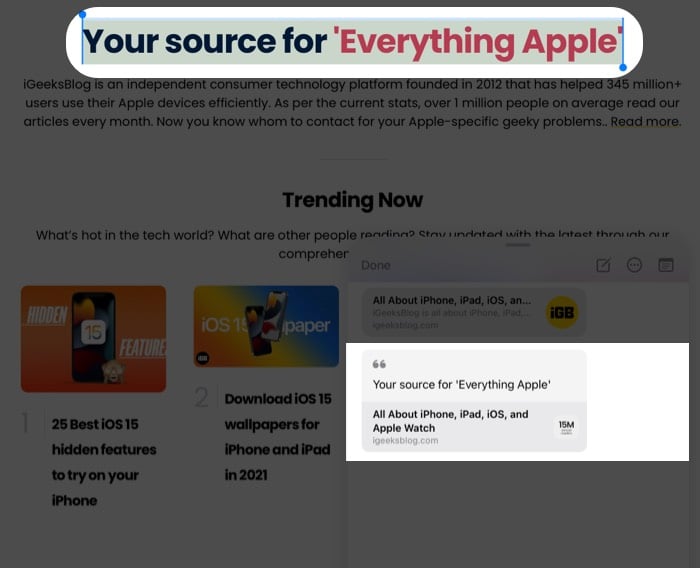
Alternatively, you can select the text, tap the arrow from the options and select New Quick Note . You can also minimize and push Quick Note to a side and continue the work accordingly.
How to view Quick Notes on iPad
- Open the Notes app.
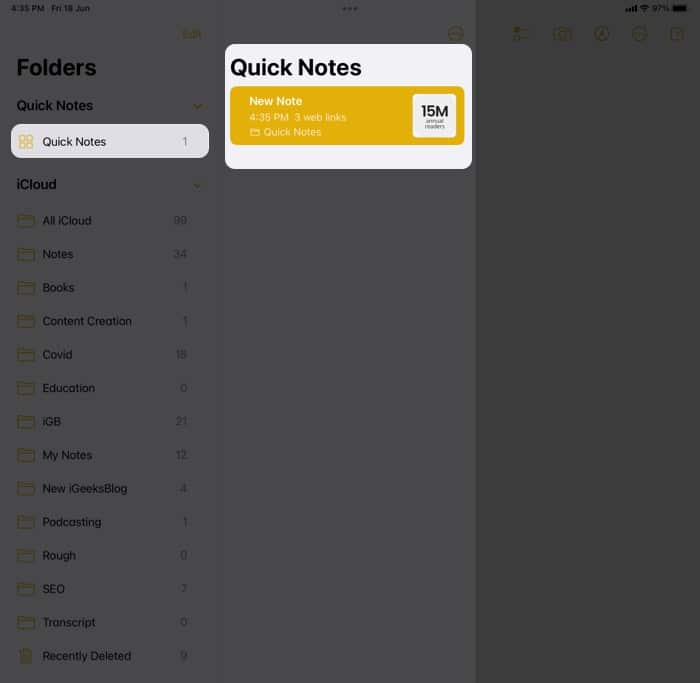
View all attachments in Quick Notes
You can also view Quick Notes based on the attachments added. Here’s how:
- Go to the Quick Notes folder.
- Tap the three dots on the top.
- Select View Attachment .
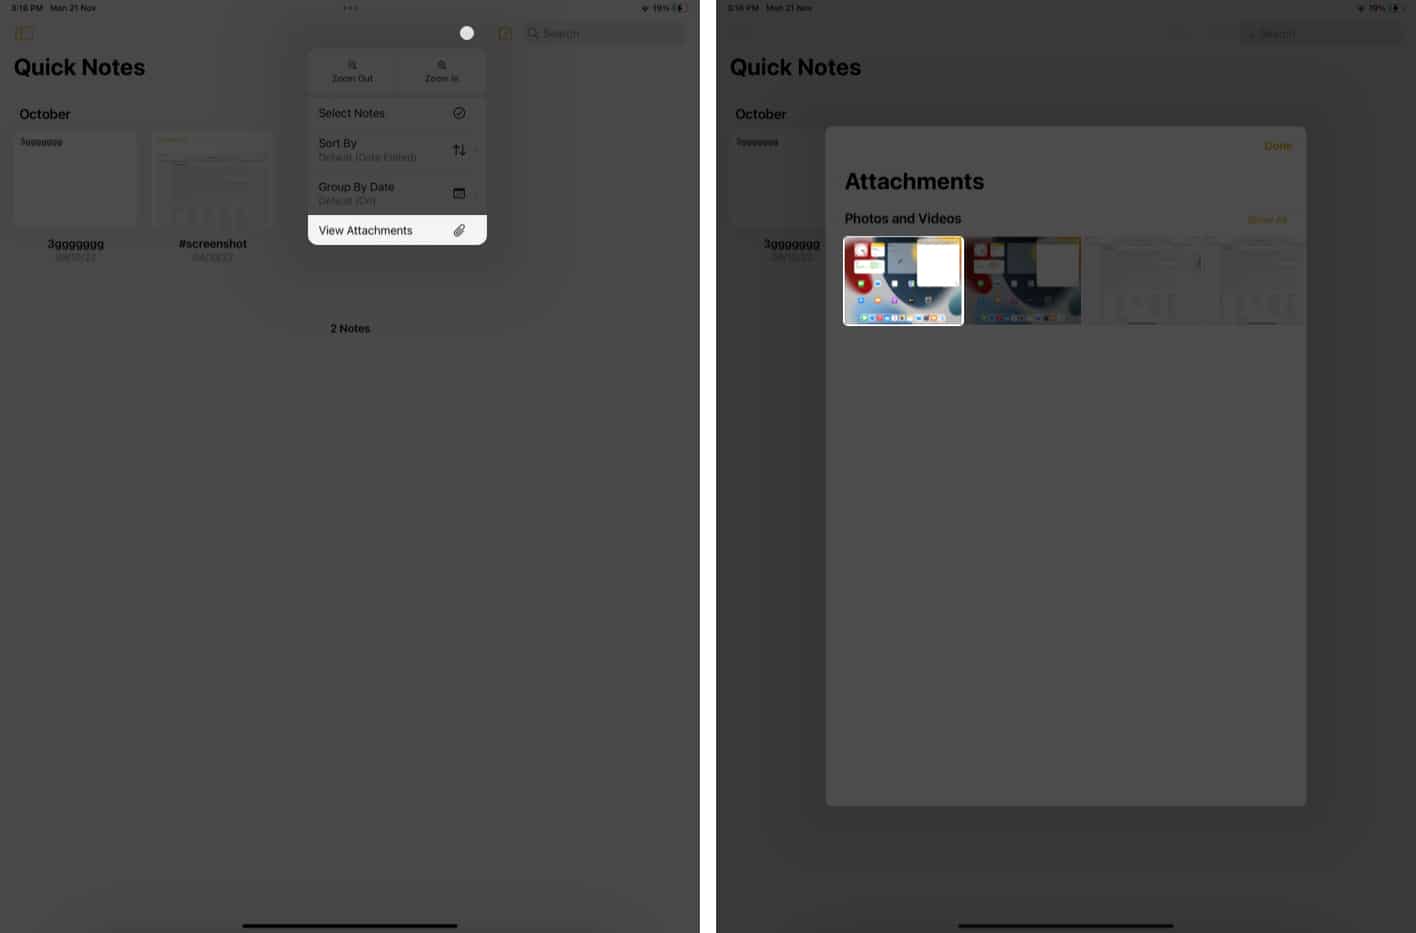
How to move Quick Notes on iPad
- Tap and hold the note you want to share.

- Choose where you want to move the note to.
Alternatively, you can open a note, tap the three dots in the top right corner, and select Move Note .
Moving a Quick Note to a different folder becomes a standard note, and it will no longer appear as a Quick Note.
- Go to the Quick Notes folder.
- Open a Quick Note to share.
- Tap the Share button.
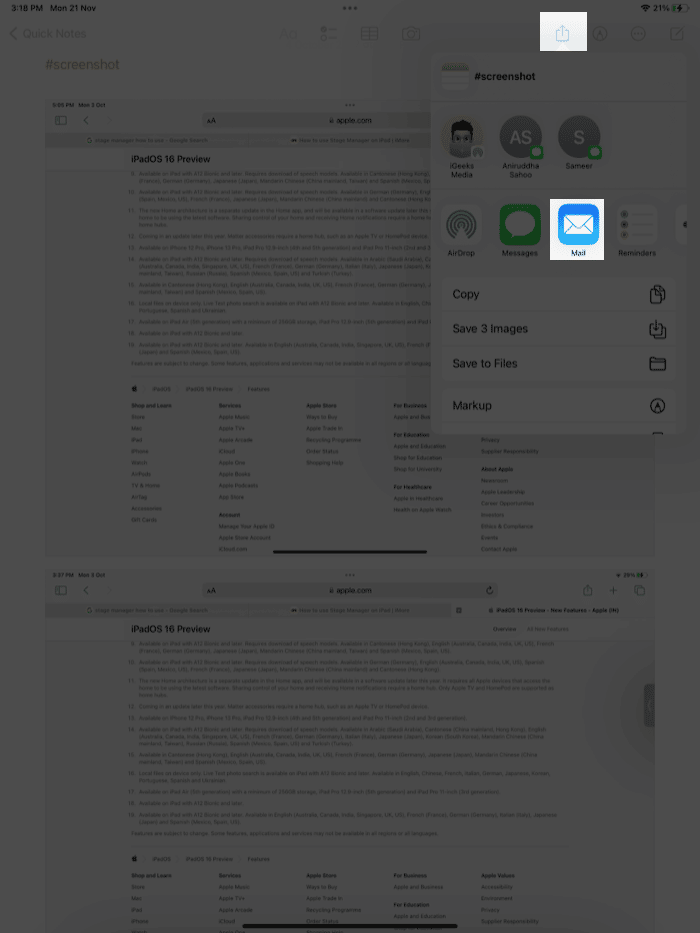
Further, when you long-press a Quick Note in the Notes app, you get all the usual options with regular notes. These include the ability to Open in New Window , Pin Note , Send a Copy , and Move the note.
How to delete Quick Notes on iPad
- Open the Quick Notes folder.
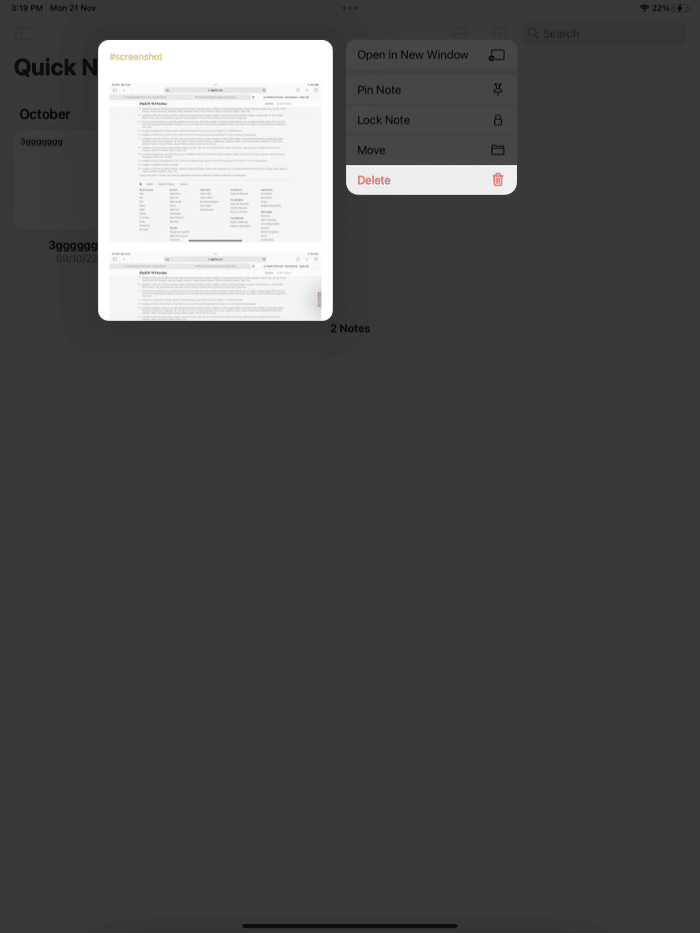
Other than that, you can open a note and tap the delete icon to delete a quick note on your iPad.
To delete multiple notes
- Tap the three dots at the top.
- Choose Select Notes .
- Select the notes you want to delete.
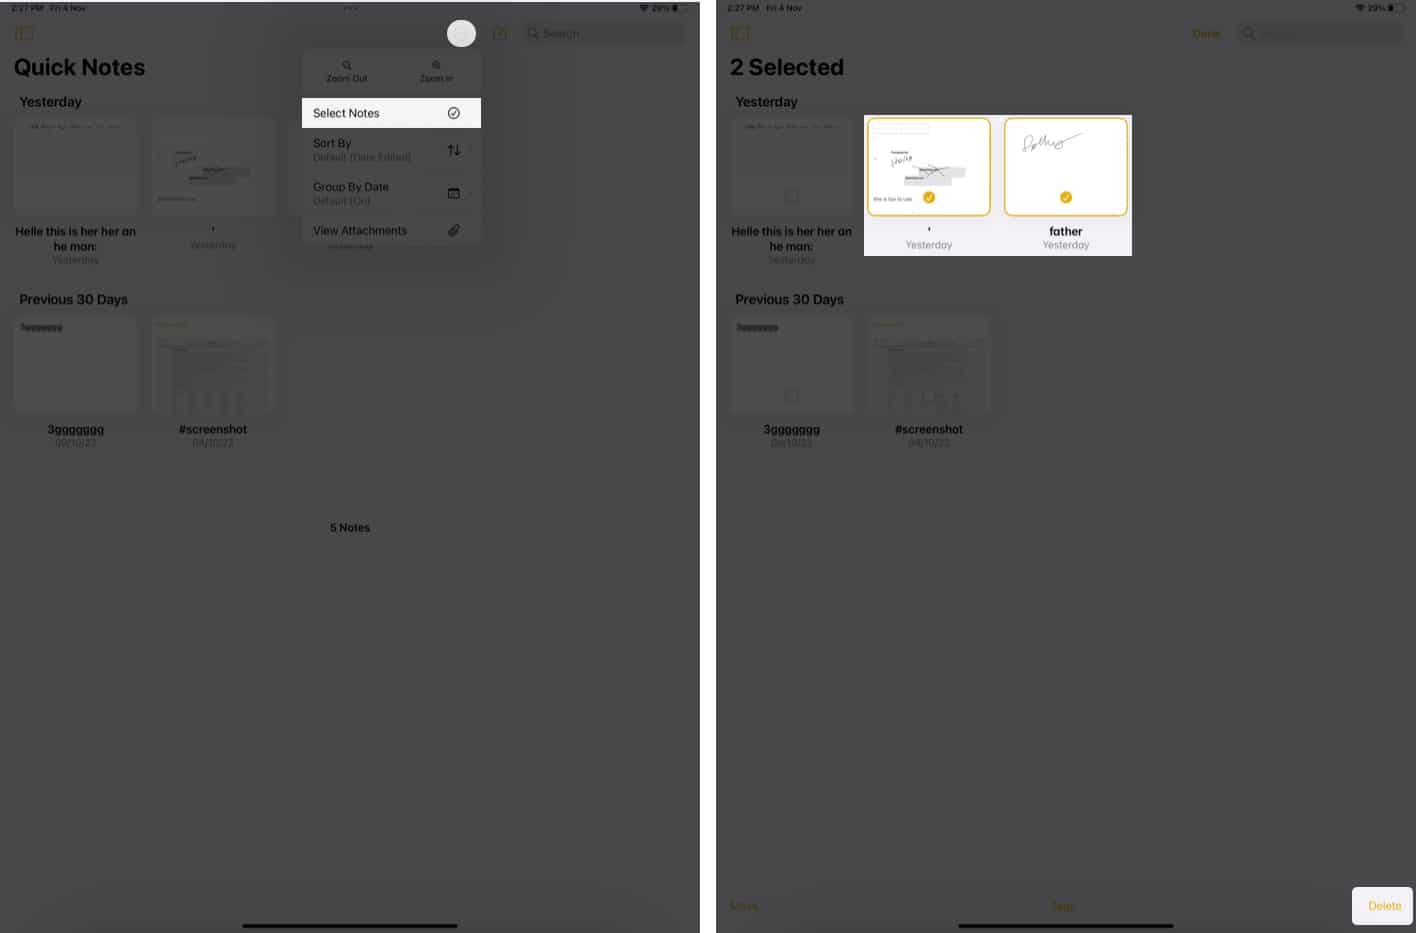
Delete Quick Notes permanently
- Go to Recently Deleted .
- Here, tap and hold the note and select Delete .
If you want to delete multiple notes:
- Tap Edit and select the notes you want to delete.
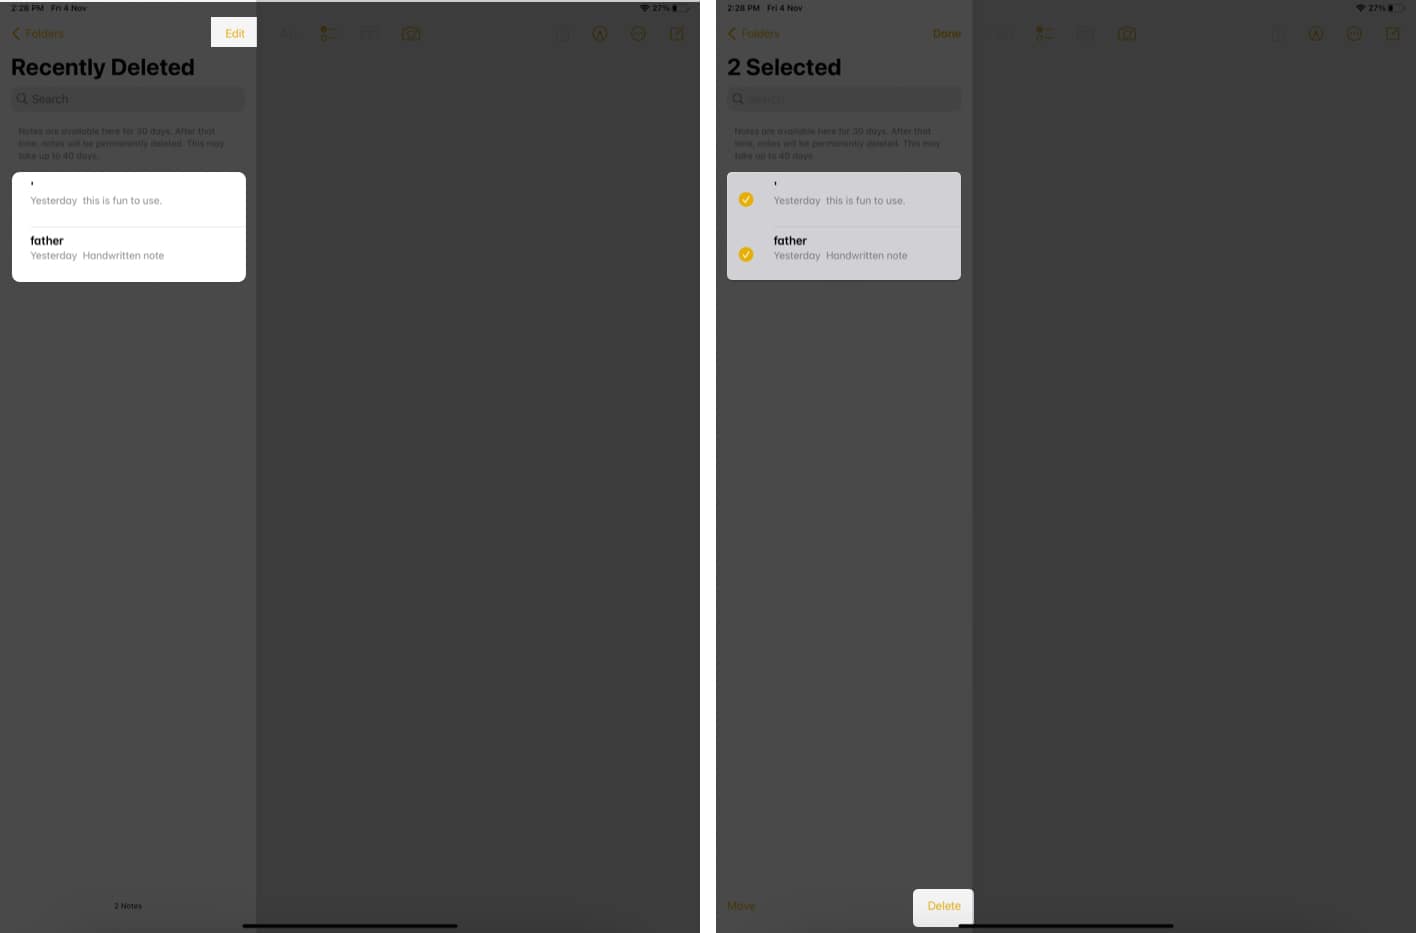
- Confirm by tapping Delete X Notes Here, X refers to the number of notes you have selected.
- If you want to revert a note, tap Move and select the place to move it.
Note : You can recover the deleted note within 30 days from the deletion date. But once it gets deleted from the Recently Deleted folder, you won’t be able to recover it.
That’s it!
Quick Note is quite a time-saving feature, especially for users who love multitasking or working on ideas. What are your thoughts about this Quick Note? Share in the comments below.
- How to use Instagram Notes on iPhone and Android
- How to find and replace text in Notes app on iPhone
Want to read more like this?
Join 15,000+ Apple enthusiast to get the latest news and tips from iGeeksBlog+.
We won’t spam, and you will always be able to unsubscribe.
Leave a Reply Cancel reply
Your email address will not be published. Required fields are marked *
Save my name, email, and website in this browser for the next time I comment.
Similar posts you might also like
How to check if iPhone is original or not (2024 guide)
What does SOS Only mean on iPhone and how to fix it?
How to summarize webpages in Safari using Apple Intelligence
Editorial Guide
Review Policy
© 2024 iGeeks Media Private LTD. All rights reserved.
Privacy Policy
13 Best Tips to Use Quick Note on iPad
At the annual Worldwide Developer Conference (WWDC) 2021 , Apple introduced iPadOS 15 to the world. It comes loaded with several cool features such as widgets on the home screen, app library, low power mode , notification summary, etc. The Notes app has also received some love. It now supports tags, activity view, and systemwide presence using the Quick Note feature. What is Quick Note in iPadOS 15 and how to use it on iPad? Find all the tips and tricks to use Quick Note on iPad in this post. Let’s get started.
What is Quick Note on iPad
iPadOS 15 makes it easy to take notes from any screen on your iPad using the Quick Note feature. Picture it as the Apple Notes app in a floating window that doesn’t occupy the entire screen. Whether you are browsing, watching a video, or reading a book, you can simultaneously jot down notes in the floating Quick Note window. You can create multiple Quick Notes or edit an existing one. The Quick Note window can moved, resized, and hidden easily.

In some apps, such as Safari, the Quick Note window is also aware of the data that can be added to it. So you will see relevant options in the floating window. For instance, in Safari, you will see an option to add a link to the Quick Note window. Tapping on it will automatically add the link of the open page to your note. Later, you can add more text, images, and other links to Quick Note.
While Quick Note works with Apple Pencil, you don’t need to have one to use it. You can use Quick Note without Apple Pencil as well.
Excited to use Quick Note? Let’s check how to get the most out of Quick Note on iPad. In case you are interested, know how to install iPadOS 15 Developer beta without a developer account so you can test drive these features now.
Tips to Use Quick Note on iPad
1. how to open quick note on ipad with apple pencil or keyboard.
Swipe up (inward) from the bottom-right corner of your iPad using an Apple Pencil to bring up the Quick Note window. Earlier, if you swiped up from the bottom-right corner of your iPad, it would take a screenshot. That functionally has now moved to left swipe. You can disable both these gestures by going to Settings > Apple Pencil . Disable the required setting under the Right or Left corner swipe.
If you own an external keyboard, press the globe key and Q button to bring in the Quick Notes window.
2. How to Open Quick Note Without Apple Pencil
There are two ways to create a Quick Note without an Apple Pencil.
Firstly, open any supported app that lets you create a Quick Note such as Safari. Touch and hold the text that you want to add to Quick Notes. When the context menu appears, tap on New Quick Note . That will open the floating Quick Note window and it will automatically add the selected text to it.
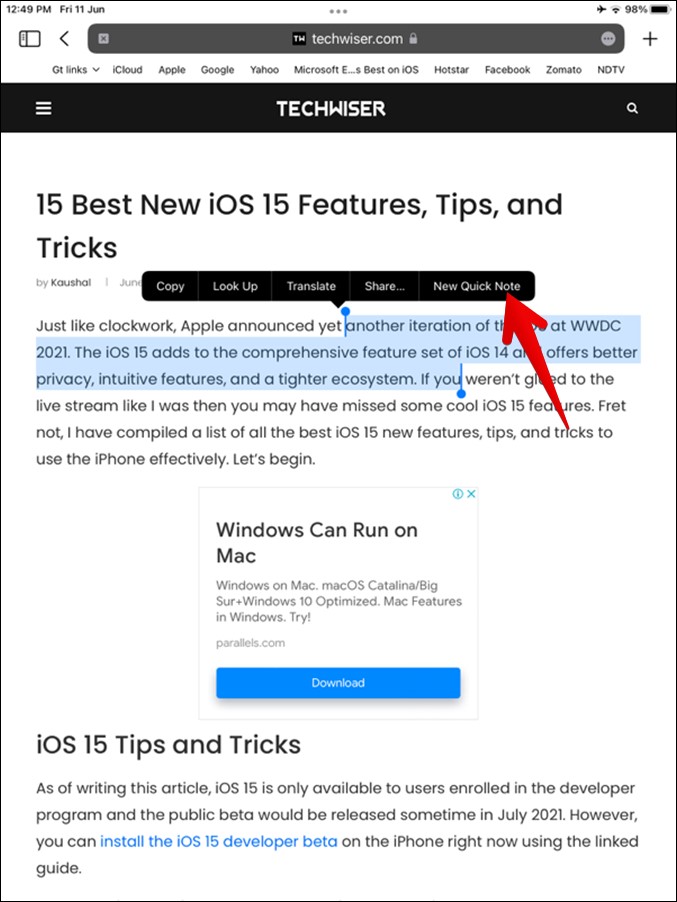
To add more data to the same Quick Note, do not close it. You can minimize it as shown below. Now when you select any other text, you will see the Add to Quick Note option instead of New Quick Note. If you want to add notes from other apps, just keep the Quick Note window open (or minimized) and you can access it from other apps as well.
Alternatively, you can add Quick Note in Control Center as well. By doing so, you can create and access Quick Notes from any app. To add it to Control Center, go to Settings > Control Center . Look for Quick Note under More controls. Tap on the add ( + ) icon next to Quick Note .
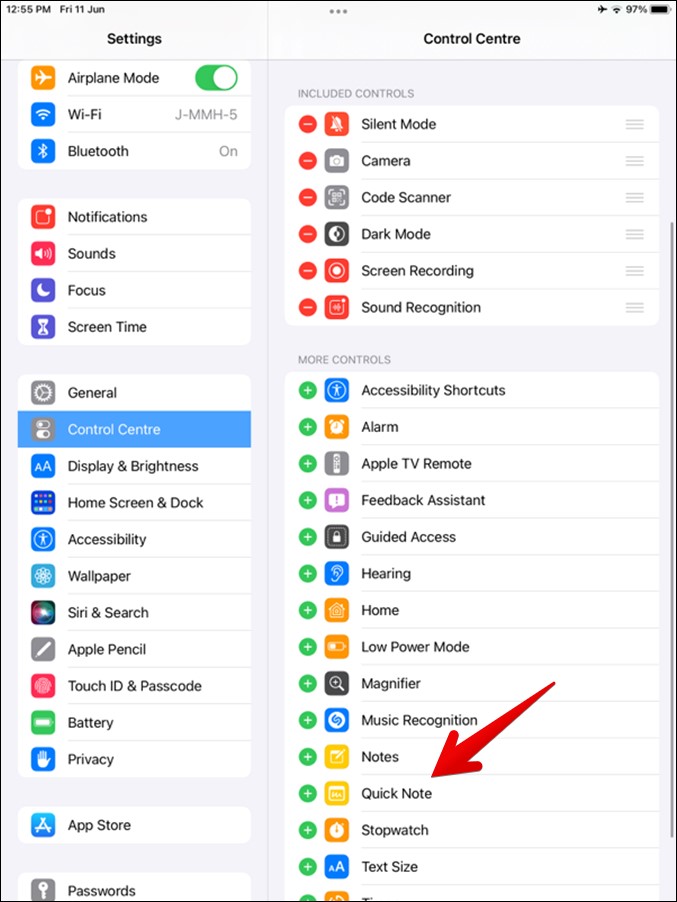
Now open Control Center on your iPad. You will find the Quick Note control over there. Tap on it whenever you want to open the floating Quick Note window.
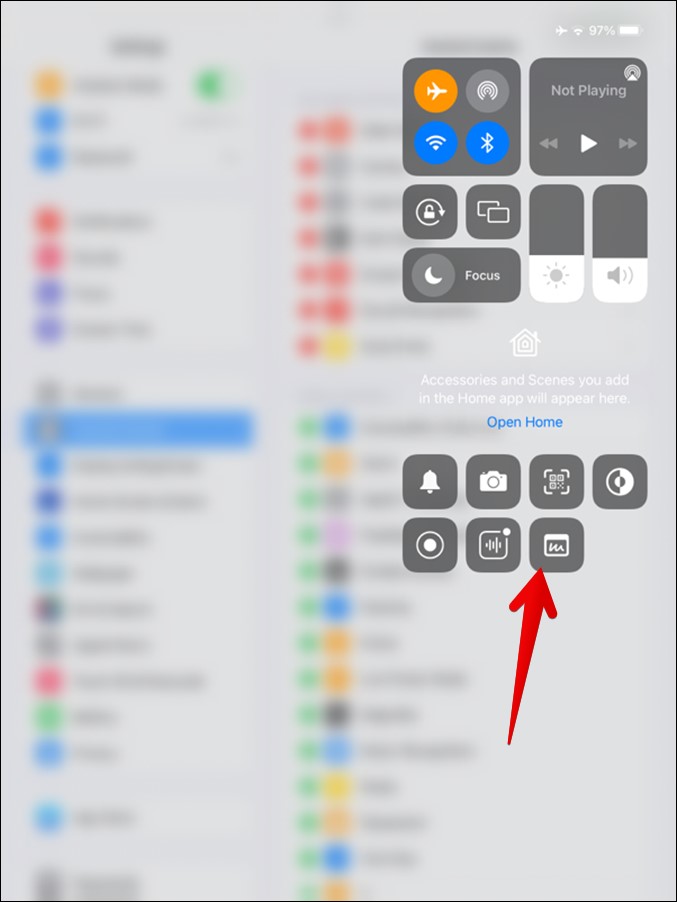
3. How to Minimize and Hide Quick Note
Swipe the Quick Note window either to the left or right edge using the floating window’s top bar. That will minimize the window to the edge.
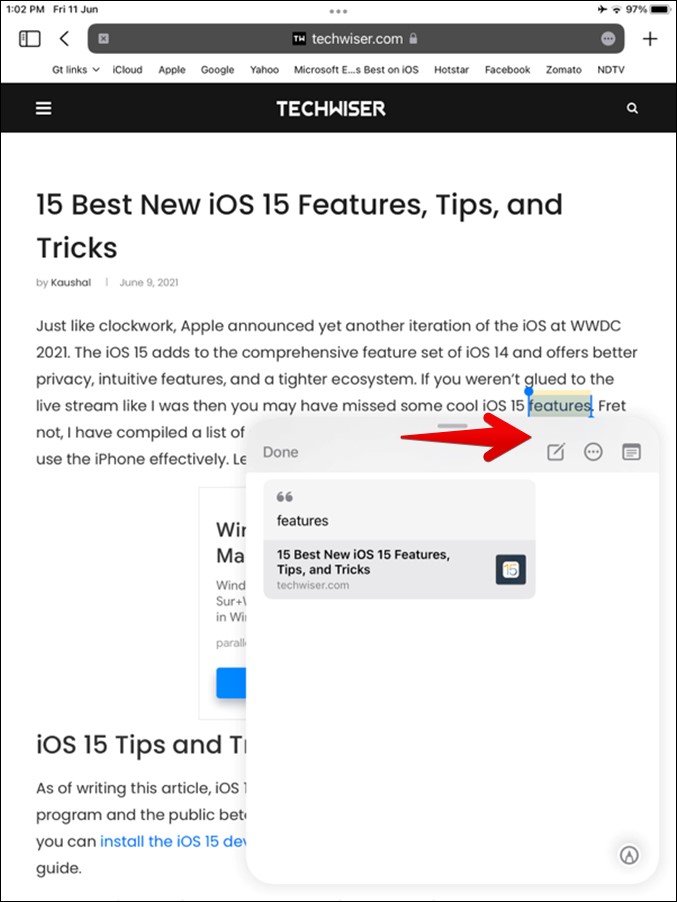
You will see the minimized panel on the edge. Tap on it or drag it inwards to open the Quick Note window again either from the same app or a different app.
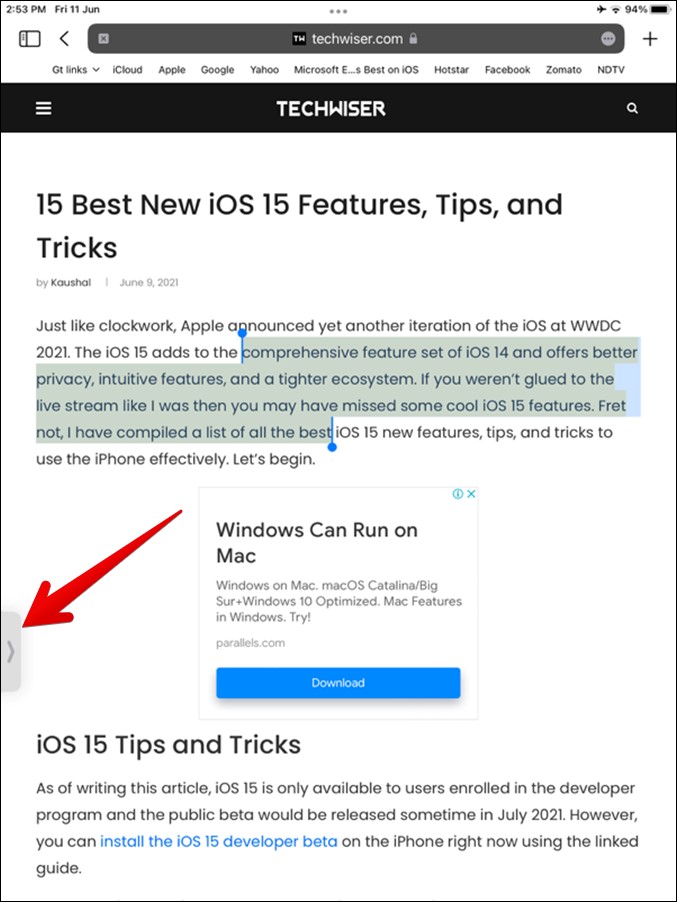
4. How to Close and Save Quick Note
To save a Quick Note, tap on the Done button at the top-left corner of the floating window. Alternatively, swipe down from the window’s top edge to close the window and save the note.

5. Resize Quick Note Window
You can increase and decrease the size of the Quick Note window using gestures. Use the pinch-in and out gesture with your fingers to change the size of floating window.
6. Move Quick Note
You can also change the position of the floating window. For that, drag the floating window using the top bar.

7. Create New Quick Note From Floating Window
Typically, when the Quick Note window is minimized, new notes will be added to the already open Quick Note. You can, however, create a new Quick Note if you want to. For that, tap on the New note icon in the Quick Note window.

8. Switch Between Quick Notes
When you are taking notes using the Quick Note window, you might want to add something to an existing Quick Note. You don’t need to open the Apple Notes app to view your Quick Notes. Simply, swipe right repeatedly anywhere on the floating Quick Note window to view and switch between your existing Quick Notes.
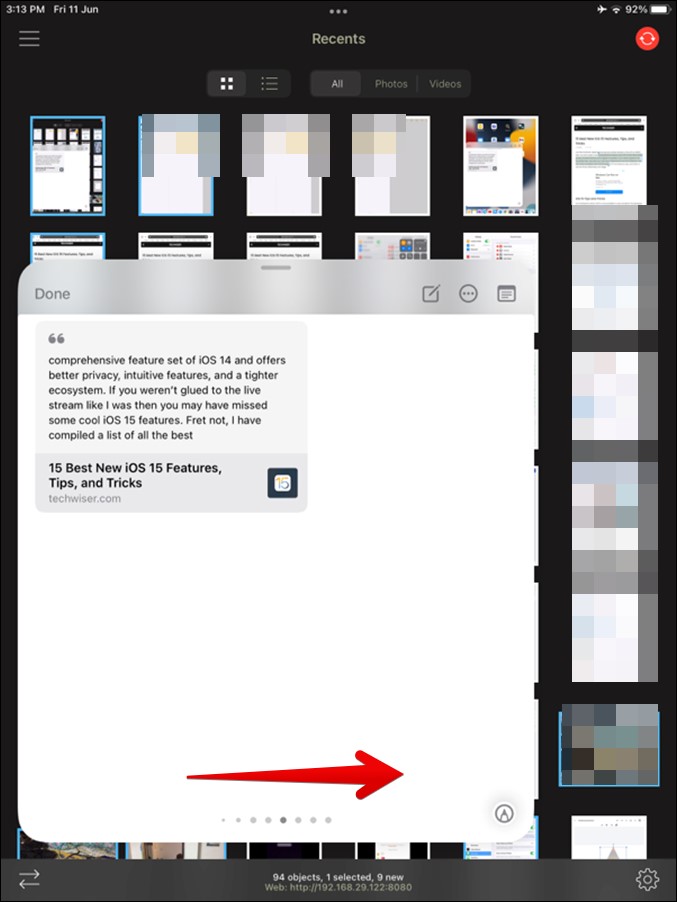
9. Drag and Drop Text, Links, and Images to Quick Notes
One of the best iPadOS 15 and iOS 15 features happens to be the ability to drag and drop data between apps. The same feature can be used to add images, text, and links to Quick Notes too. Let’s say you want to add a tweet to Quick Note. First, open the Quick Note window. Then touch and hold the text. Drag it slightly upwards or downwards. You will see that the selected text appears to be floating. Move it into the Quick Note window. Boom! The same steps can be used for images as well.

10. Draw on Quick Note Without Apple Pencil
While you can easily draw with an Apple Pencil on Quick Note, what about people who don’t have an Apple Pencil? Well, to draw or write on Quick Note using your fingers, tap on the Pencil icon at the bottom of the floating Quick Note window. There are also plenty of handwriting apps for both iPhone and iPad on the App Store too.

11. How to Use Quick Note in Safari
If a Quick Note window is open while you are browsing a web page via Safari browser , you will notice that the Quick Note automatically suggests adding the link. Tapping on the Add Link option will add the link of the current page to the Quick Notes.

Apart from that, you can manually highlight the text and add it to Quick Note using the Add to Quick Note feature. Doing so will add the selected text and the page’s link.
Interestingly, when you create a Quick Note from Safari browser by selecting text on a page, the browser remembers the selected text and keeps it highlighted even if you close and open the tab. Similarly, when you tap on the selected text’s link in Quick Note to open it, it will take you to the exact paragraph on the webpage.
12. How to Share, Delete, and Expand Quick Notes
Apart from the new note button in the floating Quick Note window, you will see two other icons. The three-dot icon lets you Share or Delete the current Quick Note. You can delete the notes from the Apple Notes app as well. Tapping on the last icon will open the Quick Note in the Apple Notes app.

13. Where to Find All Quick Notes
All your Quick Notes are saved in their own folder in the Apple Notes app. To view all your previous Quick Notes, open the Apple Notes app and swipe right from the left edge to open the notes list. Tap on Folders at the top.
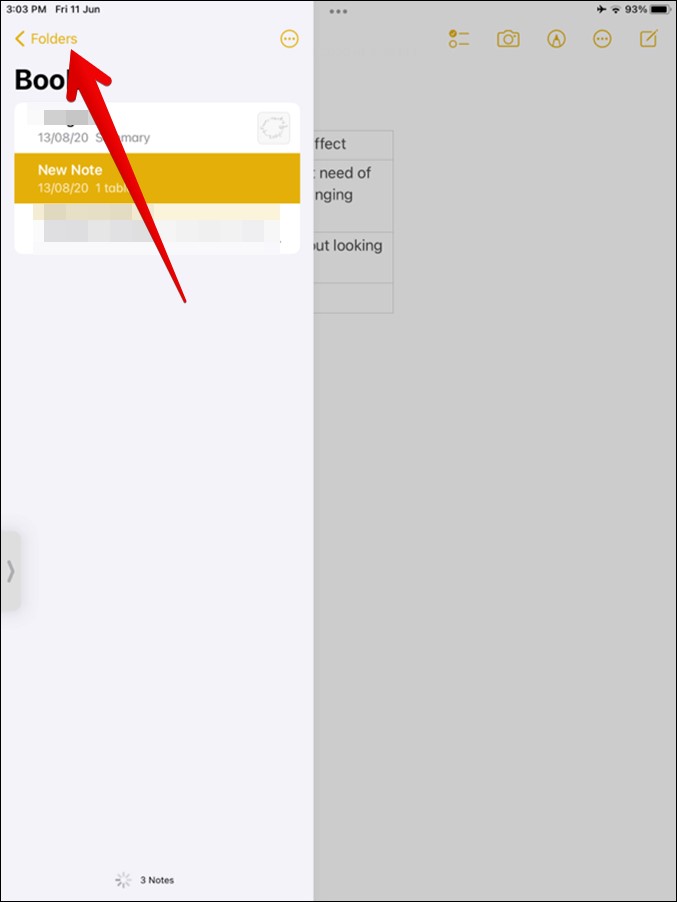
Then tap on Quick Notes folder. You will find all your Quick Notes over there. You can move, edit, or delete your notes just as you would do for regular notes.

Wrap up: Quick Notes Tips and Tricks
The Apple Notes app in iPadOS 15 has extinguished other notes app with new features such as tags and Quick Notes. However, if you are still not satisfied with the Apple Notes on iPad, there are plenty of other note-taking apps for iPad available on the App Store.

Mehvish Mushtaq is a tech lover from Kashmir. With a degree in computer engineering, she's always been happy to help anyone who finds technology challenging. She's been writing about technology for over six years, and her favorite topics include how-to guides, explainers, tips and tricks for Android, iOS/iPadOS, Windows, social media, and web apps. You can also find her work on Make Tech Easier , Guiding Tech , and Nerds Chalk
You may also like
How to get apple ai features on older..., 5 features i want apple to ship in..., how to use iphone’s clean up feature on..., how to stop ios 18 icons from turning..., how to remove or replace camera button from..., 5 pixel 9 ai features i want on..., you can use the apple pencil as a..., how to remove frequently used emojis on iphone..., 7 apple intelligence features everyone needs to use, you can delete verification codes after use automatically....
Safari User Guide
- Get started
- Go to a website
- Bookmark webpages to revisit
- See your favorite websites
- Use tabs for webpages
- Import bookmarks and passwords
- Pay with Apple Pay
- Autofill credit card info
- View links from friends
- Keep a Reading List
- Hide ads when reading
- Translate a webpage
- Download items from the web
- Add passes to Wallet
- Save part or all of a webpage
- Print or create a PDF of a webpage
- Interact with text in a picture
- Change your homepage
- Customize a start page
- Create a profile
- Block pop-ups
- Make Safari your default web browser
- Hide your email address
- Manage cookies
- Clear your browsing history
- Browse privately
- Prevent cross-site tracking
- See who tried to track you
- Change Safari settings
- Keyboard and other shortcuts
Take notes about a webpage in Safari on Mac
When you’re reading a webpage in Safari, you can jot down ideas about the webpage, copy text from the webpage, and paste the webpage address in a Quick Note, without ever leaving Safari.
Open Safari for me
Jot down ideas about a webpage in a note
Press the Fn and Q keys.
Enter text in the Quick Note that appears.
Copy text from a webpage to a note
Select text.
Control-click the text, then choose Add to Quick Note.
A link to the webpage appears in the Quick Note, and the text in Safari is highlighted. When you revisit the website, your highlight is still there, and a thumbnail of the Quick Note appears in the lower-right corner of the screen.
Paste a webpage address in a note
You can edit Quick Notes just like other notes. To reopen a Quick Note, move the pointer to the hot corner for Quick Note (by default, the lower-right corner of the screen), then click the note that appears. See Use hot corners .
You can find your Quick Notes in the Quick Notes folder in the Notes app.
JavaScript seems to be disabled in your browser. For the best experience on our site, be sure to turn on Javascript in your browser.
All orders placed 9/1-9/3 will be shipped on 9/4 due to the Labor Day holiday
LAMY safari note+: Now Available
Meet the most revolutionary member of our LAMY safari family yet: The new LAMY safari note+
What makes it so special? We’ve extended the tried-and-true LAMY safari features to write beyond paper … and beyond what you’ve imagined possible.
➕ compatible with Apple tablets* ➕ ergonomic grip ➕ soft, precise tip for nearly inaudible writing ➕ battery life up to 10 hours – and fully recharges in 1 (while you write!)
*as of iOS 12.2

LAMY safari note+

MADE IN GERMANY
We are a family business based in Heidelberg and are one of the leading German manufacturers of writing instruments.

Following the Bauhaus principle "form follows function", design for us is a holistic attitude that goes beyond mere product design.

From technology to materials to production, our high quality standards run through the entire value chain.

THINKING TOOLS
Our tools for writing, drawing and painting help to create new forms of expression and make thoughts tangible.

IMAGES
VIDEO
COMMENTS
Freebies. User guides. Complete: Apple Notes Beginner's User Guide (iPad) Apple Notes is a free handwriting note-taking app that is excellent for quick and rough notes. Apple has improved it so much over the years that now it is suitable for serious note-taking. If you want to get more done with Apple Notes, then this is the perfect user ...
In a note, touch and hold blank space. Let go to bring up the options menu. Swipe or tap the Forward button to find Add Link, then tap Add Link. Enter the title of the note that you want to link to and select it from the list. Turn Use Note Title as Name on or off. Enter different link text if needed.
Notebook. Notebook by Zoho Corporation offers an awesome Safari extension to go with its app. With the click of a button, you can capture a screenshot of the page, create a link card (note), or simply jot down your own note. You can also upload an image if you're on your blog or social page. Click View Your Notes and the app window will open ...
Safari. Browse the web; Search for websites; Customize your Safari settings; Change the layout; Use Safari profiles; Use Tab Groups. ... Get started with Notes on iPad. Use the Notes app to quickly capture your thoughts. You can add images and sketches, make checklists, or even scan documents. And with iCloud, your notes stay up to date on all ...
Bring up Quick Note using the methods above. Launch Safari on your iPad. While on a webpage, in the Quick Note, tap Add Link to save the link of the current page to your note. If you want to add text or images to the note, use your stylus or finger to highlight what you want on the webpage. On the contextual menu that pops up, tap Add to Quick ...
The Notes app on iPhone and iPad can do so much more than just text, too. In fact, you can add photos, videos, document scans, and sketches in a single note. Additionally, you can also add other attachments like web links, Maps locations, and even snippets of text from mobile Safari or your web browser of choice to Notes. With the ability to ...
Here is how you can save items from Safari into Quick Notes: Open Safari on your iPad. Swipe to activate Quick Notes. Tap the Add Link+ button in Quick Notes if you want to add a webpage. If you want to add text or images, highlight them on the webpage. Tap the Add to Quick Note button that appears from the pop-up menu.
Introduced with iPadOS 15, Quick Note provides iPad users with a convenient way to capture notes from any screen or open app. Jot your note, add the links you visit, and access your iPad Quick Notes on iPhone and Mac.. Create a Quick Note on iPad Apple gives you a few simple ways to create a Quick Note on iPad. Use your finger or Apple Pencil to swipe up and in from the bottom-right corner of ...
Note taking on iPad gets even better with new features that make it easier to capture and organize thoughts. Notes goes systemwide with Quick Note, a fast and easy way to take notes anywhere across the system. ... Safari on iPad also now supports web extensions, available from the App Store. Safari reimagines the browsing experience with a new ...
Notes goes systemwide with Quick Note, a fast way to take notes anywhere across iPadOS. Whether browsing in Safari or searching for a restaurant on Yelp, users can bring up Quick Note to jot down a thought and save links, providing an easy way to get back to exactly what they were viewing. Notes also offers new ways to organize and collaborate.
Step 3: Use an Apple Pencil. Pair your Apple Pencil with the iPad for a smooth writing experience. The Apple Pencil is a game-changer for digital note-taking. It offers precision and feels just like writing on paper. Make sure it's fully charged and paired with your iPad to make the most of your note-taking sessions.
On Mac. Select the text on the Safari web page and right-click. Choose Share and select the Notes app. You will see the actual selected text in the small window. It will be saved as a new note, but you can click the Choose Note option and add it to an existing note. Finally, click Save.
The Quick Note window will appear on your iPad's screen, and you can go ahead with the activities you want to perform. Save links, text, and images from Safari in Quick Note. With Quick Notes in Safari, you can easily save links, text, and images from a webpage. Here's how you can do it: Open Safari. Launch Quick Note.
Firstly, open any supported app that lets you create a Quick Note such as Safari. Touch and hold the text that you want to add to Quick Notes. When the context menu appears, tap on New Quick Note. That will open the floating Quick Note window and it will automatically add the selected text to it.
Open System Preferences: Click on the Apple logo in the top-left corner of the screen. Choose "System Preferences" from the drop-down menu. Go to Keyboard : Click on "Keyboard". Navigate ...
So, here's how the process works: You find an article in Safari, and you want to save the article content to Apple Notes. You tap the share icon in Safari and select Share Article to Bear. Bear ...
For example, you can drag text from Safari into a note, an image from Photos into a an email, or a calendar event into a text message. Use Split View or Slide Over to open the two apps that you want to move information between. ... On an iPad Pro with Face ID, iPad Pro 11-inch, or iPad Pro 12.9-inch (3rd generation), swipe along the bottom edge ...
When you highlight text in Safari or add a link from an app, you see a Quick Note thumbnail next time you visit the site, taking you right to what you were viewing before. You can access all your Quick Notes in the Notes app . And when you make a Quick Note on your iPad, you can see the note on your iPhone and Mac, too.
Bring the Lamy Safari to your iPad in place of your Apple Pencil! Iconic, distinctive design, perfect ergonomics and the highest quality make the LAMY Safari Note+ a real writing instrument for the digital world - suitable for everyone in the Apple Ecosystem. ... A writing experience that goes beyond simple notes - precise, responsive and ...
Many iPad users complained about the Quick Notes gesture location on the latest iPadOS version. When you swipe up to the Home screen or on Safari, a Quick Note often pops up on the screen. The new gesture location is really annoying and users are looking for ways to disable this feature.
Copy text from a webpage to a note. In the Safari app on your Mac, go to the webpage. Select text. Control-click the text, then choose Add to Quick Note. A link to the webpage appears in the Quick Note, and the text in Safari is highlighted. When you revisit the website, your highlight is still there, and a thumbnail of the Quick Note appears ...
We've extended the tried-and-true LAMY safari features to write beyond paper … and beyond what you've imagined possible. compatible with Apple tablets*. ergonomic grip. soft, precise tip for nearly inaudible writing. battery life up to 10 hours - and fully recharges in 1 (while you write!) *as of iOS 12.2. New.