
How to Hike The Tour Du Mont Blanc In 7 Days: Fastpacking Guide
By: Author Robyn Robledo
Posted on Last updated: April 7, 2024

The Tour du Mont Blanc is honestly one of the most incredible hikes we’ve ever experienced.
That’s saying something since we’ve done some incredible hikes in Alaska, the Rockies, the Cascades, Glacier National Park, Yosemite, New Zealand, and Hawaii, just to name a few.
What makes this experience so unique and incredible in comparison to other hikes around the world is the combination of easy access to refugees, going in and out of towns and cities, and the stunning beauty of all the snow-capped mountains and glaciers.
When I first started planning the Tour du Mont Blanc, it was overwhelming, to say the least, and it was hard to find the right information to help me plan my itinerary, especially when it came to camping. In our blog, Planning a Tour du Mont Blanc, I’ve included everything you need to know about getting to Mont Blanc, how long it is, how many stages, safety, and so much more.
If you don’t know much about the Tour du Mont Blanc, it might help to read the Planning Guide first (blog coming soon) to orient yourself and then use this to help you plan .
But, if you are just looking for some inspiration, want to find out how you can hike this incredible trail in only 7 days, or want to hear our story of how epic the Tour du Mont Blanc was then please, read on. And for pure inspiration, you’ll want to check out Our 35 Favorite Photos From The TMB.
Hiking the TMB was certainly a life changing experience for me.
For starters, it was way more strenuous than I expected, and like always, I tend to bite off more than I can chew. This meant that we ended up combining stages, which made it even more exhausting. That’s not to say I’d do it differently. I just want you to make sure you plan accordingly.
I’ve broken up my account of our hiking experience with tips and recommendations for those planning on trying to fast-track this wonderful trek.
If I skipped something or left any stone unturned or questions unanswered, please, ask us in the comments section below. I want to ensure you can have the best possible experience hiking the Tour du Mont Blanc.
I found it interesting that while hiking the Tour du Mont Blanc, so few people knew what a travel blog was. While I guess originally blogging was a means of journaling your experience along your travels, in the past few years it has turned into a highly detailed description of travel and thus I want you to know that this blog here that you’re reading is meant to help you have the best possible travel experience possible.
I’m not here to talk about my story, I’m using my story to help you have an epic Tour du Mont Blanc trip. Let’s get started!
Just a heads up , I will be using the abbreviation TMB on this blog occasionally. It’s kinda self-explanatory but TMB stands for Tour du Mont Blanc.
Also, if you don’t have time to read this whole blog (or even if you just want to save this blog for later), you can save any one of the photos on this blog to your Pinterest boards . All you got to do is click the Pin it button in the corner of each image (if you’re on a mobile device, click on the photo first then the Pin it button will appear.)
Day 1 on the Tour du Mont Blanc: Le Brévent to Refuge de la Balme
Trail stats.
- Total miles/kilometers hiked: 10 mi/6 km
- Total elevation gain: 800m/2600ft
- Total elevation loss: 1500m/4900ft
- Stages covered: Half of Stage 11, bypass Stage 1, partial Stage 2
Hiking Times + Distances
- Brévent to Refuge de Bellachat: 1 hour
- Refuge de Bellachat to Les Houches train station: 2 hours and 45 minutes
- Public Transport from Les Houches to Notre Dame de la Gorge
- Notre Dame de la Gorge to Refuge Nant Borrant: 40 minutes
- Refuge Nant Borrant to Refuge de la Balme: 50 minutes
Chamonix Mont Blanc
We chose to begin our TMB journey at the summit of Le Brévent.
Traditionally you would start and finish the TMB in Les Houches so that you get the most dramatic views of Mont Blanc for the grand finale, stage 11.
View this post on Instagram A post shared by Adventure Travel Family (@nomadswithapurpose) on Oct 3, 2019 at 5:41pm PDT
The weather forecast was predicting overcast with a chance of rain for the day we’d be finishing the TMB projected and the day we woke up to start the Tour, the weather was clear and too gorgeous to pass up. We decided to take the good weather when we could get it so we could guarantee amazing views on the iconic 11th stage.
In addition, we happened to be in Chamonix at the same time as the UTMB (the Ultra Tour Du Mont Blanc race). The race follows the very same TMB route hikers follow so it can get crowded on the trail. We were beginning our trek two days before the big race started and we wanted to get out ahead of the runners if that makes sense.

After grabbing pastries and a cafe in town, plus some snacks for the way, we walked north out of the town center to the cable car.
The price to ride the cable car to Brévent one way was €25 for adults and €20 for kids under 15.
I was a bit reluctant to pay so much and contemplated just hiking up to Brévent but was so very happy that I spent the money as it is an extremely steep ascent and would have trashed our legs for the descent from Brévent to Les Houches that we were about to do.

Taking the cable car up provides you with amazing views and it’s super easy to find the gondola from the center of Chamonix. Just follow the signs.
Taking the cable car up is a two-part ordeal. The first part is a gondola ride to Plan Praz, which is at 2000 meters. From here you get off the gondola and follow the signs with the picture of the cable car that in the winter, takes you to the black diamond runs in the resort. It’s very simple.
There is a cafe here if you want to grab a coffee while taking in the views or you can wait to get panoramic views from the smaller cafe at the summit of Le Brévent after the second cable car ride.

The cable car ride from Plan Praz to Brévent was interesting as it is a larger car that fits 30 + people standing in it and takes you all up together to Brévent at 2525 meters. It was exhilarating!
After you take in the views, which do tend to be clouded in from this high of altitude, it’s time to start the hike down to Les Houches. Remember, if you choose to do this the traditional way, this will be your final push of the tour and it is steep, so leave a little in the legs for this part.
Le Brévent to Refuge de Bellachat – Stage 11

The first section of the trail was rocky but a gradual decline. You’re above the treeline here and get incredible views of not only Mont Blanc but also the mountain ranges far in the distance.

The views at Refuge de Bellachat are some of the best on the entire tour. If it fits into your itinerary, I highly recommend staying here. It was a little too early in our day to stop and eat here, but like all the refuges along the way, it did serve coffee, drinks, and food. There are toilets here but only for paying customers.

Refuge de Bellachat to Les Houches – Stage 11
Just a bit after leaving the refuge the trail gets steep. Very steep.
There isn’t a lot of exposure so fear of heights isn’t a huge worry but the amount of single-leg squats you feel like you are doing is hard. Our legs were shaking most of the way down, which is rare for us.
Hiking sticks would probably be a good idea if you have any past knee issues. Keep in mind, that the trail remains steep pretty much the entire way down to Les Houches.

20 minutes after leaving the refuge, the trail winds into the forest and provides a nice respite from the intense sun rays. Eventually, you arrive at a fence and follow along the outskirts of it until you reach the entrance to the Zoo, Merlet.
After Merlet, we followed the yellow TMB signs left, winding down the Zoo’s access road until eventually turning left on the TMB trail about 30 min down the road again.
According to the book, when you get to the zoo, there is a road to the right that puts you on the TMB trail right away, however, we didn’t see it, and walking the road for a while was a nice break for our feet. There were also picnic tables on the road where we walked that provided a nice place to rest and eat.
The trail puts you out right at the train station and if this is the end of your trek as a traditional Stage 11, it’s super easy to hop on the train back to Chamonix. If you choose to fast back as we did, you may want to hop on the train here to skip Stage 1.
Les Houches to Les Contamines – Skipping Stage 1
Since stage 1 of the TMB, which goes from Les Houches to Les Contamines, isn’t as gorgeous as the other stages, we decided to skip it, but mostly because we wanted to get ahead of the UTMB runners who would be starting their race the next night, which meant we needed to get to Les Contamines so we could enjoy beautiful stage 3 without crazy crowds.

I don’t necessarily recommend skipping stage 1 but we did because we weren’t going to be able to take the alternate/high route.
The traditional path of Stage 1 involves a lot of road walking and didn’t seem worth it for us since doing Stage 1 would set us back a day.
Plus, there is a variant to Stage 1 that takes you up higher and closer to the glaciers but isn’t recommended early in the season or with inclement weather. There was a chance of thunderstorms that afternoon so we chose to take it easy and ride the train/bus to Contamines.
Train and Bus Passes
The Carte d’Hôte pass allows you to ride any bus or train between Servoz and Vallorcine.
We received one of these passes for free from staying at Camping Des Arroles. I’m pretty sure all of the campgrounds in Chamonix provide these, some hotels also offer them free of charge, or you can get one for 2 euros from the tourist office in Chamonix.
The train runs about every hour, click here for the full schedule. We took the train west to Saint Gervais where we then hopped on Bus 84 to Les Contamines. This bus is not included in the Carte d’Hôte pass and tickets were €5.50 per person. It was a very nice bus ride in an air-conditioned tour bus and the incredible views along the way made what little guilt I had for skipping a section of the TMB quickly disappear as I stared out the oversized windows at the rolling green French countryside.
Les Contamines
The tourist office in Les Contamines has outlets to charge your phone and free WiFi which was nice.

We also picked up food for our dinner (we weren’t eating dinner at the refuges since we were camping) at the small grocery store across from the tourist office in Les Contimines: a baguette, arugula, salami, and butter to make sandwiches for dinner as well as a yogurt and a pastries each for dessert, plus a chocolate croissant for breakfast the next morning.

There is a bigger grocery store in town and plenty of restaurants to eat at. I highly recommend the ice cream (glacée) at the bakery directly across the street from the tourist office.
Les Contamines to Notre Dame de la Gorge – Free Shuttle
We chose to skip the first 45 minutes of hiking stage 2 since it’s mostly near the road and while the scenery is pleasant, it was nice to just cut out this section of town. There is a free shuttle bus that takes you from the tourist office in Les Contamines to Notre Dame de la Gorge, a beautiful church in the middle of rolling green countryside. There is food here and the church is worth taking a peak inside of.
Notre Dame de la Gorge to Refuge de la Balme – Begin Stage 2
Leaving Notre Dame de la Gorge the trail immediately begins to climb and doesn’t let up to Refuge de la Balme, where we chose to camp that night.

It doesn’t let up until the next refuge, Refuge de la Croix du Bonhomme and if I had started earlier, not combined stages, or wasn’t camping, I would recommend staying at Refuge du Bonhomme mainly so that you don’t have to start with such an intense climb the next morning when you leave Refuge de la Balme.

We were camping though and not only was the camping free at Refuge de la Balme, but the views were some of the best and reminded me a lot of being in the Dolomites.
Eating at the Refuges
Since we were not guests at the refuges (we were tent camping, remember) we were able to order drinks at Chalet Refuge de la Balme but not dinner.

If we had needed dinner, Refuge Nant Borrant looked like you could just walk in and order but for Refuge de la Balme, we would’ve had to call ahead to request dinner since they only make enough food for the people paying half board.
According to people I asked on the trail, they said the food wasn’t very good at Refuge de la Balme anyway. Refuge Nant Borrant supposedly has incredible food but while it’s location is quaint and lovely, the views at the refuge and 2 nearby camping areas aren’t the best.

Having camped at the stunning camping area at Refuge de la Balme, we got coffee at Refuge du Balme the next morning but I do not recommend it. The coffee was horrible, and overpriced, and we had to wait until the guests were served before getting a cup of coffee which put us on the trail much later than I had hoped.
Overall Tips for Day 1
To fastback-like we did, take the cable car from Chamonix to Brévent, hike down to Les Houches, hop on the train from Les Houches to Saint Gervais, and then a bus from Saint Gervais to Les Contamines.
Total public transport costs per person are about 33 euros per person
Use the free shuttle (picks up right in front of the Tourism Office) to go from Les Contamines to Notre Dame de la Gorge.
If you time the trains and buses perfectly, it is possible to get to Refuge de la Croix du Bonhomme within a day but you’d have to hustle and if you aren’t camping, I’ve heard that Refuge de la Croix du Bonhomme is pretty bad.
Day 2: Refuge de la Balme to Refuge Elisabetta via Variante Route
- Total miles/kilometers hiked: 19.5 km/12 mi
- Total elevation gain: 1400 m/4600 ft
- Total elevation loss: 1000 m/3300 ft
- Stages covered: Stage 2 w/ Col de Fours Variant + Stage 3
- Refuge de la Balme to Col du Bonhomme: 1 hour and 30 minutes
- Col du Bonhomme to Col de la Croix: 40 minutes
- Col de la Croix to Col des Fours: 1 hour and 15 minutes,
- Col des Fours to Refuge des Mottets: 3 hours,
- Refuge des Mottets to Col de la Seigne: 1 hour and 15 minutes,
- Col de la Seigne to Refugio Elisabetta: 1 hour and 15 minutes
Refuge de la Balme to Col de la Croix – Stage 2 Ascent
We left Refuge de la Balme at 8 a.m. on the dot with a dozen or so fellow hikers on our tail which pushed our pace quite a bit. It’s a fairly steep and consistent climb from Refuge de la Balme to Col du Bonhomme and quite a shock to start your morning with such hard exertion. Little did we know that that was just going to be a warm-up for us.

From here the signs point you left and it’s another 40 minutes of easier climbing to get to the Col de la Croix. The views are nice in this section and a good warm-up for the spectacular views that are coming ahead.

Col de la Croix to Refuge des Mottets – Col de Fours Stage 2/3 Variant
When you reach Col de la Croix you are also at the Refuge de la Croix du Bonhomme. If you are contemplating staying here these are the things I’d consider.
- Sometimes it’s not safe to take the Col de Fours variante which is what I’m going to explain in a minute.
- This alternate route does provide a nice view of Mont Blanc and Aiguille des Glaciers, but there are way better views ahead in my opinion and you get to see the Aiguille des Glaciers for a long time from Mottets to Col de la Seigne.
- The descent down from Col de Fours to Refuge des Mottets is steep. Doing such a steep descent on back-to-back days destroyed Gabi’s knees and so if you go this way, don’t forget hiking sticks.
- Your odds of having clearer weather are much better earlier in the day so if you want to do this variant, then starting from Refuge de la Croix might be a smarter option.
Another thing to keep in mind is that you can skip the Col de Fours variant and hike downhill to Les Chapieux and then catch a bus from Le Chapieux to Ville des Glaciers (which is only a 30-minute hike from Mottets) or directly to Mottets parking lot. It’s cheap and runs often throughout the day in July and August.
Since the weather was so clear, we chose to skip Chapieux and took the variant which was another 30 minutes of steep climbing, but the views of Aguilles de Glaciers and Mont Blanc made it quite worth the over 2.5 hours of climbing we had just done.

The TMB guidebook and signs mention that it’s a 20-minute detour to get to the Tete Fours, a summit to the left, but it didn’t look worth it to me. We had already climbed so much and had great views from the Col de Fours.
If you were only walking to Mottets from here and it’s a clear day, then it may be worth the extra push to Tete Fours.

Now, the rough part. The descent down from Col de Fours is brutal. It’s a very steep descent that takes 2 and a half hours. You do get nice views of the glaciers which is wonderful but you spend most of the time watching where your next footstep will be.

The bottom of the descent puts you at a car park with toilets. Use them if you aren’t planning on stopping at Mottets (which would be almost a sin since the food at Mottets is so delicious) since the toilets there are only for paying customers.

Getting to Mottets requires a 30-minute climb that is fairly gradual but still quite hard, especially after the five-and-a-half hours we’d already walked that day.
Refuge des Mottets
I had in my mind that Mottets was going to be a mediocre pit stop for us and was completely wrong. It’s in a gorgeous location sitting below glaciers and waterfalls and looks down into the valley heading toward Chapieux. We stopped and had lunch here and the food was amazing.

We were under the impression from other blogs we read that you could camp at Mottets however it’s not a suitable place to make camp before sunset. The people that run the refuge probably don’t mind if you set up camp late in the day up just past the refuge out of sight from the guests BUT there is a sign that says no camping on the refuge property.
Since it was early in the day we decided to push on but doing so was definitely biting off more than we should’ve chewed as the next 4 hours of hiking is grueling.
Refuge des Mottets to Col de la Seigne – Stage 3 Ascent
Hiking from Mottets to Col de la Seigne is steep even with fresh legs, but we had already climbed up 1500 feet and down the same so this climb of over 2000 feet hurt.

When we started the weather was clear, but as it got closer to the top the storm clouds began condensing over the mountain peaks and the occasional boom of thunder kept up our tempo so that we’d get over the Col before the storm.
Luckily the clouds seemed happy to stay attached to the highest peaks and as we summited Col de la Seigne an hour and a half after leaving Mottets, we were greeted with great views of Val Veni in the distance.

Col de la Seigne to Rifugio Elisabetta – Stage 3 Descent
After capturing pictures of the views, we began another demanding descent that was not quite as steep as the one earlier that day but still significantly challenging, especially because our legs were beat up from an already long day of hiking.

Each step sent waves of pain to our knees, calves, and very tender feet and so it took us almost an hour and a half to get to Refugio Elisabetta.
I knew ahead of time that Elisabetta was located in a beautiful location but when we rounded the last corner and saw the three-story rocky exterior of the hut surrounded by two enormous glaciers with braided waterfalls running off of them, we were so awestruck I thought we were dreaming.

Italy in general doesn’t allow wild camping unless you are above 3,000 meters and you’re making camp at sunset. Of course, if you are camping on private land and have consent from the owner it is allowed.
For the entire descent from Col de la Seigne, all I had been thinking about was I hoped Elisabetta would let us camp outside their Refugio . But when I saw how beautiful the views were here at the refuge, all I could think of on the five minutes of steep climbing up the road to get to the refuge was “ Please have 3 beds for us .”
Of course, manifestation works and sure enough within 30 minutes we were showered and sitting down at a large table with wine, bruschetta, risotto, meat, veggies, potatoes, and a creamy tiramisu dessert.

What started as a gorgeous day with views under Dolomite-like spires of rock and a bad cup of coffee, turned into an athletic feat the two girls and I will forever be proud of, crossing two 2500 meter (8200 ft) cols, gaining a total of 1800 meters (5900 ft), and losing 1100 meters (3600 ft), all while experiencing culinary treats and epic views of glaciers, waterfalls, and the most textured and jagged peaks you can imagine.
As the day quickly came to an end I remember thinking, Did all that just happen? But the pain in our lower legs reminded us of our accomplishments as we hobbled to the bathroom to brush our teeth and go to bed.
Overall Tips for Day 2
Going from Refuge de la Balme to Refugio Elisabetta is hard but doable. It ended up taking us from 8 a.m. to 6 p.m. with a 30-minute rest at Col de Fours and an hour lunch at Mottets, but the rest of the time was pretty steady hiking.
If you choose to go the Chapieux side, you may want to double-check if the bus is running to cut off some time, especially since you really won’t miss much by skipping that section from Chapieux to Mottets.
Staying at either Mottets or Elisabetta is a great choice and while the food at both was incredible, if you are tight on time or Elisabetta is full, Lac Combal is 30 minutes further and is also stunning. It’s supposedly a more iconic refuge experience and some prefer it over Elisabetta since it can be really crowded at Elisabetta in peak season. Staying at Lac Combal would also put you closer to starting tomorrow’s climb.
Day 3: Refuge Elisabetta to Courmayeur/Val Ferret
- Total miles/kilometers hiked: 18km/11mi (13km/8mi if you get on the gondola at Plan Checrouit)
- Total elevation gain: 450m/1500ft
- Total elevation loss: 1600m/5200ft
- Stages covered: Stage 4
Hiking Times
- Refugio Elisabetta to Mount Favre Spur: 3 hours and 30 minutes
- Mount Favre Spur to Courmayeur: 2 hours and 50 minutes
Rifugio Elisabetta to Mount Favre Spur – Stage 4 Ascent
Day 3 started out as a glorious morning and from the refuge, you could see a line of UTMB runners coming down the hillside looking like a trail of ants. It was exciting to see and motivated us to get back on the trail (after 3 shots of espresso of course).

Staying at Elisabetta was comfortable with fluffy down comforters, good strong coffee, and a light breakfast of bread, cookies, and jams.
We left the Refugio feeling rested and ready for an easy day of hiking, or so we thought.

As you leave Elisabetta, prepare yourself for the most stunning section of the Tour du Mont Blanc
While the entire Tour du Mont Blanc is stunning, especially on stages 10 and 11, I find the Italian side from Rifugio Elisabetta to Rifugio Elena to be the most unique and spectacular section of hiking I’ve ever experienced.

The road from Elisabetta winds down for 25 minutes or so to a valley where our path then merges with the UTMB. It stayed flat for another 25 minutes before arriving at a fork. (Also, this is where Lac Combal Refugio is if you need a place to stay).

Now, normally the alternate route is the high route however, in this case, the classic TMB route takes the high road whereas the “alternate” stays left in the river valley.
If you go left/straight and opt for the bad weather route, you have the option to hop on a bus in La Visaille an hour of hiking later. This bus can pick you up and take you to Courmayeur.
The traditional route, however, goes right up a narrow trail and here you will get some of the best views of your life.

We chose to go right and I highly recommend you do too unless the weather is bad and in that case, take the low road.
Today was the day that the UTMB runners had finally caught up to us (they started about 12 hours ago in Chamonix) and as we followed the continuous line of runners up the hill for an hour-and-a-half climb, we were greeted with picture-perfect views of the glaciers across the valley for almost our entire day.

While this is not a difficult climb up to Mont Favre Spur, the downhill section from Mont Favre Spur to Col Chécrouit took us a long time (slower than the Cicerone guide pace) with our weary legs and aching joints.
If your legs are well-trained or well-rested, you will find this section quite pleasant.
Seeing the glaciers from so many angles might also have slowed our pace as we spent a lot of time stopping to try and capture the textures and gorgeous shades of colors of rock and ice.

Mount Favre Spur to Courmayeur – Stage 4 Descent
When you reach Col Chécrouit there’s a refuge here where you could eat and then continue another hour and a half down a steep trail through mostly forest to arrive at Courmayeur.

If the cable cars are running, I highly recommend skipping this section and taking the ride into town. It will cost €15 but is worth what it will save your knees and shins from not having to go down such a steep grade.
Optional: At Col Chécrouit you also have the option of going left around the north face of Mont Chétif.
When you reach the bottom and get off the gondola, walk down all the steps to get to street level, then cross the street that you see on your right and head north (to the left) across the bridge where you will see the TMB sign and continue under the highway and up one flight of stairs.

It’s a 10-minute walk that will bring you to the tourism office and main bus stop. It’s also where I started messing up our itinerary.

Fatigue had set in and we were beginning to feel the effects of pushing so hard multiple days in a row. By the time we arrived in Courmayeur, it was siesta time and all I could think of was how badly I needed a siesta. Not much was open for us to refuel our bodies with and grocery stores were closed so we couldn’t restock. Luckily the campground we were headed to was supposed to have a restaurant so we left Courmayeur in hopes of some rest…turned out the restaurant was no longer open 🙁
Overall Tips for Day 3
I’d cut off the downhill section from Col Chécrouit but note that the cable car only runs until 5:30 p.m.
If you are camping, see our Camping the TMB blog for details on your camping options nearby since there are no campgrounds in the town of Courmayeur.
If you are trying to fastpack the TMB you have a big dilemma.
Your dilemma is whether to skip Courmayeur to experience Bonatti or try to get to Bonatti and skip Courmayeur. As you’ll see in the next section, Bonatti is amazing and I wouldn’t skip it.
From Courmayeur, you can get to Refugio Bonatti in about 3 hours by getting a bus ticket to the Ferret Valley and getting off close to Camping Grandes Jorasses. Then you walk the road a few more minutes and will see the familiar yellow trail signs that will point you toward La Leche and then onto Bonatti.
Going this way still gives you impressive views of Mont Blanc and the Jorasses but in less time than hiking straight from Courmayeur.
You can even cut more time off by riding the bus further to Lavachey and then taking the trail straight up to Bonatti, but I’d only do this as a last resort in bad weather since the views from the upper trail on the way to Bonatti are fantastic. Although, the views from Bonatti too are some of the best you’ll ever see.
Day 4: Val Ferret to Refugio Bonatti
- Total miles/kilometers hiked: 8km/5mi
- Total elevation gain: 300m/1000ft
- Total elevation loss: 100m/300ft
- Stages covered: Stage 5 (with a modified start)
- Campground to Main TMB Trail: 1 hour
- Main TMB Trail Junction to Rifugio Bonatti: 1 hour
Val Ferret to Main TMB Trail Junction – Alternate Route
Back to how we fastpacked the TMB…We left the campground at 7 a.m. and within 5 minutes arrived at a river with the familiar yellow trail signs pointing us to La Leche.
Several roads are branching left and right but when in doubt, just stay on the main center road. In less than 20 minutes you’ll see a much smaller trail on the left side of the road. That’s the one you want . There’s a small sign on a rock pillar that says 30 min to La Leche. It took us closer to 45 minutes but that’s because we had clear views of Mont Blanc the entire way up and were constantly stopping to take pictures and admire the scenery.
La Leche is just an on old abandoned building, not too exciting, but marks the way and confirms that you are on the right trail.
Main TMB Trail Junction to Rifugio Bonatti – Stage 5
About 15 minutes later our trail merged with the main TMB trail and from here it’s an hour and fifteen to Rifugio Bonatti.

It was wonderful being on a mostly flat trail that weaves in and out of the forest along the hillside while staring at the walls of rock and ice across the Ferret Valley.

The only hard part that day was the 5-minute steep climb to Bonatti, but the views and food were worth the tiny effort.
Rifugio Bonatti
We had heard great things about Refugio Bonatti both in terms of location and food. It was all true. The location trumps all the others we’ve been to, even Elisabetta because it faces a huge glacial cirque.

There is a large grassy area in front with picnic tables but we used the space to spread out and do some Yoga for Hikers . This was our halfway point and we were hoping to do some major recovering in the next 22 hours before we hiked again.
Since we did spend the entire day here it was fun to watch all the other hikers come and go. This is the busiest hut I’d seen and since it’s only a four-hour hike from Courmayeur, it gets a lot of day hikers in addition to the hikers doing the TMB.
Eating at Rifugio Bonatti
Let’s start with the coffee. One of the best parts about Italian rifugios is the espresso. Oh my! The espresso foam on the top is just amazing and I can’t get enough of it.
Then there’s the pastries. We arrived at the Refugio at 10 a.m. on an empty stomach and started by snacking on their homemade biscuits, which were just shortbread cookies– but some of the best I’ve ever had–along with a few shots of amazing espresso.

For lunch, we split the homemade chocolate cake topped with walnuts and a blueberry shortbread cake because even though the antipasto salad was better than any I’ve ever seen—prosciutto, apples, and cheese on a bed of spring mix lettuces—the cakes looked like something we couldn’t get again and so we gobbled that up and washed it down with a glass of house red wine, all making for a perfect way to chill out while staring at the glaciers.
Then came dinnertime which started with a nice salad and bread followed by a vegetable and bean soup. Next, the main course was a spinach frittata with mashed potatoes and a side of sautéed eggplant, and a slice of brie cheese.

This was all washed down with a simple, yet delicious, dessert of yogurt, apples, and granola. It was a nice finish to a big meal and while many people were grabbing their stomachs and throwing in the towel from being overly full, I was finally just full . It felt like a perfect amount of food for me.
Reservations at Bonatti
We had reserved Rifugio Bonatti a week in advance when we saw rain in the forecast (even though it ended up never raining on us the entire time we hiked), and while it was a great place to stay, it ended up throwing off our timing a little bit and made us lose a day on the trail.
That being said, if you had to pick only one refuge to stay at on the whole Tour du Mont Blanc, Bonatti is the one to stay at.
Bonatti is family run and quaint but also delivers a high-end experience with 5 star service, beds, amenities, and a great mountain community.
As far as reservations, Refugio Bonatti is a large refuge and we probably could’ve found a bed there even without reservations since it was later in the season. Even though we only booked our beds a week in advance, we had to modify our reservation twice and they were able to change our dates easily.

If you don’t want to miss this Refugio, then I’d say to reserve it ahead of time especially if you hike in July or August.
Other Tips on Rifugio Bonatti
The dorm-style room that we slept in here was different than the semi-private room we had at Elisabetta but like Elisabetta, it was a fairly comfy bed with actual sheets and a warm down comforter (and I happened to get lucky and get the bed by the window that looked out at Mont Blanc).

I had the best night’s sleep that I had had since arriving in Europe and woke up the next morning ready to charge.
- The cost for half board was 55 euros and included dinner, a bed in the dormitory for the night, breakfast, a hot shower, and tea to take with you.
- You can pay 75 euros for half board if you’d like a private or semi-private room.
- They don’t take credit cards so make sure to have cash.
- You don’t pay until after dinner, since alcohol isn’t included in the cost, and then you pay for everything when you are done “relaxing” for the evening.
- They say in the confirmation email that you are required to have a sleeping sheet bag or rent one for 3 euros but that didn’t seem the case as I didn’t have one nor did anyone else in my dorm room.
- When you enter the refuge they ask you to take off your hiking shoes and either wear your flip flops/sandals or they have Crocs available for you to wear.
- You can make your reservation online here and they are usually very quick to respond.
Overall Tips for Day 4
If you are trying to fastpack the TMB and you want to experience Bonatti, then skip Courmayeur and either start your stage 4 early in the morning so you have time to get to Bonatti on the main trail, which is about 4 hours after Courmayeur or hop on a bus to cut off some of this time. Or…
If you are trying to fastpack the TMB and you want to experience a night in Courmayeur, then combine stage 5 with stage 6 either by getting an early start since it will be about a 10-hour day of hiking, or shortening it quite a bit by busing to the end of Val Ferret and then rejoining the trail. You can also cut almost an hour off by getting a bus from Ferret to La Fouly in Switzerland.
Day 5: Refugio Bonatti to Champex
- Total miles/kilometers hiked: 29km/18mi
- Total elevation gain: 900m/3000ft
- Total elevation loss: 1900m/6200ft
- Stages covered: Stage 6 and partial Stage 7
- Rifugio Bonatti to Rifugio Elena: 2 hours and 15 minutes
- Rifugio Elena to Ferret: 3 hours
- Ferret to La Fouly: 30 minutes
- La Fouly to Praz-de-Fort: 3 hours and 30 minutes
Rifugio Bonatti to Rifugio Elena – Stage 6
We really had no intention of “fastpacking” the TMB when we were leaving Bonatti.
We wanted to take the alt stage 8 AKA high route to cross Fenettre d’Arpette on a sunny day since it is so high and steep. The best weather in the forecast was for the following day (day 6) so that meant we would need to squeeze two stages together on day 5.
The first part of stage 6 started with great weather and a good pace but by the time we got to Rifugio Elena, the fog was so thick and the wind so strong that we had to take a quick break inside the refuge.

Be warned that stage 6 may not seem like it has much elevation gain based on the elevation profile in the Cicerone guidebook, but it’s still a solid amount of climbing.
You have to descend a small hillside to the base of the valley before you start your climb up to the Grand Col Ferret.
We stepped into Refugio Elena and were so glad we did. We warm up with coffee, a slice of blueberry pie, and the best hot chocolate we’ve ever tasted before attacking the only pass on the day, Grand Col Ferret.
Rifugio Elena
Refugio Elena seemed like a nice alternative to Refugio Bonatti. The pie wasn’t quite as amazing as the pastries we had at Bonatti but the atmosphere was nice and if we could have seen the entire mountain and glaciers across from the Refugio, I’m sure we would’ve been impressed however, the clouds were obstructing the view.

Rifugio Elena to La Fouly – Grand Col Ferret
Getting over Grand Col Ferret was harder than I expected. The climb was steep leaving Elena and the trail was busy.
We cleared the col in the fog so no views but we were thankful for a mellow descent into Switzerland. Really! The trail from Grand Col Ferret to Alpage de la Peule is so heavenly after the crazy steep trails we had hiked down on day two that I remember just being so happy and feeling like we were hiking through Scotland or Ireland since the vegetation changes significantly when you cross the col into Switzerland.
Alpage de la Peule is small but if you decide to stay a night in Courmayeur and want to get a full day of hiking in the next day, then stopping at Refugio Bonatti or Elena might make for too short of days. There’s not a lot to Alpage de la Peule but it would be a good place to rest and eat for the night.
When we left Alpage de la Peule we chose to stay on the road to hike down to Ferret. We were tired and it was easier on our sore feet. You could opt for the trail but the views aren’t much different.
Upon arriving in Ferret, the plan was to hop on the bus to Champex so we’d be rested for the next day since it was going to be a tough one.

But when we got to Ferret, I didn’t understand the bus schedule at first so we decided to walk another 45 min to La Fouly. The buses were also way pricier than I expected so I thought if we hopped not the bus from La Fouly it’d be cheaper.
I have this tendency to make rash decisions and wing things. Sometimes it works out great and other times it doesn’t. In retrospect, we should’ve waited for the bus because this stretch from Ferret to La Fouly was underwhelming, as will be the stretch from La Fouly to Praz de Fort I’ll soon discover.
We thought we’d get food in La Fouly and then get on the bus but when we got to town the grocery store was closed for siesta. In fact, everything seemed closed for the siesta. I was kind of shocked at how dead asleep the entire town felt.

We had just seen the bus pass on the road heading toward Ferret and figured we’d wait because it should be turning around at Ferret and heading back our way. But after waiting for a half hour I finally took the time to decipher the bus schedule and realized the bus too takes a siesta and wouldn’t be coming back for two more hours😩
We should’ve walked over to the campground and either set up our tents and called it a day or at least lay on the grass and stretched but no, our overzealous egos got all excited about hiking more and so we took off into the forest starting stage 7.
La Fouly to Champex – Begin Stage 7
Stage 7 is basically “The Flat Part of the TMB Through Switzerland “
Stage 7 is in theory an easy day. The thing is, an easy day on the TMB is still a pretty challenging day. It looks like it’s mostly flat and downhill. But there were a few short uphill sections that were calf burners and if you do the entire stage 7, the climb from Praz de Fort to Champex looked steep.
Easy if you do just stage 7 but not easy if you combine it with another stage.

Two hours after leaving La Fouly, we couldn’t go any further. We hobbled into Praz de Fort and we’re overcome with joy and gratitude when the one restaurant in town was open.
If you are planning on camping the TMB, make sure to read that blog because we would’ve ended up in a huge bind if this one restaurant hadn’t been open.

We ordered two pizzas to eat right then and six sandwiches to go which ended up saving us big time in the day to come.
From Praz de Fort it was easy to grab the bus since it was back to running once per hour in the evening.
We made it up to Champex right before nightfall with just enough time to snap a couple of pics by the lake and get our tent set up.

Champex is a pleasant Swiss town and somewhere I would’ve liked to spend a day. If you choose not to fastpack the TMB, you should consider spending a day here. We met a wonderful couple who spend half their year living here and the other half in Phoenix, Arizona– talk about 2 extremes!!!
Overall Tips for Day 5
If you are fast packing, skip all of stage 7 but make sure you know the bus schedule ahead time so you can make it to Champex before the grocery stores close.
Champex is a much nicer area to rest in than Ferret or La Fouly in my opinion and having some time to rest your legs here before Stage 8 is highly recommended.
Day 6: Champex to Col de Balme
- Total miles/kilometers hiked: 20km/13mi
- Total elevation gain: 1800m/5900ft
- Total elevation loss: 1300m/4200ft
- Stages covered: Alternate Stage 8 and alternate Stage 9
Hiking Times:
- Champex to Fenêtre d’Arpette: 3 hours
- Fenêtre d’Arpette to Chalet du Glacier: 2 hours and 30 minutes
- Chalet du Glacier to Refuge Les Grandes: 1 hour and 15 minutes
- Refuge Les Grandes to Col de Balme: 1 hour and 30 minutes
Champex is a small town and it was only a 5-minute walk from the campground to a delicious bakery that, in addition to having wonderful pastries and bread, offers a breakfast buffet that may be the best deal in Switzerland. For 12 SF you get all-you-can-eat bread with butter and jam, an assortment of cheeses, and deli-style meats. (I’m not sure if coffee is included in that.)
We are not big breakfast eaters so we just grabbed our coffee and pastries and a loaf of bread for later and began the variant (or alternative) to stage 8.
Champex to Fenêtre d’Arpette – Alt Stage 8 Ascent
The alternative stage 8 takes you up and over Fenêtre d’Arpette, the highest point on the TMB (along with Col des Fours). You gain and then lose on this route over 3500 feet, but the descent brings you quite close to the Trient Glacier.

The first 2 hours of this climb aren’t too bad, but then the last hour you are doing so many high steps. In some ways, this was a nice break for our calves but it was hard on the glutes and quads and all the big steps keep pushing your heart rate to 90% max exertion.

We chose this alternative thinking that the views were going to be outrageous but in my opinion, compared to the Val Veni and Val Ferret views, they were just mediocre.
You can see far off into the distance and you do get pretty good views of the Trient glacier, however, if you do alternate stage 9, which I highly recommend, you get just as good views without the torture that comes next for us.

Fenêtre d’Arpette to Chalet du Glacier – Alt Stage 8 Descent
The ascent is hard but feels good plus, there was a bit of scrambling over boulders which I loved. The descent however, was torture.

It’s super steep and there was a lot of scree (loose rock) that made your footing less stable. Luckily, there wasn’t much exposure so the worry was just in slipping, not falling to your death.
The other negative was that this is also a main stage of the Haute Route and so, while we were descending, the trail was very crowded with people climbing up and many places where you’d have to stop and wait for people to pass because the trail just isn’t wide enough for two.

This section beat up our knees quite a bit and I’d recommend just sticking with the regular stage 8 if you have any knee issues or if the weather isn’t great. However, if you love bragging rights, then this is your type of hike.
At the bottom of the climb, you get to Chalet du Glacier, which is a small restaurant and a great place to sit and eat some food before either finishing your day in Trient, Col de la Forclaz or Le Peuty or doing the insane like we did and tackle the alternate to stage 9 on the same day.

Water at Chalet du Glacier
This was our first time on the entire TMB to have to filter water. If we had just been going on to Trient we probably could’ve got by for the one-hour hike with just beer and soda from the Chalet. But since we were going to be climbing again, we busted out our GoFlow Gravity Bag and filtered some water from the river.
Chalet du Glacier to Col de Balme – Alt Stage 9
The next stage was nice. We might have bit off a little more than we can chew, but it wasn’t too big of a bite.
The times in the Cicerone guidebook book were pretty spot on and so it was an hour-and-a-half climb up to Refuge Les Grandes from Chalet du Glacier where we sat and had a wonderful convo with a local who was manning the refuge for the weekend.
The views and ambiance here were so rad because you felt like you had discovered a hidden gem and had it all to yourself pretty much. I highly recommend this route .

The goal for the evening of day 6 was to get to Col de Balme and while it didn’t require crossing any more passes, because from here you just skirt the side of the mountains for a few kilometers, after already doing the oh-so challenging appetite, this was a bit long and required more effort than we hoped (but what else is new on the TMB).

Thankfully we were rewarded with one of the best nights on the trail.
We walked into Refuge Col de Balme and the owner instantly made us feel welcome. Because it was such a calm and clear night, we wild camped near the refuge and had the most incredible views of Mont Blanc and the surrounding mountains.

Normally the owner recommends trekkers go down a bit from the refuge just because of the weather.
The best part of the day was the delicious dinner we had at the refuge. This was our first time eating croute and it was better than anything I’d eaten so far on the TMB.

After finishing off our amazing dinner with the best cheesecake I’ve ever had, we retreated to the peace and solitude of our lone tent perched high on the col overlooking Mont Blanc and Chamonix Valley to the west and Trient to the east.

This was one of the most memorable nights of my life. The night sky was so clear and there were so few lights from here that I have never seen the Milky Way so creamy in my life (and I’ve camped in a lot of places). The density of stars just blew me away and my girls may never forgive me for not waking them up at 2 a.m. to soak it in.
But this peace and gratitude I felt that night is probably the reason I ended up kinda screwing up our next day by making a few bad decisions, which meant that instead of ending our TMB on a high note, we end up limping into Chamonix on the seventh day at 9 p.m. with feelings of frustration.
Overall Tips for Day 6
The most direct way to fastback these two stages is by doing the alternate route for both stages.
Go over the Fenêtre d’ Arpette and at Chalet du Glacier, cross the bridge to climb to Refuge Les Grandes. OR you can choose to save the knees and take the traditional route from Champex to Col de la Forclaz and then come around to Chalet du Glacier from the opposite direction before heading up to Refuge Les Grandes.
Time wise the latter (the classic stage 8 route) may be faster even though the distance is a few kilometers longer. Doing the Fenêtre d’ Arpette can be slow and tedious while the regular stage 8 has way less elevation gain or loss so you can keep a faster pace.
Day 7: Col de Balme to Chamonix
- Total miles/kilometers hiked: 20km/12.5mi
- Total elevation gain: 1000m/3300ft
- Total elevation loss: 2100m/6900ft
- Stages covered: Stage 10 with a detour to Lac Blanc
- Col de Balme to L’Aiguillette des Posettes: 2 hours
- L’Aiguillette des Posettes to Tre-le-Champ: 1 hour and 45 minutes
- Tre-le-Champ to Lac Blanc: 2 hours and 45 minutes
Col de Balme to L’Aiguillette des Posettes – Begin Stage 10
We woke to a clear sky and the sunrise was simply incredible. The utter silence and complete stillness of the valley below was an experience we will never forget.

We took our time packing up and drinking our coffee that morning, probably more because we loved the vibe and views up at the Refugio than because we were exhausted from two days of intense hiking, but let’s be honest, we had to be pretty worn out at this point.

I’m sure the cortisol pumping through my body from the stroke factor made me not notice how tired I was, but, just like the previous days, we threw our packs on our backs, excited to be on the trail again.
I think we might’ve started on the wrong trail though.

Somehow we ended up summiting L’Aiguillette des Posettes from the wrong side and got a bit confused. It wasn’t a big deal, but probably set us back in time by 20 minutes or so. We thought we’d be camping at Lac Blanc that night so we didn’t worry about it.
It’s funny how much your expectation plays a role in your experience and I expected the day to be somewhat easy so I didn’t think much about how fast we were hiking or feel like there was a need to rush. In retrospect, we should’ve been on the trail earlier and paid more attention to the signs.
L’Aiguillette des Posettes to Tré-Le-Champ – Climbing and Ladders
The descent down to Tré-Le-Champ from Aiguilette was, you guessed it, harder than expected but not as bad as coming off the Arpette the previous day.

When you hit the road you see the trail that starts stage 10 and will take you to Flégère and Lac Blanc if you wish so I was tempted to just push on and get to Lac Blanc as quickly as possible but we only had a loaf of bread with us and I knew I should play it safe and stop for lunch just in case Lac Blanc doesn’t have food.
It was a good call because for one, the food at the restaurant we went to was really good and two, we ended up getting to Lac Blanc after they stopped serving lunch so we didn’t get to eat again that day.
We played it safe and walked down the road for about 5 minutes to this restaurant that serves many many hikers along the TMB.
The food really is incredible and it’s worth the detour if you have time.

After sitting to enjoy our meal for an hour, we put on our packs and I distinctly remember looking at my girls and saying, “I need a nap.” Which is a huge rarity for me. I never nap.
But we pushed on anyway because that’s just what we do.
We hiked back up the road and began the steep climb to Aiguillette d’Argentière. It was fun walking past all the rock climbers and by the time we reached the ladders, I felt invigorated again.
The ladders aren’t as scary as they sound but if you have any fear of heights, you should just take the alternative via Col de Montets.

If you are concerned about the ladders, my friend Mags at Family Freestylers has a great article about the difficulty of the ladders that you can read here .
With the fun behind us, we looked up the mountain and saw Refuge Lac Blanc which we were planning on finishing our day. But we looked up?! For some reason, I thought that when we finished the climb to Tête aux Vents it would be a flat trail to Lac Blanc. I never really considered that it might be another grueling hour of climbing to get there.
I had nothing left.

I remember trying to appreciate the pain in every step, knowing how much I was going to miss this journey soon.
In addition, we had so much good luck along the way that I made the error of assuming what was will always be. But our luck had run out.
A half-hour before you arrive at Lac Blanc, you reach Lacs de Chésery. It was more crowded here than I expected and we ran into fellow hikers that we had met at Bonatti who said we should stop here and enjoy these lakes because they are prettier than Lac Blanc.

I thought about listening to their advice and even thought that it might be good to just set up camp here and then hike up to check out Lac Blanc but FOMO and hunger got the best of me.
We had read on other people’s blogs on camping the TMB and I thought we’d be able to camp at Lac Blanc. The view was supposed to be incredible there and I wanted to get to the refuge as fast as possible to make sure we’d be able to get food because we only had that loaf of bread left from two days ago (yummy!).
After 30 minutes of painful climbing, we arrive at the refuge only for the owner to tell me she’s done serving lunch, has no beds available for the night, and can’t camp there.

She does offer to include us for dinner but at 25 euros per person, I was reluctant and the thought of sitting down to dinner with a bunch of strangers who would be nice and clean from their hot shower made me uncomfortable seeing as we hadn’t showered since Bonatti, three nights ago.
It’s almost 6 pm and I’m beaten. I just want to be done. I needed food, rest, and a hot shower. In retrospect, I should’ve paid for dinner and not cared how smelly I was.
It’s going to replay in my mind for so long.
Why didn’t I just pay for the dinner, get over myself for being stinky, and then hike back down to the Chésery lakes, and enjoy one more night on the trail ?
Forgiveness is hard, especially forgiving yourself.
Instead, I looked at Google Maps and it says 2 hours walking time to get to the closest town of Les Bois, which is right next to Chamonix. I look at the girls and say Can we just be done? They reluctantly “agree” but moreover they just succumbed to my pleas to finish right now because they just want to make me happy. And so, we set off to complete the TMB in 7 days.

Lac Blanc to Chamonix – Partial Stage 10 and Le Flegere Alternative Descent
The first mistake was taking the most direct route to Flégère via a trail that was marked closed. It was being repaired and while we saw others take this route and the path wasn’t that bad, I did step on a loose wooden board that caused me to fall, almost cartwheeling off the side of the mountain. Luckily, I wasn’t hurt, but it was a bad start to an even worse finish.
When you get to Flégère you can go left more towards Les Tines or slightly to the right toward Chamonix and Les Bois. Normally the cable car is running and this would be the easiest option if you were fastpacking the TMB.

But this year the cable car was being repaired and so we had to hike off the mountain. To our surprise, the entire trail network near Flégère was closed and since night was falling we thought we should play it safe and stay on the road.
I have never seen a road this steep in my life.
I’m not sure how vehicles make their way up and down this road because even with 4wd and a low gear, I’d be afraid of losing control and ending up in the trees.
We practically scooted down on our butts for the 20 switchbacks in the first 2 kilometers. Google Maps was finally wrong.
It took us 3 painful hours to get down the mountains and another hour to hike to the campground.
The only positive to this horrendous evening of hiking was the absolutely beautiful sunset that graced Chamonix Valley. The whole mountains were glowing and even in our frustrated stupor, we couldn’t help but stand there awestricken.

By 10 p.m. nothing was open and while the kind man at the campground reception offered us a can of ravioli, I was way too tired to eat cold noodles. We went to bed hungry and feeling defeated.
I know we missed out that night on what would’ve been the second most memorable night of my life.
We woke up though in good spirits and laughed it off. We may have messed up on our last day, but the sum total of the experience was perfect.
In fact, after showering and packing everything back into our packs, we walked to the train station to go get coffee and chocolate croissants in Chamonix planning out next year’s backpacking trip.
Will it be the Alta Via or the Haute route?
Stay tuned…
Overall Tips for Day 7
Basically don’t do what we did.
First of all, you should absolutely just ride the gondola down from Charamillon and Le Tour then walk the last bit to Tré-Le-Champ.
The views from L’Aiguillette des Posettes aren’t much different than the trail Col de Balme and our legs would’ve felt so much better on stage 11 if we had skipped that section.
Second, reserve Lac Blanc if you are planning on doing a long day of hiking and want to stay there for the night because there are not any other food options along stage 11 until you get to Brévent or Refuge de Bellachat, and if you get there late they might not be open or they will be only serving food for their guests staying the night.
Lac Blanc was very beautiful and is rightfully known as one of the most scenic spots on the Tour du Mont Blanc. On a clear day, you get views of the jagged mountains towering above the crystal-clear lake. So with that, I will say that it is worth the detour to come here .
If you’re camping just know that you’ll actually have to make camp at Lacs de Chésery and then go up and explore Lac Blanc. I probably would recommend calling in advance and paying to be a part of dinner unless you somehow have your own supply of food for the night.
For non-campers or if even campers, I highly recommend staying at the refuge. This refuge just re-opened after being closed for 2 years and supposedly it’s a quaint but nice refuge with solid food.
Thanks for reading and I honestly hope this helped you with planning your TMB trip! I hesitated to even share this post because I know it’s a little rambly but all the mistakes I made on our trek were because there wasn’t enough information on the internet for me to know ahead of time. My goal is to help you learn from my mistakes 🙂
If you haven’t already, be sure to check out related Tour du Mont Blanc blogs below!
Tour du mont blanc resources.
- 35 Photos to Inspire You to Hike The Tour du Mont Blanc
- Where to Stay in Chamonix, France
- Ultimate Tour du Mont Blanc Pack List
- The Ultimate Planning Guide to the Tour du Mont Blanc (coming soon)
- Tour du Mont Blanc Camping Guide (Coming soon)
- The Best Stages on the Tour du Mont Blanc (Coming soon)
Don’t forget to share this or Pin it!

Hey! We're glad you found us! You may want to also join us on Instagram and follow our travels. .
Notify me of follow-up comments by email.
Notify me of new posts by email.
This site uses Akismet to reduce spam. Learn how your comment data is processed .
Tuesday 31st of January 2023
Loving this blog, thank you for writing it. I am helping my twin sons research their TMB trip and had a few questions. They are both strong long distance runners (both compete in college and run 60+ miles a week) and their coach suggested running on average 10 miles a day then hiking the rest of that days miles to the next town. I am having a hard time finding a time frame to use that will help me book places to stay. Meaning, they are unsure how to break the trip up. They don't want to race it and want to enjoy the beauty but also would enjoy the run and for sure do not want to take a guided tour. Any advice would be welcome.
Friday 10th of February 2023
@Nan, Did you look at our other blog Tour Du Mont Self Guided? It has the days/times broken down. We did it in 7 days and didn't have to run at all and I wouldn't consider us fast hikers. It was pretty easy to just put in a long day of hiking and still enjoy the views. For example, we'd get up and hike from 9-1, stop to enjoy lunch, and then hike again from 2-6. There was that one day in Switzerland where we go to town during siesta so we hiked on and it ended up being a really long day and had to catch a bus to the campground and the last day we should've stopped to camp at the lake instead of hiking all the way back into town, but other than that, our other days weren't that hard.
Saturday 9th of July 2022
Thanks so much for the info, super helpful and cant wait to put it to use when tackling the Mont Blanc Trail !
- Fast Running Coaching
- Support Fast Running
- This week’s fastest runs at parkrun
- Athlete Interviews
How to “Fast-Pack” the UTMB

In 5 Tips for Fastpacking the Tour du Mont Blanc (UTMB) ,Iain Martin shares his advice for a four-day hike around the famous trail running course.
For anyone with a place in the UTMB, fastpacking – trail running with a light backpack – is the most time-effective way to recce the course.
The classic Tour de Mont Blanc typically takes hikers 7-10 days to complete, but you can strip that down to just four days, reducing the 100 mile circuit to manageable chunks of 25-30 miles per day.
There are companies and coaches who offer a ‘serviced recce’, with your luggage transferred from your accommodation each day. This is a great option if the dates and budget fit, but if you are going solo, here are my five top tips for fastpacking the Tour du Mont Blanc.
It may be axiomatic that fastpacking means packing light, but just how much are you willing to forgo?
I took only one set of run clothes, plus some compression tights, a pair of shorts, one set of socks, and two T-shirts for the evenings. [I always take a spare pair of socks, because the joy they can bring far outweighs the extra grams. But also “two evening shirts”? – Robbie]
Some people might flinch at wearing the same running gear for four days in a row, but if you’re going to wear it non-stop in the race for longer, then why not test that now?
Most refuges have rooms to leave your kit and trail shoes in overnight to dry out. They also normally provide Crocs, so there’s no need to weigh your pack down with sandals either.
Refuges will provide blankets, but typically require a sleeping sheet, especially with Covid protocols in place. If you don’t have one already, shop around. Silk bags take up less space and weigh less than cotton.
A book takes up too much space, so you’ll need to compromise culturally as well. I downloaded a few films onto my phone to fill the few hours I wasn’t running, eating or sleeping.
There are a few areas where you can’t compromise. Ensure you have your required combination of chargers for your phone and watch – because if it’s not on Strava, it didn’t happen.
I also carried all the compulsory safety gear on the UTMB kit list, because it’s there for a reason – the weather can change very quickly in the mountains.
Finally, remember to take some cash as not all refuges accept cards.
Plan your Nutrition
I managed to fit all of the above into the Inov8 Race Ultra 2in1 pack. This has a 10-litre pocket, which was just about filled to the top after I had added two-dozen gels.
Although this added significantly to the weight, I needed to be sure I could fuel. Fastpackers don’t stop for lunch, so having guaranteed calories onboard is essential.
I recommend you load up at breakfast as much you comfortably can. In refuges, you’re likely to be limited to cornflakes and bread, but if you’re in a hotel with a buffet breakfast…well, there’s your lunch too! My hotel in Courmayeur not only had the normal pastries and cereals, but ham, cheese, bacon, scrambled egg and even chocolate tarte.
Refuges offer a picnic lunch, but these rarely pack down small, nor are great value for money. I supplemented my gels instead from shops along the way – croissants can last surprisingly well, I learned.
Those mountains can be sweaty work, but there are fountains aplenty. Knowing the more sparkly hydrated sections is quite important though.
Keep Hydrated
When you’re out on the trail for most of the day, having a hydration plan is essential. Every litre of water is an extra kilo of weight to carry, but this is not an area to gamble with.
You should know from your own experience what your sweat rate is in different temperatures and conditions and ensure you’re stocked accordingly.
Ironically, it’s easier to find water on the Tour de Mont Blanc than food.
You can top up by buying from shops and refuges, but those single-use plastic bottles will cost you and the environment. Instead, you can top up from the many water fountains in villages you pass through on the route, especially from La Fouly onwards.
And don’t be afraid to top up from streams. It sounds like an advert for Evian, but this is pure, filtered snowmelt. As long as you are above any livestock or human habitation, you can’t get any healthier or fresher.
If you are unsure about stream water then it’s quite easy to take purification tabs with you or have a bottle with a filter like this.
Know your Route
The signposting on the Tour du Mont Blanc is very good and if you pay attention it’s hard to lose your way.
The complications come if you are on a recce for the UTMB. From the top of Les Houches, the traditional Tour du Mont Blanc will take you direct to Les Contamines, but you will need to drop down to Saint Gervais, then follow the course of the Bon Nant river upstream.
Good research and the various .gpx files available online to download can help you follow the exact route, but be mindful that the UTMB course has changed several times over the years, so select the most recent you can find.
Consider as well how much you want to cover in any single day. Assuming you start and finish in Chamonix – as 90% of people do – then the obvious midway break at the end of day two is in Courmayeur.
However, this is less than half of the anti-clockwise route, leaving two significantly longer and hillier days to finish. Instead, consider pushing on through Courmayeur to one of the refuges beyond.
You might miss out on a night of (relative) comfort in a hotel, but you’ll be able to start the hike to the highest pass on the course at Grand Col Ferret (2537m) with fresh legs and before the heat of the day.
Iain got a great deal on this refuge.
Book your Accommodation Early
Having decided on your route, your immediate next step should be to book your accommodation.
Some refuges have reduced capacity available due to Covid regulations, but even those operating normally book quickly in peak season.
The official Tour du Mont Blanc website is very efficient and, in most cases, gives you live updates on current availability, as well as allowing you to book online.
I’ve only sampled a small number of the refuges available on the route, but my favourite was the Auberge de La Nova in Chapieux. Friendly, family run, neither too large, nor too small, good food and a great welcome.
My final piece of advice is to book a good hotel for the start and, especially the finish of your trip.
I chose Plan B – a funky hotel/venue near the Aiguille du Midi, which struck the right balance between comfort and expense.
By the time you return to Chamonix you will have covered over one hundred miles and climbed over 9500m of some of the most beautiful, but testing mountain scenery in the world – it’s time to treat yourself!
Love to run fast?
Sign up for Fast Running’s FREE weekly newsletter and get the latest running news, race round-ups, training advice and offers delivered straight to your inbox.
Emails may include information and offers from third parties which Fast Running believes will be of interest to you as a runner. You can choose to unsubscribe from the mailing list at any time by clicking the unsubscribe link at the bottom of each email sent.
By adding your information and clicking the subscribe button you consent to receive email communications from Fast Running as outlined above.

Great Britain
10 fastest uk parkrun times on 10th august (2024).

10 fastest UK parkrun times on 17th August (2024)

The Irish non-Olympic round-up

Success in the Stade de France – Olympic Games Report

The Grand Finale – Olympics Preview

Fantastic Four(th) – Emile Cairess Shines in Paris

Breaking2 – How the World’s Fastest Men Almost Broke the 2-Hour Marathon

Strava Wants Runners & Athletes To Share Their Real Unfiltered Photos

Athlete Insights
Video: tom bosworth interview with mo farah.

Elaine Thompson runs 10.94 for 100m in trainers

Injury Prevention
It band relief with this yoga routine.

Running & Athletics News
An act of kindness by two runners in philadelphia half marathon goes viral, more in trail running.

2024 Valsir Mounatain Running World Cup opens at Broken Arrow

Insights from Experience: Racing in Aosta

The importance of specificity

Hanna storms to 5th in World – Irish round-up

Tour du Mont Blanc Packing List - The Ultimate TMB Gear List
Complete tour du mont blanc packing list.

Travel insurance details
Medical insurance details
Boarding passes for flights
Accommodation booking confirmation (if you're staying extra nights)

Switzerland
Cash and Bank Cards

Cash: bring both Euros and Swiss Francs
Credit/debit card

We're giving away a trip to Morocco! It's time to win your next Skyhook adventure. Click below to check out the details and enter the competition.
Tour du Mont Blanc Gear List

Sleeping bag liner: this is for use in the refuges and is usually for sale at the lodge before your trek.
A daypack you can carry: a small backpack with a 35L to 45L capacity should be plenty to fit all your kit. We recommend one with a waist belt.
Trekking poles: these are available for rent from Vert Lodge (approx EUR 10)
Quick dry, lightweight travel towel
Water bottle: at least 2L or two smaller bottles equalling this.

Clothing For Your Trek

N.B.: Cotton clothing is not recommended for trekking. This is because cotton soaks up sweat and does not dry easily.
Trekking boots: 3- or 4-season lightweight boots or trail runners
Comfortable shoes for the evenings (flip-flops, sandals etc.)
2 x t-shirts for the hike (fast dry material)
1 x comfortable shirt for the evening
4 x socks for hiking
3 to 4 pairs of underwear
Fleece jacket (optional)
Light down or Primaloft jacket
Rain and windproof hooded jacket (fully waterproof)
Rain and windproof trousers
1 x pair of hiking trousers (pants with zip-off legs that change into shorts are ideal)
Comfortable trousers for the evening
Lightweight hat and gloves
Swimsuit (optional)
Medical and Other Items

Sun cream and other sun protection, such as a hat and buff
Personal medication: inhaler, blister pads, etc.
General toiletries
Contact lenses and glasses (if needed)
Electronics: phone, charging cable, USB plug. You can buy Swiss-compatible plugs before you start the trek.
Hand sanitiser
Final Tips On What to Pack For Tour Du Mont Blanc

More TMB Articles
How Hard is Tour du Mont Blanc
Tour du Mont Blanc Accommodation
Best Time to do Tour du Mont Blanc
Find your next adventure

Tour du Mont Blanc (4-Days)
€750 per person

Tour du Mont Blanc - 10 Days
€1,845 per person

Canoe Across Scotland
United Kingdom
£566 per person

Hike Mount Toubkal (4,167m)
£299 per person

Hike, Kayak and Wild Camp the Norwegian Fjords
£654 per person

Beginners Ice Climbing
£375 per person
Gear list for Fastpacking Tour du Mont Blanc YouTube
How to hike the tour du mont blanc in 7 days fastpacking guide artofit.
The proof can be found in this related blog of 35 photos to inspire you to hike the Tour du Mont Blanc. Things to Consider Before Camping on the Tour du Mont Blanc Camping and Fastpacking Don't Mix. Regret camping TMB, not fastpacking & camping it. Fastpacking means rapid backpacking, finishing TMB in 7-9 days vs. 9-11 days normally.
How to Hike The Tour Du Mont Blanc In 7 Days Fastpacking Guide • Nomads With A Purpose
Tour du Mont Blanc (known on the trail as TMB) is the most famous multi-day alps hiking journey in Europe. Mont Blanc (French), Monte Bianco (Italian), or "White Mountain", is the highest mountain in the European Alps at an imposing 4,810m (15,781 ft). The tour follows well maintained trails through France, Italy and Switzerland as it leads.
In 5 Tips for Fastpacking the Tour du Mont Blanc (UTMB) . ,Iain Martin shares his advice for a four-day hike around the famous trail running course. For anyone with a place in the UTMB, fastpacking - trail running with a light backpack - is the most time-effective way to recce the course. The classic Tour de Mont Blanc typically takes.
A brand NEW guidebook for the Tour du Mont Blanc, and an accompanying waterproof map, has recently been launched by Vertebrate Publishing. It's unique and innovative, in several ways; timings for trip planning for all trail users from steady walkers to faster trail runners, 1:40,000 scale custom mapping provided on the description pages of the.
This Tour du Mont Blanc 7 day itinerary follows the complete TMB trail but ideally uses occasional public transport so is best taken during the peak trekking months of July and August. Completing the entire TMB trek in just 7 days is a definitely a challenge and only for the very fit!
The Tour du Mont Blanc or TMB is a 105 mile hike around the Mont Blanc mountain range. You hike through Italy, Switzerland, and France and weave through quaint towns and mountain passes. The loop is typically hiked in 11 days, counter-clockwise. You will have more than 32,000 ft of height gain/loss, more than climbing Everest.
I fastpacked the Tour Du Mont Blanc in 4 days - 184km distance, 11,200m climbing. I wild-camped rather than using the refuges, which meant enduring a snowsto.
Based in Chamonix in the French Alps, I'm lucky to live at the foot of Mont Blanc -the start/finish of the famous multi day trekking route - the Tour du Mont Blanc. Five years ago I hiked the TMB with my 10 year old girl and 65 year Mother & fell in love with this incredible hut to hut trek through France, Italy & Switzerland.
FRANCE, SWITZERLAND & ITALY / 5 NIGHTS / 6 DAYS. This 5 night / 6 day version of the Tour du Mont Blanc trek is an incredible opportunity to completely immerse yourself in the mountains and enjoy the natural beauty of the valleys that surround western Europe's highest mountain. The trek offers an unusual variety of spectacular scenery and.
The Tour du Mont Blanc packing list will also work for our 7, 11 and 14-day Haute Route and our Alta Via 1 hikes in Italy. CHECK OUT OUR SELF-GUIDED TOUR DU MONT BLANC 6,7 & 10-Day Tours. How to Use this Tour du Mont Blanc Packing List:
Overall Tips for Day 1. To fastback-like we did, take the cable car from Chamonix to Brévent, hike down to Les Houches, hop on the train from Les Houches to Saint Gervais, and then a bus from Saint Gervais to Les Contamines. Total public transport costs per person are about 33 euros per person.
This adventure packs in all the best Mont Blanc views, uphill trails, and meadow strolls of the classic route—in just 9 days. Despite being shorter, this express version of the TMB makes almost zero compromises. You still get to enjoy snowy peaks while reaching +8,200ft passes, spend a night in a mountain hut, and hit ancient Roman roads.
How to Hike The Tour Du Mont Blanc In 7 Days Fastpacking Guide • Nomads With A Purpose Tours
Fastpacking Tour du Mont Blanc is the way to go. Over the course of 7 days, you'll be doing big miles and gaining lots of elevation every day. With spectacular views of crystal-clear lakes, high cols, charming villages, and towering peaks, you'll cross three European countries before you know it! There will be an expert guide by your side.
This Turbo Tour du Mont Blanc 4 day itinerary follows the TMB trail from each end of the Chamonix Valley starting in Les Houches and finishing in Le Tour. Designed for trail runners or fast packers moving very quickly running down descents. This itinerary IS NOT suitable for walkers or trekkers.
Blog: http://parflora.comInstagram: https://www.instagram.com/parfloraPinterest: http://pinterest.com/parfloraFacebook: https://www.facebook.com/runparflor.
How to Hike The Tour Du Mont Blanc In 7 Days Fastpacking Guide • Nomads With A Purpose Camping
Heading over to do a 4 day fastpacking trip (Bivvy and tarp) middle of September. Taking a couple of the alternative routes for better scenery but makes it slightly shorter at 160km.
- Historia De Pescados Y Mariscos
- Clima En Mcallen En Diciembre
- Observatorio Griffith Los Angeles Ca
- Virgen De Chiquinquirá Patrona De Colombia
- Casas Color Naranja Por Fuera
- New Lancome Perfume Julia Roberts
- Pueden Comer Ejotes Los Perros
- Diferencia De Tabla De Contenido E Indice
- Cual Es La Masa De Los Planetas En Kilogramos
- Horario Misa Señor De Los Milagros Bogotá
How to Hike The Tour Du Mont Blanc In 7 Days Fastpacking Guide • Nomads With A Purpose Tours
How to hike the tour du mont blanc in 7 days fastpacking guide • nomads with a purpose.
Overall Tips for Day 1. To fastback-like we did, take the cable car from Chamonix to Brévent, hike down to Les Houches, hop on the train from Les Houches to Saint Gervais, and then a bus from Saint Gervais to Les Contamines. Total public transport costs per person are about 33 euros per person.
Fastpacking the Tour Du Mont Blanc 4 days in 4 minutes YouTube
Distance: 11 km / 7 miles. Hiking: 5-6 hours. Elevation gain: 423 m / 1,388 ft. Day 7: Flégère to Montroc via Lac Blanc. The last hiking day takes us to the massive Bossons Glacier, Needles of Chamonix, Vallée Blanche, Les Drus, going towards the seracs of the Argentière Glacier and ending in Montroc.
Gear list for Fastpacking Tour du Mont Blanc YouTube
This adventure packs in all the best Mont Blanc views, uphill trails, and meadow strolls of the classic route—in just 9 days. Despite being shorter, this express version of the TMB makes almost zero compromises. You still get to enjoy snowy peaks while reaching +8,200ft passes, spend a night in a mountain hut, and hit ancient Roman roads.
A version of the film from our fastpack of the Tour du Mont Blanc with Director's Commentary. Thanks to my Channel Members for the support!Be sure to watch t.
Tour du Mont Blanc (known on the trail as TMB) is the most famous multi-day alps hiking journey in Europe. Mont Blanc (French), Monte Bianco (Italian), or "White Mountain", is the highest mountain in the European Alps at an imposing 4,810m (15,781 ft). The tour follows well maintained trails through France, Italy and Switzerland as it leads.
The proof can be found in this related blog of 35 photos to inspire you to hike the Tour du Mont Blanc. Things to Consider Before Camping on the Tour du Mont Blanc Camping and Fastpacking Don't Mix. Regret camping TMB, not fastpacking & camping it. Fastpacking means rapid backpacking, finishing TMB in 7-9 days vs. 9-11 days normally.
FRANCE, SWITZERLAND & ITALY / 5 NIGHTS / 6 DAYS. This 5 night / 6 day version of the Tour du Mont Blanc trek is an incredible opportunity to completely immerse yourself in the mountains and enjoy the natural beauty of the valleys that surround western Europe's highest mountain. The trek offers an unusual variety of spectacular scenery and.
This Tour du Mont Blanc 7 day itinerary follows the complete TMB trail but ideally uses occasional public transport so is best taken during the peak trekking months of July and August. Completing the entire TMB trek in just 7 days is a definitely a challenge and only for the very fit!
How to hike the tour du mont blanc in 7 days fastpacking guide Artofit
A 12-day Tour du Mont Blanc trekking adventure adapted for advanced hikers; Accommodation in hotels (3 nights), chalets (3 nights), mountain huts (3 nights), and a guest house (1 night). Classic Hiking or Fastpacking of Tour du Mont Blanc. From $2,350 | 7-10 days . Chamonix | France . Hidden Mont Blanc: The 5-Star Hiking Tour. From $3,950.
This Turbo Tour du Mont Blanc 4 day itinerary follows the TMB trail from each end of the Chamonix Valley starting in Les Houches and finishing in Le Tour. Designed for trail runners or fast packers moving very quickly running down descents. This itinerary IS NOT suitable for walkers or trekkers.
The Tour du Mont Blanc packing list will also work for our 7, 11 and 14-day Haute Route and our Alta Via 1 hikes in Italy. CHECK OUT OUR SELF-GUIDED TOUR DU MONT BLANC 6,7 & 10-Day Tours. How to Use this Tour du Mont Blanc Packing List:
Fastpacking Tour du Mont Blanc is the way to go. Over the course of 7 days, you'll be doing big miles and gaining lots of elevation every day. With spectacular views of crystal-clear lakes, high cols, charming villages, and towering peaks, you'll cross three European countries before you know it! There will be an expert guide by your side.
In 5 Tips for Fastpacking the Tour du Mont Blanc (UTMB) . ,Iain Martin shares his advice for a four-day hike around the famous trail running course. For anyone with a place in the UTMB, fastpacking - trail running with a light backpack - is the most time-effective way to recce the course. The classic Tour de Mont Blanc typically takes.
The Tour du Mont Blanc (TMB) is a challenging hike with steep ascents and descents. It typically involves climbing around 3,000 feet and then descending the same amount daily. Fastpacking, where two passes are covered in a day, is quite intense and not recommended for most.
A brand NEW guidebook for the Tour du Mont Blanc, and an accompanying waterproof map, has recently been launched by Vertebrate Publishing. It's unique and innovative, in several ways; timings for trip planning for all trail users from steady walkers to faster trail runners, 1:40,000 scale custom mapping provided on the description pages of the.
Blog: http://parflora.comInstagram: https://www.instagram.com/parfloraPinterest: http://pinterest.com/parfloraFacebook: https://www.facebook.com/runparflor.
- Plano Perpendicular A Una Recta
- Definicion De Geografia De Mexico Y Del Mundo
- Leer One Piece Manga Español
- Desarrollo Economico Durante El Porfiriato
- La Mejor Tenista Del Mundo
- Que Significa El Nombre De Evan
- El Defensor Con Mas Goles
- Hijos De Su Madre Reparto
- Puppet Master Vs Demonic Toys
- De Donde Es Lada 473
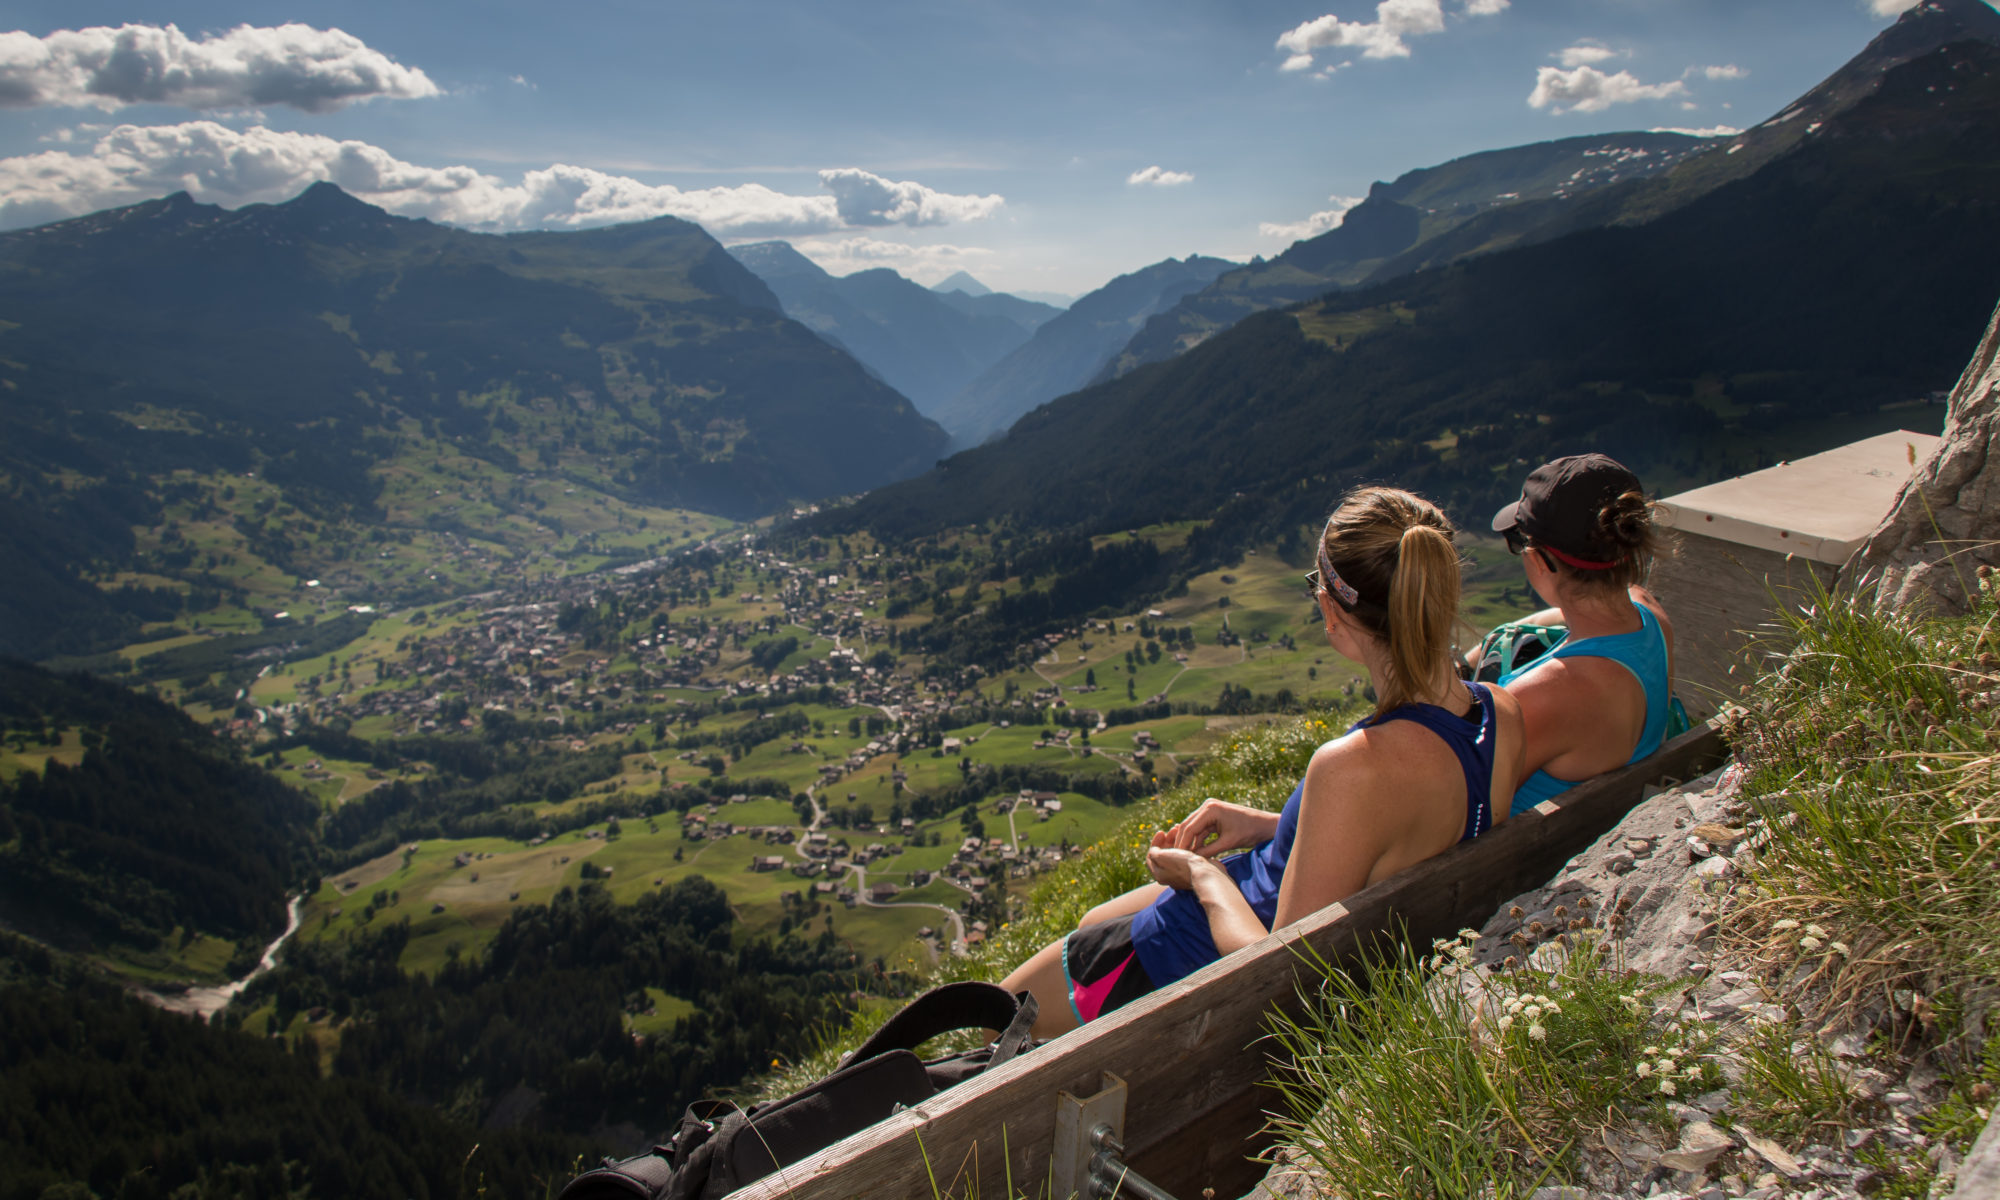
Our Daily Balance
Balance isn't something you find, it's something you create.

4-day “fastpack” on the Tour du Mont Blanc
I still remember the first time I read about the Tour du Mont Blanc or TMB for short. Inspired by our first through hiking adventure on the Inca Trail, I was down a rabbit hole, reading about other epic multi-day hikes. Along with the “W” in Chilean Patagonia, the TMB shot right to the top of my list of day dream worthy destinations. I knew we had to do it someday, but, given that it’s recommended as an 11 day hike, it would have to wait until we could dedicate an entire 2-week vacation to it. Or so I thought…

Fast forward a few years, and we found ourselves living just an hour’s drive from the TMB trail. Our first summer living in Switzerland was a busy one, full of visitors, travel and exploration. An 11-day through hike wasn’t in the cards, but the more we visited nearby Chamonix, the more we realized that the TMB can be completed in an almost endless amount of ways. There are some who complete the UTMB, a trail race in which the fastest competitors complete the trail in just over 20 hours, and others who make their way around the Mont Blanc Massif using a combination of buses and chair lifts. So, with a holiday weekend looming in early September, we decided to try our luck at covering the 105 mile trail in 4-days.
We covered a lot of ground in those 4 days, so this post will be a doozy – read on if you want to know more about…
- The TMB trail in general
- Our Method (fastpacking)
- Day-by-Day breakdown of how it went
- Our gear list – what we brought with us
A little about the TMB:
- The 105 mile trail (with 40,000 feet of vertical ascent) makes a giant loop around Mont Blanc, Europe’s highest peak.
- The trail passes through 3 countries – France, Italy and Switzerland.
- The “traditional” TMB hike starts and ends in Les Houches, a small French village about 10 minute’s drive outside of Chamonix, and walks counter-clockwise toward Italy.
- There is an incredible network of mountain huts all along the trail, most of which offer a bed and half-board (dinner and breakfast) in their nightly rate. Be sure to book in advance – many of the best huts are full during the summer season.
Our Method:
In order to cover the distance in 4-days, we’d have to move at a pretty good pace. This meant keeping our pack’s light was essential. In fact, we made it our goal to carry only one small hydration backpack each. These bags are made for trail running, and are built like vests, so they hug your body and minimize bounce. This meant we could run sections of the trail without feeling encumbered by our gear. In general our goal was to hike the uphills, and run the downhill and flat sections.
Full disclosure, we did not actually complete the full loop. During the summer, we had hiked and run the trails between Argentiere, Chamonix and Les Houches many times already, and quite frankly, the motivation to add them on at the beginning or end of the already long trail just wasn’t there. So, we decided to depart from Les Houches, and end our hike at a friend’s house in Argentiere. In total we would cover 96 miles.
We also failed to heed the tip I offered above about booking huts in advance, thinking mistakenly that September would be a lower month and therefore easier to find last minute accommodation. Because most of the huts we wanted to stop at were full, we had to alter our route a little bit to ensure we could find hotels in 3 of the bigger towns along the trail.

Day 1: Les Houches to Les Contamines
Day 1 was, by far, our shortest day on the trail. This ended up being a good thing, as it was also the only day we had to deal with afternoon storms. We set out in the morning from Les Houches, after a quick stop into the bakery for some Pain a Chocolates. Fuel in tow, we headed into the unknown. The trail between Les Houches and Contamines is less remote, and winds through many small villages and even through a few backyards. There were plenty of places to re-fill water, and some pretty views despite a moody sky. We made good time, covering the 11.4 mile distance in about 3 hours, and missing most of the storm. We checked into our hotel, grabbed some snacks and food for breakfast at the grocery, and enjoyed a relaxing night. Day 2, which would be nearly triple the distance, was looming.

Day 2: Les Contamines to Courmayeur
On Day 2, it was time to get serious. We had a border to cross, and 30 miles to cover. This day would also have the most vertical climbing. We set out in darkness, a bit before 7AM, and continued in a thick fog as the sun rose. The first 7 miles took us up, up and up, as we ascended to the trails highest point. Fortunately, as we began to descend back into the valley, the fog lifted and the views did not disappoint. We passed a few herds of sheep and cows, as we made our way back down to the valley floor. Unfortunately, around this time, Matt’s stomach also started to go downhill.

Unlike Day 1, the stretch of trail between Les Contamines and Courmayeur is relatively remote. There are a few huts along the way, but water fountains are much more scarce and you don’t really pass through any towns. This makes for beautiful scenery, but not a lot of bail out options for someone who suddenly finds themselves with a bad stomach. For the next 10 miles, we trudged along. I tried my best to keep Matt’s spirits high, and he did his best to put one foot in front of the other between breaks to puke off the side of the mountain. It wasn’t pretty, but by mid-afternoon, we made it across the Italian border and to the Elisabetta hut.

With the hours until grocery stores would close dwindling, we decided to split up for the final 10 miles. I left Matt at the hut with a sprite, and took off to cover the final stretch. After some flat running on the valley floor, the trail turned upward one last time. The struggle was real, but fortunately the views and the thought of a giant pizza kept me moving. I arrived in Courmayeur with the sun shining, checked into our hotel, and hustled over to the grocery store where I proceeded to purchase an obscene amount of snacks. Matt’s stomach had started to rebound during the final few miles, and we enjoyed an evening of pizza in bed and views of Mont Blanc from our balcony.

Day 3: Courmayeur to Orsieres
What’s better after a 30 mile day than another 30 mile day? Don’t answer that. Fortunately, Matt’s stomach bug seemed to have been temporary, so we only had sore legs to contend with as we set off toward Switzerland. This day was my favorite in terms of views. The sun was shining, and as soon as we made it above the tree line coming out of Courmayeur , we were rewarded with some of the most incredible scenery all along the trail. After the initial climb, the trail flattened out for awhile, and we jogged our way along a rolling trail that led to the Bonatti hut. If you have the chance, I highly recommend making a stop here. The hut was beautiful, clean and offered some of amazing views. We grabbed a blueberry tart, and espresso and a citrus soda (I ordered a a Sprite, the waiter pointed to the soda and I said “oh, it’s the same?”, to which he replied, “It’s better.”)

After a relaxing mid-morning break, it was time to hit the trail again. It was smooth sailing across a nice flat section of trail, until we hit a road block – an Italian shepherd moving his cows right along the main trail. After a failed attempt to pass them, we spent about 20 minutes trailing behind them, while the shepherd chatted to us in Italian, not seeming to care that we could neither understand nor respond to anything he said.
After making it around the cow-train, it was time to head back up. While the total elevation gain was less than Day 2, there was still one more big climb between us and the Swiss border. Perhaps more demoralizing than the climb itself, was the fact that it came off the back of a long descent back to our starting elevation. Such is the TMB.
The trail up to the Grand Col Ferret, the high point of Day 3, was much busier than previous sections and seemed to be frequented mostly by day hikers. When we reached the top, it was easy to see why this was such a popular trail, with views in every direction. We took a short break to refuel and take in the views, before starting another long descent into Switzerland. The downhill was gradual, and we were able to make good time running past a few more huts, and startling a few hikers (“They need bells on them!”).

From there we passed through the Swiss town of La Fouly, where we split up again for the final, flat, 7 miles. Despite making good time jogging through the mostly flat trails and some stretches of road, when I arrived at our hotel in Orsieres, Switzerland at 5:02 PM, I was informed by the man working the check in that all the grocery stores had closed for the weekend at 5PM. We were back in Switzerland after all.
It’s worth saying that Orsieres is not actually on the TMB route. Because hotels in Champex-Lac, the main town along the actual route, were sold out, we had to divert slightly into Orsieres. If possible, I’d recommend using Champex-Lac as your stopping point. The town seemed a bit more lively, has better views and is right along the route.
After wandering around in search of a restaurant where we could get something quick, we eventually ended up back at our hotel, where we sat alone in the hotel’s restaurant, scarfed down 2 more pizzas and convinced the hotel staff to leave a few croissants out for us to take in the morning given we had depleted our snack reserves and breakfast wasn’t served until 9AM.
Day 4: Orsieres to Argentiere
The final day. 18 miles stood between us and the end of our tour. Or was it 24 miles? Details…
The day started with a long slog up to Champex-Lac, during which we cursed ourselves for not booking a hotel earlier and thus avoiding this early morning climb to get back on the trail. Once we made it to town, though, the bakeries were open so we grabbed some pastries and continued along our way.
From here, we were rewarded with more climbing and more views. After a relatively steep section, we were above the tree line and the next several miles were pretty flat, and skirted us around the side of the Massif, giving us expansive views of the Swiss canton of Valais. We descended into the town of Trient, famous for it’s pink church, stopped to refill our water, and readied ourselves for the final climb of the tour.

We made it to the top of the climb with high spirits, but it was on the descent that things began to unravel a bit. Our map of today’s route showed 18 miles and so far, our estimates had been pretty spot on. As we set out this morning, though, I had a feeling we might have mis-calculated something based on the segments we had to cover. Unfortunately, 17 miles in, we realized my feeling was correct as we were still 7 miles from our final destination.
While I tried to rally us by reminding Matt that the last segment was downhill and flat (we could be done in no time if we jogged!), his legs weren’t having it. So, miles 88-95 were a nice, slow victory walk across the valley floor. It might not have been the ending we wanted, but after deciding to do the trail in 4 days on a relative whim, it was probably the ending we deserved. All in all, despite some physical pain along the way, we stepped off the trail feeling satisfied and energized by the experience.
While the 4-day version of the trail might not be for everyone, I would highly recommend this hike. There are so many ways to piece together the segments (or just do a portion of the trail) so it’s easy to adjust based on the amount of time you have and your level of enthusiasm for long hikes.
While building up our fitness level to complete the trail was one thing, perhaps the biggest challenge was pairing down our gear so we could be as fast and light as possible. Here’s what we brought on the tour:
- Salomon hydration vests – I brought the 12L Adv-Skin vest, and Matt carried the 15L version
- Soft-flask water bottles and/or hydration bladder
- Black Diamond Trekking Poles
- 2 pairs of running shorts
- 2 dri-fit t-shirts
- 2 pair lightweight trail running socks
- 1 pair of running tights (we had great weather, so I never wore these)
- 2 sports bras
- 4 pair underwear
- 1 long sleeve baselayer
- 1 pair lightweight pants (these pants are my go-to for travel, and throwing in a bag just in case!)
- 1 lightweight running rain jacket
- 1 puffy jacket (could have gotten by without this, but was helpful for night time)
- Trail running shoes – my current favorite are the La Sportiva Akasha’s
- 1-day’s worth of snacks (you can stop at grocery stores along the way to re-stock)
- contact lenses & glasses
- small travel brush
- ziplock bags – to carry snacks, organize/compress clothing, and keep things dry if it rains
- toothbrush/paste
- running gloves
*clothing that I brought, Matt brought very similar items, minus the puffy jacket, sports bras and tights
Happy Trails!
Monte Rosa Spaghetti Tour
- Gran Paradiso
- The Triple Crown
- Alps, Haute Route Ski Tour
- Austria, Otztal Ski Tour
Swiss, Bernese Oberland Ski Tour
- Italy, Gran Paradiso Ski Tour
- Tour du Mont Blanc Trek
- Dolomites, Alta Via 1
- Walkers Haute Route
- Tour Du Mont Blanc 11 Days
- Tour du Mont Blanc Highlights
Haute Route Trek Guided 11 Days
- Ben Nevis: Skills & Climb
- Toubkal Summer: Prep Peak
- Toubkal Winter: Prep Peak
- North Wales: Mountaineering Intro
- North Wales: Alpine Prep
- Chamonix: Off-Piste Skiing Intro
- Chamonix: Ski Touring Intro
- Chamonix: Hut Ski Tour Intro
- Chamonix: Winter Alpine Skills
- Chamonix: Ice Climbing intro
- Tailor-Made
- Better Business
- Get In Touch
- Build an Adventure
Self Guided Treks: Tour du Mont Blanc
Tour du mont blanc fast packing 6 days.
This 6 day self-guided version is specifically designed for experienced trekkers who want to go at a fast pace. Expect to cover distances of up to 30 km per day with 2000m of elevation.
Adventure Snapshot
5 Nights, 6 Days
Start Location
Les Houches, Chamonix
June - September
From €949
VIEW GALLERY
FRANCE, SWITZERLAND & ITALY / 5 NIGHTS / 6 DAYS
This 5 night / 6 day version of the Tour du Mont Blanc trek is an incredible opportunity to completely immerse yourself in the mountains and enjoy the natural beauty of the valleys that surround western Europe’s highest mountain. The trek offers an unusual variety of spectacular scenery and varied walks and you are sure to come away from this trek refreshed and invigorated, if a little creaky at the joints. The route crosses three borders (France, Italy and Switzerland) over 6 days, traversing beneath huge glaciers, and meandering through beautiful alpine meadows and picture-book villages. That's right, this is a truly memorable journey and one of worlds classic long-distance hiking routes. This 6 day self-guided version is specifically designed for experienced trekkers who want to go at a fast pace. Expect to cover distances of up to 30 km per day with 2000m of elevation. Not sure whether you're ready? No problem. Take our Tour du Mont Blanc Trek 'Readiness' test or join us on our Tour du Mont Blanc guided trips: Take our Tour du Mont Blanc Trek 'Readiness' test
Learn more. Download our guide here.
Enter your details to download the tour du mont blanc fast packing 6 days brochure.
Yes, I consent to be signed up to the Adventure Base newsletter & accept the privacy policy.

YOUR ADVENTURE STARTS HERE
Who is this for.
This version of the Tour du Mont Blanc Trek is only suited to very fit hillwalkers, capable of trekking for multiple days carrying a reasonably heavy rucksack for long distances. You follow footpaths each day and the terrain is very hilly. You can expect to do up to 2000m ascent and descent per day. You stay in a mixture of mountain refuges, gites and auberges during the trek, which all provide basic but comfortable lodging and good food. This helps keep your packs fairly light carrying only snacks, clothing and essentials.
It might seem like a lot to take in so if you're not sure if you're ready.. No problem. Take our Tour du Mont Blanc Trek 'Readiness' test or join us on one of our Tour du Mont Blanc guided trips: Take our Tour du Mont Blanc Trek 'Readiness' test
Adventure Overview
Guide Ratio
Self Guided
You have some previous experience in the outdoors, whether that’s hiking, skiing or climbing. You will either be starting to venture into more technical terrain or slightly more 'aggressive' environments. Let's dial it up!

ENVIRONMENTAL RESPONSIBILITY
Great news! Your place on this adventure is carbon offset along with our footprint in creating it. To learn more about what we're doing head to our 'Better Business' page.
See real footage of previous expeditions

The Tour du Mont Blanc Trek
Stunning views and great memories. This is the Tour du Mont Blanc Trek.

What is Self Guided Trekking?
Olly and Charlie discuss what a self guided trip looks like.

Beginner Hikes Tour Du Mont Blanc
Check out Dave’s experience on the Tour du Mont Blanc with us.

Omar's Trip
A snapshot at Omar’s experience on the trails with us.

Meet The Team
Introducing our crack squad of mountain lovers and adventure junkies. We spend most of our days plotting, planning and building some of the very best trips out there for you all to enjoy.
EQUIPMENT REQUIRED FOR THIS TRIP
Please note this is a guide and you may be required to rent or purchase last minute equipment on arrival dependent on the weather and changes in itinerary.
For the full downloadable Tour Du Mont Blanc Trek kit list please click here .
Hiking shoes / Trail Shoes
Good grip and ankle support is recommended
Softshell Jacket
Light technical jacket, ideally with a hood.
Lightweight fleece
Something light and thin.
Thermal Tops
Keep them light and thin.
Tech T-Shirts
Highly breathable, lightweight synthetic technical t-shirt.
FULL KIT LIST
Click the link in the text above to find the full kit list
We had an amazing experience planning the TMB with Adventure Base. Everything went well before and during our trip. Great support from their side. Filipa Self guided Tour du Mont Blanc
The direct, face to face meetings with both Beth Gavoille and Charlie Krarup left me feeling that they each genuinely wanted to understand my needs, wants and concerns and would do whatever they could to assist me as much as possible. I never felt that I was simply a customer in a financial transaction with them but rather that they authentically cared about me. You truly felt that you were being listened to. Raymond Self guided Tour du Mont Blanc
Booked our 11 day self guided tour du mont blanc trek with adventure base who were great from the outset. From prior to booking in answering all of our questions, keeping us informed throughout the booking process all the way through to being readily available to answer any questions and provide alternative gpx and information on varient routes we wanted to take. Incredible team. Thank you Zena Self guided Tour du Mont Blanc
7 Day Self-guided TBM was an amazing trip. AB planned everything exceptionally well. No issues. I will use them again for my next trip. Steven Self guided Tour du Mont Blanc
5 stars for the Adventure Base team! We are so pleased with our self-guided 9-day Tour du Mont Blanc trek through Adventure Base. The company had clear communication with us the whole way- from making our itinerary, checking in before with left the US, checking in once we got to Chamonix, and then while we were on the trail as well. They helped us chose a different route mid hike, making us feel safe and supported. They also did a lot of small things that went a long way- holding our luggage + dropping it off at our hotel to be ready for us once we were done hiking, providing us with digital + paper maps, a mini trail first aid kit and buffs. We are so thankful to have used them! Elizabeth Self guided Tour du Mont Blanc
The Adventure Base team was a complete pleasure to work with - friendly and knowledgeable. The team was super responsive from start to finish (from planning phase and throughout our trek) providing great advice, logistics and support. We will use AB again - 5 stars!! Dino Self guided Tour du Mont Blanc
We did the TMB with adventure base- family with 2 teenagers. We honestly could not have asked for a better organised self guided tour- the accommodation, bag transfers, food and the communication by Adventure base were amazing. Only trumped by Mother Nature- what a beautiful and bucket list walk. Olly, Beth and Virginia were superb and we highly recommend this tour company. Ginny Self guided Tour du Mont Blanc
We had a spectacular trip - and Adventure Base was a big reason why. The staff was proactive before the trip, providing advice on packing and IMPORTANTLY on weather and proper equipment (ie micro-spikes and poles) to make us safe and comfortable. All the staff were knowledgeable and responsive to all our many questions during the Tour. It was like having a personal guide OFF the mountain - a prefect solution as we wanted to hike on our own but wanted expert advice. thank you! Betsy Self guided Tour du Mont Blanc
FINER DETAILS
Your adventure package .
The trek begins in Les Houches at the Bellevue cable car in the Chamonix valley. Typically people will arrive the night before and overnight either in Les Houches or overnight in Chamonix and take the train from Chamonix to Les Houches in the morning to start the hike. If you would like us to book your accommodation for the first night please ask.
What's Included?
What's not included.
- Airport transfers (approx €50pp each way)
- In resort travel (bus / lifts / trains)
- Lunches, snacks and drinks (approx €15 a day)
- Luggage transfers (approx €35 a day)
- Additional nights before, during and after your trip (can be added on request)
- Travel insurance (required)
WHAT TO EXPECT FROM THE ACCOMMODATION
We know the importance of having comfortable accommodation on this trip. After a long day of trekking it's vital to have a comfortable bed and good food to enjoy in a scenic location. We've handpicked refuges and other mountain accommodation along the way that we're sure you're going to love. (A single room supplement is available where possible, please request this far in advance)
ON THE TREK
The majority of the accommodation on the trip will be in dormitories and / or small shared rooms. You can upgrade in some of the accommodation options if requested in advance and based on availability.
Not included
Shared arrangements
5 Breakfasts + 5 Dinners

Immerse yourself in Nature
Adventure itinerary.
Here you'll find the full itinerary including distances (KM) ascents and descents each day and a rough estimate of how long it will take. Start point: Les Houches End point: Chamonix Length: 6 days Whilst we aim to stick to the itinerary below, accommodation in some of the locations may not always be available. In this instance you will be booked into a suitable alternative accommodation.
Les Houches - Val Montjoie
This itinerary takes the Bellevue cable car from Les Houches to the Bellevue Plateau & picks up the path for the Col du Tricot. After the Himalayan suspension bridge the route begins to gently climb until the spectacular Bionnassay glacier comes into full view. From here you can see the top of the Col du Tricot and it’s a steady climb up to the grassy saddle. Spend some time here to admire the views over the Miage Valley and far off the Col du Bonhomme. Spot Refuge Miage in the distant cluster of farm buildings way down in the valley below (a great stop refreshment stop if you have time). If you look carefully to your left, you’ll see a stone archway on the ‘smugglers route’ to Refuge Plan Glacier (see our adventure itinerary). The descent down is STEEP! Take it easy and use your poles. Reaching the valley floor follow the signs to reach Refuge Miage in just 5 minutes. This cluster of farm buildings in set in an idyllic rural setting and is charmingly French. The view of the Dômes de Miage (3600m) from the refuge is outstanding. After an initial short climb from the Miage Valley up and over to Auberge du Truc. From here it’s a long steady descent through the forest into Les Contamines. Have a leisurely lunch in this small French town before either choosing to walk along the river to Notre Dame de la Gorge or pick up the free shuttle bus (navette) outside the Tourist Office to Notre Dame de la Gorge where the trail heads out into the wild once more. Taking the free shuttle bus means the difference between the stated length & hike time above. Take a moment to visit the beautiful Notre Dame de la Gorge chapel next to the gushing water before setting out on the well marked path. Warning – the trail is VERY steep here along an ancient slabbed Roman road to Refuge Nant Borrant but pleasantly flanks the bubbling racing gorge for much of the ascent. Be sure to look out for the pont naturel sign leading to a natural arch on the river, just a minute from the trail. Cross the roman bridge to take in the rushing gorge below. After reaching Refuge Nant Borrant press for almost a further 3kms before reaching Refuge Le Balme. Approximate time and distances: 24.1kms / 2004m up / 1320m down / 6-7 hours trekking 14.9m / 1245ft up / 4330ft down / 6-7 hours trekking
Val Montjoie - Val Veny
Today you’ll make the climb over a whopping 3 mountain passes! Col du Bonhomme (2329m) and Col de la Croix du Bonhomme (2483m) where early in the season (late June – end of July) you can expect to cross snow patches and finally Col de la Seigne (2516m) the border between France and Italy. If the weather is fine take the alternative route just before Refuge de la Croix du Bonhomme via the Col des Fours. This spectacular variant leads you over a lunar like landscape before dropping into the Vallée des Glaciers picking up the trail at Ville des Glacier. Tip: take the 10 minute detour at the top of Col des Fours to the view point Tête des Fours – it is nothing short of spectacular and is the only point on the trek where you can see where you’ve come from and where you’re going to from a birds eye view – oh and the view of the Mont Blanc Massif is nothing short of spectacular as well! I advise stashing your rucksack behind one of the many boulders to simply float up to the view point! Note this route cuts out the hamlet of Les Chapieux. Never attempt this variant route if the weather is nothing short of perfect. If you’re continuing along the normal TMB route the well marked trail will descend all the way to the valley of to Les Chapieux, where you can stop for a welcome refreshment at the friendly Auberge de la Nova and carry on a further hour up the trail to Refuge Les Mottets. Or as we would suggest catch the navette (shuttle bus) which ferries you in 30 minutes to the parking area of Refuge Les Mottets (you’ll then have to walk down the hillside to the refuge in the valley bottom). Climbing the Col de la Seigne, your third and final col for the day, is a gradual affair with a couple of false summits promising the end. At the top if the weather is good you’ll see Mont Blanc again but this time from the Italian side. It’s now referred to as Monte Bianco! The view here is astounding. From the col it’s all downhill onto the wide, flat valley floor of Vallon de la Lée Blanche. Be sure to look out for marmots as you descend – they hang out along the rocky spine on the initial descent. It’s an easy descent to Refuge Elisabetta, a basic cavernous refuge, commanding an exceptional view perched on a spur of the Pyramides Calcaires, with not one, but two glaciers (Glacier d’Estellette and Glacier de la Lée Blanche) spilling down behind it. You are now in the Val Veny and you will either sleep in Refugio Elisabetta or head on the further 45 minutes along the ancient arrow straight Roman road to the picture postcard A frame Refugio Cabane Combal (below). Approximate time and distances: 25km / 1725m up / 1450m down / 7-8 hours trekking 15m / 5659ft up / 4757ft down / 7-8 hours trekking
Val Veny - Val Ferret
There are no cols to climb today however it’s easy to presume that this stretch is not demanding. Think again. This stage is one of my favourites hands down. The formidable wall of rock holding up the Mont Blanc Massif on the opposite side of the valley highlights our minuscule selves. Prepare to feel humbled. The trail climbs up the side of the V shaped, moat like Val Veni to the highest point of the day, the Mont Favre spur (2430m). With every step along the high balcony path, the sheer southern flanks of the imposing Mont Blanc Massif range rising on the opposite side, take your breath away. Whilst not particularly challenging, the deceiving nature of this balcony trail leads to you believe you’re almost there. Many times. During the peak summer weeks of July and August it is possible to take a gondola and chair lift from Maison Vielle down to Dolonne. From there it’s just a ten minute walk into the centre of Courmayeur. This is a good option for those with delicate knees – the descent into Courmayeur is brutal and in fact we would recommend this to anyone hiking in the peak period – you are not missing anything on this descent. Take a leisurely lunch in the Italian town of Courmayeur before the next ascent. We highly recommend Pizzeria Ristorante du Tunnel who serve the largest pizza we’ve ever seen! After lunch the climb is steep up to Refugio Bertone after which a gentle balcony trail traverses along to Refugio Bonatti – your home for the night. Approximate time and distances: 28.1km / 1663m up / 1895m down / 8-9 hours trekking 17.4m / 5456ft up / 6217ft down / 8-9 hours trekking
Val Ferret - Relais d'Arpette
Today you’ll climb over the Grand Col Ferret and cross into Switzerland! The gentle Swiss alpine meadows are in stark comparison to the jagged wild landscapes you’ve trekked through in Italy and France. The trail descends to the hamlet of Ferret and the town of La Fouly – a good place to stock up on snacks. La Fouly sits at the foot of two mighty mountains, Tour Noir (3, 836m) and Mont Dolent (3,823m) which incredibly is the tri-point where all three of the Tour du Mont Blanc countries, France, Switzerland and Italy’s borders meet! The route meanders easily through the valley past Swiss mountain pastures. Drink in the delightful scenes of rural life in Switzerland as you potter leisurely along this stage. There’s only one more up before you reach Champex-Lac, your home for the night is a beautiful little town next to a pretty lake. Nicknamed ‘Little Canada’ it’s not hard to imagine why – this beautiful lakeside town is surrounded by hills of pine and is genuinely a beautiful spot. It may be that you are pushing further up to the Refuge Relais d’Arpette – this is a lovely trail through the woods 45 minutes further on the on the variant trail. Approximate time and distances: 34.9km / 1636m up / 2035m down / 9-10 hours trekking 21.6m / 5367ft up / 6676ft down / 9-10 hours trekking
Relais d'Arpette - Tre le Champ
Today is a long day combining two variant stages into one. We must again make you aware that you cannot hike the Col du Fenêtre is the weather is less than perfect. It’s the most technical terrain on the entire TMB and unlike the rest of the trek, the trail is not marked well and can be lost. The boulder field just before the Col requires a lot of attention and trekkers need to be mindful of loose screw and rocks that dislodge easily and can be fatal to trekkers below. Set off super early though and you’ll be in for a treat. When you finally summit the Col you will feel a real sense of achievement – it’s the only place on the trek I’ve experienced other trekkers congratulating each other a real sense of camaraderie. The descent from the Col du Fenêtre is nothing short of astounding. Hairpin bends wind down the rocky descent with the incredible Trient Glacier trailing down beside the trail. This huge hunk of ice will mesmorise you during your descent and will surely be one of your unforgettable memories of this incredible trek. Once you reach the buvette you’ll cross the wooden bridge and start the uphill slog to Refuge Les Grands. The Tibetan style path carved out of the rock will leave you in awe. Stop at the refuge for a cold drink and press on high along hugging the mountain flank until eventually you’ll spot Trient far below and the Trient glacier disappears behind you. You’ll soon see Refuge Col du Balme with it’s iconic red shutters – a tiny dot on the Col du Balme saddle – another frontière marking the boundary between Switzerland and France. Approximate time and distances: 28.8km / 1850m up / 2113m down / 8-9 hours trekking 17.8 / 6069ft up / 6932ft down / 8-9 hours trekking
Tre le Champ - Les Houches via Lac Blanc
Trekking the north flank of the Chamonix Valley, this itinerary divides stages 10 and 11 of the Tour du Mont Blanc with an optional detour up to the infamous Lac Blanc. Hiking through the Aiguille Rouge National Park, you’ll have a good chance of seeing marmots, chamois or bouquetin. If you want to complete the entire Les Houches to Les Houches circuit though you’ll need to set off uber early today – it’s a challenging day ending with a knee crunching descent into Les Houches. It may be too much for some and if this is the case there’s the option to take the Plan Praz cable car down to Chamonix centre rather than pressing onto Les Houches. It’s a 2 hours climb up to Lac Blanc for fast packers. The route climbs steadily until you reach the infamous TMB ladders – a series of 13 ladders and metal ware built into the rock. It’s the most exciting physical aspect of the entire Tour du Mont Blanc. At the Tête aux Vents, a large cairn (2132m) which borders the national park you can choose to detour up to Lac Blanc or traverse along the trail to La Flégère. Lac Blanc (2,352m) has an almost mythical stature – however if you’re not staying overnight at the refuge you’ll most probably experience the hoard of day trippers who access the lake via the cable car and chair lift. It’s still worth a look but downgrade your expectations. The magic here happens when the day trippers leave late afternoon. If you have an extra day in your schedule it’s worth booking Refuge Lac Blanc and experiencing the incredible serene peace that descends each evening. It’s worth noting that today you’ll have a number of exits available to you on the trail. If you need to cut your trip short and leave for home today you can either take the gondola down from La Flégère to the village of Les Praz (10 minute bus ride to central Chamonix) or continue along the balcony route until Plan Praz and take the Plan Praz gondola down to central Chamonix. Longer options are taking the Le Brévent cable car up from Plan Praz and then hiking down to Les Houches, or the longest option to trek the entire trail to Les Houches. From Refuge Lac Blanc follow the balcony trail past La Flégère and continue to Plan Praz. The entire route along this balcon walk has incredible views of Mont Blanc weather permitting. It truly is astounding. Often it seems like a painted landscape it truly is surreal. Descend via the Plan Praz cable car to Chamonix centre or if you’ve still got energy – you’ve set off early and want to complete the entire circuit from start to finish you’ll need to continue onwards. The best way to do this is to take the cable car UP from Plan Praz to Le Brévent which gives again, insane views of Mont Blanc. The long descent from Le Brévent is hard on the knees but is beautiful with wild red and pink azaleas popping with colour. This area again is known for common sightings of chamois. Expect to fall into Les Houches exhausted but elated. You did it! The entire TMB in 6 days is an incredible achievement! Approximate time and distances: 24.5km / 1800m up / 2187m down / 8-9 hours trekking 15.2m / 5905ft up / 7175ft down / 8-9 hours trekking
Are you ready?
Our adventures are attributed a difficulty level from A to E. This Tour du Mont Blanc Fast Packing 6 Days trip is rated Level B, for those with some prior experience We recommend you only book a trip that reflects your ability.
For beginners and newcomers
- You’re not quite sure where to start but you’re hungry for an adventure
- Little / no prior experience
- Shorter time duration
- No technical skills required but keen to learn
- Basic level of fitness
More your level?
For those with some prior experience
- You have some previous experience in the outdoors, whether that’s hiking, skiing or climbing, and are keen to build on that
- You will either be starting to venture into more technical terrain or slightly more challenging environments
- Some basic skills
- Moderate fitness
Think you've got this?
This trip is at this level
For accomplished adventurers
- You enjoy challenging yourself physically and mentally
- You’re comfortable on multi-day adventures and you call yourself an avid adventurer
- You're not quite George Mallory but you subscribe to his 'because it is there' attitude
- Strong level of fitness
For the pros
- You're ready to test your skills on the next challenge
- You're comfortable in most types of alpine environments
- Some level of technical skills
For the experts
- You’ve been on multiple adventures and have built up a solid skillset to tackle most challenges out there
- Good technical skills and knowledge
- Experienced in alpine/mountains environments
- Very high level of fitness
View less challenging trips
Skills & climb: ben nevis.
Tackle Britain's highest peak in the snowy winter months away from the summer crowds. Spend 2 epic days on the west coast of Scotland as you take on the challenge of climbing Ben Nevis in winter conditions, with crampons on your feet and an ice axe in your hand. The perfect introduction for hikers with a good level of fitness who are looking to dive into mountaineering.
January - March
€700.00
The Tour du Mont Blanc Self Guided Trek: Custom Trip
The Tour du Mont Blanc is a 170 km trekking trail through France, Italy and Switzerland. Circumnavigating Western Europe’s highest mountain, Mont Blanc, it is one of the world’s most famous classic multi day treks and is on every serious hiker’s bucket list.
The Tour du Mont Blanc Self Guided Trek: Fully Booked
Prep peak: toubkal summer.
Enjoy a Moroccan cultural rollercoaster ride in the warmer summer months, from the bustling streets of Marrakech to the wild and quiet Atlas Mountains in just 5 days. Climbing Toubkal, the highest peak in North Africa at 4167m, is challenging but suitable for newcomers to trekking mountains. The combination of mountain and culture on this trip is what makes it extra special. This trip runs during the 'summer season'.
May - October
€590.00
Climb Gran Paradiso
Gran Paradiso (4061m) is the highest peak that lies entirely in Italy. Although an impressive and imposing mountain, it is a feasible objective if you have a high level of fitness.
June - August
€1050.00
This trip is based out of Zermatt in Switzerland and is aimed at climbing a variety of 4000m peaks in the Monte Rosa range whilst developing your mountaineering experience. Learn new alpine skills or refresh old techniques and climb some epic peaks in a stunningly beautiful location. What’s not to like?
July - August
€3150.00
Intro Hut Ski Tour – Chamonix
Introducing keen and competent off-piste skiers to the world of hut ski touring. This is great preparation for our hut to hut ski touring trips and an important confidence builder. You will learn the essential skills required for ski touring over multiple days and experience staying in a mountain hut.
February - March
€1250.00
The Haute Route trek is one of the world’s great multi-day treks. The route links two world famous alpine mountains, Mont Blanc in France and the Matterhorn in Switzerland.
July - September
€3250.00
Mont Blanc Turbo
Climb Mont Blanc (4808m) the highest peak in Western Europe. It’s a beautiful, imposing and highly sought after summit that sits at the roof of the Alps on the border of France and Italy. If your adventure juices are flowing, then keep on reading...
June - July
€2650.00
Climb the Triple Crown
Climb the famous Triple Crown of the Alps. Mont Blanc, Matterhorn and Eiger. A lifetime mountaineering achievement, all possible within 10 days with the right fitness and preparation.
€12500.00
The Bernese Oberland ski tour is a stunning link up of high altitude mountain huts and peaks in the wild Bernese Oberland region of the Swiss Alps. The ski terrain in this region is suited for those with previous ski touring experience, who are looking to progress to the next level and discover some high altitude peaks and glaciers. You can expect long ski tour days, comfortable huts and big ski descents.
€1950.00
Mera Peak at 6476m is the highest trekking peak in Nepal. At this altitude the oxygen content of air is less than half of what it is at sea level. It is located in the Himalayan mountain range in Nepal, a little east of the main Khumbu valley on a much quieter trail. Book this trip and receive a free sleeping bag and duffle bag for your adventure.
Spring & Autumn
€4940.00
The Eiger is one of the most sought after summits in the Alps and a formidable challenge for any keen mountaineer. Located in the Bernese Alps in Switzerland, this is a major Alpine classic steeped in historic tales of heroic climbing. On this trip we climb via the Mittellegi ridge. Got what it takes?
€4450.00
READY TO TREK THE TMB?
We hope you've found all the information you need above, but if not don't hesitate to get in touch. If you're ready to book, follow the link below.
Account sign in
Don't have an account? Sign up
By signing in, you are agreeing to our Terms of Use and Privacy Policy.
Create your profile and get first access to the very best of our products, inspiration and community.
By creating an account, you are agreeing to our Terms of Use and Privacy Policy.
Already have an account? Sign in here
Reset your password
Enter your email address below, and if an account exists, we’ll send you a link to reset password.
Know your password? Return to sign up
- Where to stay – Chamonix
- Geneva Airport to Chamonix
- Tour du Mont Blanc public transport
- Itineraries
- Tour du Mont Blanc Refuges
- Refuges ebook
Tour du Mont Blanc packing list

One of the most important factors in preparing for the TMB is considering in detail your Tour du Mont Blanc packing list. With a recommended pack weight of no more than 10kg, trust me every ounce matters. Lightweight has never been so literal. Packing the essentials is crucial – anything else could well be the straw that broke the camel’s back.
Of course many Tour du Mont Blanc hikers choose to ferry bigger bags along the route with luggage transfer companies, of which there are many. So for those of you where minimal packing is just not feasible, luggage transfers will be your knight in shining armour and in this case your Tour du Mont Blanc packing list might be a little more luxurious than the norm. Note though that not all refuges, understandably on this high altitude terrain, are accessible to vehicles – so there will always be days when your day pack is all you will have access to for a couple of days. Another factor is cost. Luggage transfers ain’t cheap.
Our Tour du Mont Blanc packing list includes trekking kit, refuge essentials, safety inclusions and first aid requirements. Many of the items on are our packing list, most serious hiker will already own. However, we’d serious urge you to consider upgrading any existing kit to more lightweight versions to lighten your load on your TMB – don’t underestimate the elevation gain on the Tour du Mont Blanc. It’s serious. When you’re hiking your second 1000m col in one day, you’ll be wishing you hadn’t brought along that newly released novel from your favourite author!
This post contains affiliate links which help fund this website. When you click on the links to purchase gear, I may get a commission – without costing you anything more. Thank you for supporting this website.

Tour du Mont Blanc Packing List
Weight restriction.
I’ll say this again, just in case you didn’t get it the first time. Your packing list for the Tour du Mont Blanc needs to be restricted to the absolute minimum. Just essentials. Unless you’re intending to arrange luggage transfers, you’ll be carrying all your kit on your back.
Every single step.
NO DAY PACK SHOULD BE OVER 10KG WHEN TREKKING THE TOUR DU MONT BLANC
With an average of 7-9 hours on the trail each day combined with serious daily elevation gain (the whole TMB trail is 1km higher than Everest!) anything superfluous is going to become dead weight.
You need to be strict.
Don’t underestimate how much even 1kg will add to your pack weight. I packed three times, pairing down repeatedly until the barebones of the essentials lay before me. It’s not easy! And I still definitely took more than I wished I had once I was on the trail.
The photo above is all of our gear and equipment for three of us (2 adults, 1 child) for hiking half the Tour du Mont Blanc in July.
Below I’ve detailed what essential items you’ll absolutely need to take with you on your Tour du Mont Blanc hike, as well as a complete packing list below. There are a few items that you may not have thought of.

The right gear
There’s no such thing as bad weather right. Only bad gear.
My first advice is to get the right gear. The Tour du Mont Blanc is challenging enough without being ill equipped and poor quality outerwear and kit will be enough to break you. Invest wisely in the main piece of kit. Numbers 1 and 2 being footwear and backpack.
You will require a 25-30 litre backpack with chest straps and hip straps if you aim to stay in refuges. Hikers camping the TMB will need a 50-60 litre pack.
Children will need to carry their own (smaller) backpacks. Make sure kids have proper backpacks with comfortable straps, not the plastic ones which don’t have the all important chest and hip straps.
If you’re buying a new backpack specifically for your TMB adventure, make sure you test it out beforehand. It’s a good idea to train with all the kit you’ll be using on the trek, so my advice is to buy your backpack at least 3 months before so you can wear it during your training hikes. It will soften and become more comfortable over time and you’ll know your way round it well before you embark on the TMB.
If you are buying a new backpack, look for one with an in-built rain cover. It will save you having to buy a separate one or having to take thick black bin liners to cover your pack in the event of rain on the trail. We can’t recommend Osprey backpacks enough.

Layering is vital to staying comfortable on the Tour du Mont Blanc. Layering brings versatility so you can easily adapt your clothing to changing weather conditions on the route. You need to be insulated, ventilated and have wet weather protection – all with minimum weight!
Choose synthetic quick drying fabrics over cotton. These will wick away sweat and will dry faster should you get wet, plus they’re much lighter.
RELAXING IN THE REFUGES Make sure you take a change of clothes dedicated to refuge only use. You won’t want to put back on a sweaty, damp top or use one of your fresh technical hiking tees. Once you’ve reached the refuge, you’ll want to shower and change pronto. A great tip is to use a pair of thermals to relax and sleep in. That way they’ll be in your bag should you hit cold, wet weather and need to quickly layer up.
You’ll need a good waterproof jacket and trousers, as well as a fleece that packs down well. Pack 1-2 pairs of hiking sh o rts (I’d recommend 1 pair of shorts & 1 pair of zip off hiking trousers) and 2-3 technical hiking t-shirts.
Waterproof jacket
A good quality waterproof, breathable, windproof jacket is worth it’s weight in gold …. if it’s lightweight. I favour Arcteryx but yes they cost the earth! Anything gortex is going to keep you dry.
Make sure it’s lightweight – the temperatures on the Tour du Mont Blanc can hit 30 degrees even in the high mountains so it might well just be buried in your backpack the entire time, unless your summiting one of the cols and then you might need it as it tends to get chilly. However, bad weather can sweep through the mountains quickly. In the summer the weather system change in the afternoons with storms quickly brewing. It’s best to always set off early and try to get to your refuge early to mid afternoon to avoid the storms.
Other seasoned TMB hikers swear by packing a lightweight collapsible umbrella or a hiking poncho also works well if the weather forecast is looking dubious for some of your hike. Decathlon do cheap ones that work well.

Never scrimp on socks. Your feet are key to the TMB.
Prepare them. Protect them.
Buy good quality wool blend socks and pack enough to enable you to have a clean, dry pair everyday. Obviously if you’re doing the whole trek, you’ll need to wash some along the way, but make sure you have at least 4-5 pairs of socks. Keeping feet dry and warm is pivotal in preventing blisters. Something you want to avoid at all costs!
We’ve also recently discovered the amazing 1000 mile sock range. This brand are big into anti-blister technology and their ingenious double sock system is perfect for long distance treks. Double-layer socks can prevent blisters by reducing friction and wicking away moisture. The inner sock stays with the foot whilst the outer foot moves with the shoe to eliminate friction with the skin.
Tour du Mont Blanc footwear
(i) hiking boots.

You will need good quality hiking boots to trek the Tour du Mont Blanc. Don’t even think about doing it in trainers, although some on the trail swear by trail running shoes which are built for impact, however still run the risk of ankle injury.
Boots should have good ankle support, a sturdy vibram like sole and be waterproof.
I’ve trekked this trail in my trusty Danner hiking boots (read my review here) which are good for warm weather hiking, although not massively waterproof. I was lucky and the weather was kind to us during our TMB trek, however I could have been slopping around with wet feet if the weather hadn’t played ball.
I’ve also worn a pair Salomon hiking boots which were super lightweight and waterproof which I can highly recommend. Read my review here .
Invest in a good pair of hiking boots for your children too. I know it’s costly. Kids are costly full stop right. And boy those small feet just keep growing. But seriously for the Tour du Mont Blanc your kids will need comfortable, well supported and broken in boots. Make sure they are well worn in before setting off – your dream of trekking through the Alps with your family will certainly become a nightmare if not. Comfortable footwear is a must. Try picking up kids hiking boots in the sales at the end of summer or after Christmas six months before doing the trek. Remember to size up one size.
(ii) Flip flops or refuge slippers
One of the rules in the refuges is that hiking boots are kept in the boot room or allocated area. This is regardless of whether they are muddy or not. The refuge provides indoor shoes for hikers to where inside the refuge. These are normally crocs and they provide a variety of sizes.
If you don’t wish to use the inside shoes the refuge will provide then bring with you something suitable which will be lightweight & comfortable, for example flip flops or light shoes. I’m never too fussed about wearing the crocs, even if they have been used by lots of people (I’d rather save weight in my back) but my 65 year old mother baulked at the idea & brought along a pair of soft shoes.
Trekking Poles

Trekking poles are essential for the Tour du Mont Blanc. Don’t even think about setting off without any. The extreme elevation gain and loss along the route is severe. Hiking poles will be your friend trust me.
The extra weight trekking poles offset from your knees and leg muscles is significant . Studies suggest that you can save up to 25% of energy using hiking poles. Who knows if that’s true. What is true is that people generally love or hate them.
When you have a heavy back pack on, trekking poles definitely help you keep your balance on uneven terrain, and having two extra anchor points is extremely helpful crossing streams or to keep your balance on a slippery patch of remaining snow (called névé ) on the trail.
It’s also proven that using hiking poles prevents hand swelling. The position of poles (keeping your hands above the heart) and the action of using the poles keep your arms moving constantly thus reducing swelling.
Collapsible hiking poles are the best for long distance trekking. They pack up nice and small & can be strapped onto your backpack when not in use. Using poles constantly can be annoying when you want to take a photo or eat a snack whilst walking for instance.
Which hiking poles would we recommend? Black Diamond Distance Z Trekking Poles are excellent quality, super durable and really lightweight. The Black Diamond Distance Z poles are made from aluminium so are a bit more hardy (& less expensive) than their carbon equivalent the Black Diamond Distance Carbon Z . I used Black Diamond Pro Trail trekking poles You can read my review here .
I would definitely recommend the Black Diamond First Strike trekking poles for children. Don’t buy them the expensive ones above. I bought a pair for my daughter locally in Chamonix (but you can buy them at a fraction of the cost on Amazon, see link above). These are brilliant value (compared to the price of adult poles!) and she loved them. They are lightweight (431g) aluminium poles with comfortable hand grips, very durable (very important with kids who thwack anything) and available in lengths 66-100cm. My daughter really felt the part on our TMB adventure with her new poles and I’m confident that it’s partly due to them that she managed to make it around the trail!
Hiking Crampons

Better to be safe than sorry, particularly if you’re hiking the TMB trail in June or July. Hiking crampons were a must for us trekking the Tour du Mont Blanc mid July. It might seem slightly over the top but trust me, it’s not.
Crampons are lightweight, so won’t add too much weight to your pack and will give you confidence, along with your trekking poles, to cross slippery patches of snow left from winter on the high mountain cols which can be fatal from a simple slip.
We bought Grivel Ran Crampons which worked a treat. They were easy to pop on over your hiking boot with wide rubber and velcro straps that secure the crampons nicely to your boot. We would highly recommend them. Buy the small pair for kids (my daughter was a UK size 4 & the small was an okay fit for her).
Sleeping Bag Liner

In all the mountain huts on the Tour du Mont Blanc trail, sleeping bag liners are mandatory. Either take your own or you can normally rent one for around €3 a night (check when you book).
Each refuge bed comes with a mattress (& sheet), a duvet and a pillow case with cover, however the linen will not have been washed since the last trekker so a sleeping bag liner is essential and warning, you will not be allowed to stay without one.
I always prefer to take my own and have a RAB silk sleeping bag liner (expensive but worth it – it’s so light you don’t even know you’re carrying it, plus silk is so comfortable to sleep in).
Read my review of RAB’s silk sleeping bag liner here.
It’s worth noting that cotton sleeping bag liners, whilst cheaper, are considerably heavier and so, particularly for the Tour du Mont Blanc, I would HIGHLY advise you to buy a silk liner. Anything to streamline your trek as much as possible. Trust me, you’ll thank me for it later!

If you are camping along the Tour du Mont Blanc trail, you’re going to be needing obviously some extra kit. Choose your tent with care. It needs to be as lightweight as you can afford. Remember you’ll be carrying it for 8-10 hours a day! Choose a good quality tent that will be robust enough to withstand any bad weather.
ELECTRONICS
Most of the refuges have electricity sockets to charge phones etc, however they are highly in demand! We suggest you bring a USB multi socket charger which will enable to you still charge your phone even if all the sockets are being used!
I would also advise bringing a power bank with you. Admittedly they do add to your weight but these handy, pocket sized gadgets will guarantee a fully charged phone which is a safety must on the Tour du Mont Blanc, to be able to track the trail on an off-line app such as Gaia to prevent getting lost, or in the event of an emergency to call mountain rescue.
Read more: why the Gaia GPS app is a godsend to hikers navigating the TMB
Read more: 10 safety tips to know before embarking on the Tour du Mont Blanc
(i) Passport
Don’t forget as you’re trekking into three different countries you’ll need to pack your passport in your backpack. Whilst the borders aren’t controlled officially with border guards on the high mountain cols, you still need to keep it on you.
(ii) Insurance
Make sure your travel insurance covers you for high altitude trekking. For many standard policies hiking is only covered up to 2,000 metres. The highest point on the TMB is on the Col des Fours and Fenêtre d’Arpette alternative routes which both reach an altitude of 2665m. The highest point on the traditional route is 2532m on the Grand Col Ferret.
When seeking insurance you will need to state what elevation you will be hiking up to. In most policies hiking to this kind of altitude will require an additional premium and maybe labelled ‘adventure sports’. If you have an annual travel insurance, call them to find out what you’re covered for – it’s important. Don’t even consider embarking on the TMB without travel insurance!
The Tour du Mont Blanc is not without it’s risks. Some of the trail is precipitous and if snow is on the trail, some areas can be difficult to negotiate with steep falls below. Note: if the thought of this scares you, make sure you hike the TMB in late Summer (end of July and August) when the snow patches (névé) have mostly melted.
Remember, something as simple as a sprained ankle may require you to be lifted out by helicopter. It’s at this point you don’t want to be worrying that your insurance might not cover you! Helicopter rescue is not cheap in the Alps!
For cheap multi-risk sport insurance which includes trekking take a look at Vieux Camper . It’s €25 per person or €70 for a family.
OUR COMPLETE TOUR DU MONT BLANC PACKING LIST
HIKING THE TRAIL
- hiking shorts x 1
- walking trousers x 1
- T-shirts x 3
- wool socks x 4-5
- waterproof jacket
- waterproof trousers
- fleece (that packs down well)
- thermal top & bottoms (can double as pyjamas)
- neck warmer/scarf
- hiking boots (well worn in)
- 30-35l backpack (or 50-60l if camping)
- trekking poles
- hiking crampons (if early in season)
- gaitors (if bad weather due)
- water bottle/camel pac (1.5-2.0l capacity)
- rucksack rain cover (if not built in)
- snacks/emergency food (biltong, nuts, chocolate, trail bars, real turmac)
FOR THE REFUGES
- sleeping attire (thermal top & bottoms)
- bed socks (optional luxury)
- fleece or down jacket (packs down well)
- beanie/warm hat
- a change of clothes to relax in (thermal top & bottoms)
- flip flops (if don’t want to use the refuge crocs)
- sleeping bag liner (recommend silk)
- phone charger (USB multi-charger recommended
- travel towel
SAFETY
- whistle (for each member of group, including children)
- foil blanket
- first aid kit (see below)
FIRST AID KIT
- antiseptic wipes
- antiseptic cream
- gauze & medical tape
- scissors & tweezers
- triangular bandage
- Compeed blister plasters
- arnica oil (for massaging aching legs & feet)
- anti – inflammatories (abrufen)
- pain killers (paracetamol/in france doliprane )
- rehydration salt sachets (we like dioralyte)
- kinesiology tape (to relieve pressure & pain)
- lip salve (SPF 50+)
- suncream (SPF 50+)
- toothbrush & travel sized toothpaste
- Any prescription medicine
- Foot salve (we like Scholls)
- Soap (we like a bar of soap)
- Travel size shampoo/conditioner
MISCELLANEOUS
- selection of ziplock bags (to keep things dry)
- large durable bin liner (if you need a cheap rain cover)
- small binoculars (optional)
- small foot massage ball (recommended optional luxury)
- packing cubes (to keep organised & reduce volume)
- waterproof map case
- book or kindle
- gaffer tape wrapped around a small pencil (great for preventing blisters if you feel friction
TIP: Packing cubes whilst not essential do make life super easy, particularly when you’re tired arriving at your refuge. Keep one cube just for your refuge stuff (relaxing/sleeping clothes, sleeping bag liner, head torch, eye mask, ear plugs, toiletries) and another for hiking clothes. Packing cubes make organisation in your backpack simple.
Further Reading...

RAB silk sleeping bag liner review
16 comments.

Well organised list of requirements. Thank you for sharing. Your experience shown through!

tourdumontblanchike
Thanks Doug. Enjoy the trek!

Thanks so much! Very helpful.

Material excelente. Muito obrigado

My dad and I plan to do the TMB next year. However, we are planning on wild camping for the duration. We aim to complete within 5-6 days, approx 15miles or so per day. What’s the approx. distance between each village to restock with food until the next one? I wouldn’t want to be carrying a weeks worth of food, so plan to restock along the trial. I tend to just have stuff that I can just add boiled water too. Water-wise, I’ll be relying mainly on streams etc using my water filter. Will flavor it when required using the SIS electrolyte tablets.
Hi Michael you’re actually not allowed to wild camp unless you are above 2500m in Italy and in Switzerland it is prohibited so in these countries you would need to stay in a proper campsite. France allows you to ‘bivouac’ from dusk to dawn so you can wild camp throughout the French sections. There is a bivvy spot next to Refuge Miage on variant stage 1, another one just after Refuge Nant Borrant on stage 2 as well as outside Refuge Le Balme on stage 2 and then a lovely wild spot just before the top of the Col de la Seigne on stage 3. Mid way through stage 9 you can camp at the top of Col de Balme and then just under Lac Blanc at Lac Cheserys (you cannot wild camp at Lac Blanc). I am not sure of the approximate mileage between each village. You can work that out from using one of the guidebooks. There is plenty of water on the trail however take extra water for stages 10 and 11.Best wishes. Mags

Can you please recommend a store in Chamonix who rents collapsible hiking poles?
Hi Scott, SNELL SPORTS on the main pedestrian road Rue Dr Paccard rents poles (downstairs), or RAVENEL SPORTS near the Alpina Centre (downstairs). TECHNIQUE EXTREME is a cheap sports shop near the Aiguille du Midi (on Avenue Aiguille du Midi) – I’m sure they also rent poles.

A great article and a thorough list to walk MB. I have already added a couple of items to my list when I will finally get to walk MB in July 2023 after being cancelled in 2020 because of Covid. One other item; Your comment that studies have shown that using hiking poles “suggest that you can save up to 25% of energy using hiking pole” is an incorrect statement. One doesn’t “save” energy when using trekking pole; they simply allow a hiker to use their shoulder and upper body muscles to push off while reducing the leg muscles. The TMB is a physical challenge so using trekking poles to spread the work load is vital to success. Don’t leave home without them!
Absolutely Alan. Thanks for your input – you are absolutely correct, thanks for adding this. Have a fantastic trek in July – it will be worth the wait!

Thanks for this great article that really helps figuring out how feasible the TMB is.
Most of the articles I’ve been reading refer to the month of July as the month when the hike happened. Any idea of how is it in September when compared to July?
Hi Norberto. The trail opens on 14 June each year until September. Mid June to the first week of July normally has snow on the trail so extra precautions are necessary. I would say now July, August and the beginning of September are now peak season. Many of the refuges close mid September but I’ve noticed many are staying open longer. September is a great time to trek – I often trek solo in September as the weather is more settled (none of those broody afternoon thunderstorms of the summer) and there are less people on the trail.

Do you need protection from rodents etc for your food ans scented items while backpacking and tent camping along TMB
Hi Cathy. Not particularly no I’ve never used anything and its never been a problem. Have a great trek!

Hi, Thank you for the details and very well written article! My son & me are traveling to do partial TMB from Les Houches to Courmayeur in 6 days. starting at Jun 11 until Jun 16. My son will be 13 year old, what is the recommend weight for him to carry? when will be the time to book for refuge?
Thanks in advance! Yehuda
Hi Yehuda June 11- 16th is VERY EARLY to trek. The trail hasn’t officially opened at this point. Have you read my latest post on trekking early? https://tourdumontblanchike.com/trekking-the-tour-du-mont-blanc-in-june/ Many people don’t realise there is still snow on the trail in June. I would not be trekking with my 13 year old so early. My daughter had an 18l backpack when she hiked at ages 10 and 11. He could probably carry one a bit bigger say a 24l. We say no more than 10kg for an adult so you can use your judgement here. There refuges are beginning to open now for 2024 reservations. If you would like more advice and help on planning I offer zoom consultations. As I said I would not be trekking during June 11-16th. Best wishes. Mags
Leave a Reply Cancel Reply
Save my name, email, and website in this browser for the next time I comment.
This site uses Akismet to reduce spam. Learn how your comment data is processed .
Dorm or private room? Your guide to which refuges offer what accommodation
Tour du mont blanc self guided v guided, tour du mont blanc hike, privacy overview.
Ultimate Tour du Mont Blanc Packing List: Everything You Need for an Epic Hike

Your ultimate Tour du Mont Blanc packing list—essential hiking gear, clothing, and a few luxury extras, all while keeping your pack light and ready for the adventure.
It can also be intimidating knowing what to pack for the Tour du Mont Blanc, especially if you’re carrying everything yourself, haven’t stayed in a mountain hut before and are trying to blalance having the essential gear for the TMB, with the weight of carrying it.
Besides our TMB Packing list, which you can shop for directly here , you can also check out our 6, 7 and 10-day TMB Self-Guided and Guided Tours . Or, if you’re wanting to plan it yourself and want further information, then check out: Tour du Mont Blanc: How to Plan for this Epic Trek.

My Experience of Packing for the Tour du Mont Blanc
The TMB was my first real long-distance hike. I had only a vague idea of what to pack since most of my other hiking trips were day hikes or just an overnight backcountry camping trip.
When I first laid everything out on my bed and tried to stuff it in my backpack, a third of it didn’t fit. The next attempt, I managed to get it closed, but just barely.
After strapping it up and staggering a few steps, I quickly realized that if I was having a hard time making it across my bedroom, I had no chance of making it 160km across mountain passes every day.
S o I reduced it again. I can’t emphasize how important it is to prepare your Tour du Mont Blanc packing list in advance and see if you can carry your backpack!
It’s also a great idea to do some practice hikes with the equivalent weight of what you plan to bring with you on the TMB. Not only will your back and shoulders thank you, but it will also help build the muscles that you need.
The Tour du Mont Blanc packing list will also work for our 7, 11 and 14-day Haute Route and our Alta Via 1 hikes in Italy.
How to Use Our Tour du Mont Blanc Packing List:
Our TMB Packing List assumes that you will be staying in mountain huts, and taking between 7 – 12 days to do the hike, as I did when I hiked the TMB .
If you plan to sleep in a tent, of course, you would need camping gear. You’d also need to decide whether you would be cooking your own food or eating at a nearby refuge.
It also assumes that you will be carrying your own backpack. You’ll need a 45-60-L backpack. If you pack really light you can get away with a 45-litre backpack, which I used.
If you don’t want to carry your own backpack, then I highly recommend doing one of our Tour du Mont Blanc Self-Guided Hiking Tours .
We can organize luggage transfer for you so that you just have to carry your day backpack. If you’re having your luggage transferred daily, a 20-35-L backpack is fine.
Check out this day hiking packing list if you choose that option. You can also shop our TMB list here .
Tour du Mont Blanc Packing List: Clothing for the Upper Body
Base layer: for wicking sweat off your skin. I LOVE Merino wool as a base layer because it repels ordor but quick-drying polyester will also work and is cheaper. Never wear cotton, you’ll be too hot or too cold .
Your base layer can be a merino wool t-shirt or long sleeve shirt that’s loose enough that you can push the sleeves up if it gets too hot. And you can actually wear your Merino wool shirt multiple days without washing it and it really doesn’t smell, wicks away moisture and dries quickly. It’s also really soft on the skin.
Two shirts is enough if they have sleeves that you can roll up. Otherwise bring two long sleeve and one t-shirt in your Tour du Mont Blanc packing list.
Mid-layer: this is for insulating and helps your body retain heat. I always bring a lightweight fleece, even in summer, since temperatures can drop very quickly. You’ll likely also wear it in the evenings if you go outside the mountain huts, as the nights do get chilly in the Alps.
Outer layer: this is a shell with a hood to protect you from wind and rain. There’s a good chance that it will rain at least once while you’re doing the TMB. Weather can change quickly, and it can often be cold and windy in the French and Swiss Alps.
Sports Bra: Obviously, this one is for women only. Ladies take care of your girls while staying comfortable and look for one that’s breathable and quick drying to prevent uncomfortable moisture from building up.
I’d recommend bringing 2 sports bra, plus 1 more for wearing in the mountain huts after hiking.
You can see all these items in our TMB gear list on Amazon.
TMB Packing List: Lower Body
Convertible Hiking Pants: These are my favourite essential item of hiking gear . They are full length pants that zip off at either just below the knee and/or also zip off above the knee, turning them into shorts, depending on the style.
I almost never hike in regular shorts. These are much more practical should the weather change as it very likely while you’re hiking the TMB. Plus, then you only have to pack one pair, making your load lighter.
W aterproof Pants: As mentioned, it will likely rain on your TMB hike, so bring a lightweight pair that doesn’t take up much room.
Hiking Shorts: These are optional, since I still prefer the convertible hiking pants mentioned above.
Hiking Socks: Socks are one item you don’t want to cheap out on. A good pair of socks will help prevent blisters by wicking the moisture away. They’ll also help regulate your foot temperature.
All it takes it getting a bad blister once for you to be convinced of the value of a good pair of socks. Trust me, don’t learn the hard way. Bring 2 pairs of hiking socks, and another regular pair of socks for wearing in the evenings in the mountain huts.
Quick Dry Underwear: Bring 3 pairs of quick-dry underwear . By being quick dry, you save space by not having to bring so many pairs.
Long Underwear : You only need these if you’re hiking the TMB in June or September. A thin pair made from Merino wool that easily fit under your convertible hiking pants will do the trick.
Gaiters: You don’t need gaiters if you’re doing the TMB in July or August, but they do come in handy if you’re doing it early season in June or mid-September when there’s likely to be snow at the higher altitudes.
Hiking Boots: You’ll want to invest in a good pair of hiking boots . Your feet will thank you for it. I always buy a 1/2 to 1 size bigger, since your feet swell after a day of hiking. I recommend trying them on near the end of a day, when your feet are already swollen.
Since you’ll be hiking multiple days in a row, I recommend hiking boots over hiking shoes for extra support and because you’ll be less likely to sprain an ankle. Be sure you break in your hiking boots well before your Tour du Mont Blanc adventure begins to prevent blisters .
You can find all these items in our TMB gear list on Amazon.
Tour du Mont Blanc Packing List Accessories
Duffel Bag/Soft Shell Luggage: If you’ve chosen the luggage transfer option on our Tour du Mont Blanc Self-Guided Tour , you’ll need to put your hiking gear in a duffel bag or soft shell luggage. The maximum weight is 33 lbs (15 kg). If you’re carrying your own stuff then you don’t need to worry about this.
Hiking Backpack : 20-30L is fine if you’ve chosen the luggage transfer option. Otherwise, I’d recommend 45-60L if you’re carrying everything yourself but staying in mountain huts. Look for one that has a built-in rain cover. It will fit better than if you buy one separately.
Also, buy one that has space between the pack and your back to prevent back sweat. It can be uncomfortable and can have a huge impact on your body temperature. Check for more tips on how to choose the right hiking backpack . I’m a big fan of Osprey and Deuter backpacks.
Hiking Poles: While these are technically an optional item on your Tour du Mont Blanc packing list, I highly recommend them for multi-day hikes since they significantly reduce the load from your joints, especially when hiking downhill.
Plus, studies show that they reduce muscle soreness (something you’ll definitely have on the TMB after hiking for multiple days in a row) and reduce recovery time.
Look for anti-shock (to absorb more of the impact) & retractable hiking poles so that you can carry them on your backpack when you’re not using them.
Baseball/Suncap: You definitely don’t want to get sunstroke while hiking so bring some kind of hat that will protect you from the sun. You only need the following three items if you’re hiking the TMB in June or September.
Neck Warmer/Buff: This is an optional item in your Tour du Mont Blanc packing list, but I find it really useful and carry a thin one when I do the TMB, even in summer.
Merino Beanie: When hiking in the French and Swiss Alps in June and September it can be cool in the mornings so I recommend bringing a Merino wool beanie that’s moisture wicking since hiking the TMB will make you sweat even if it is cold. Light Gloves: As it can be cold in the mornings in June and September, and sometimes throughout the day in June and September bring a thin pair of gloves to keep your hands warm.
Tour du Mont Blanc Packing List: At the Mountain Hut
These TMB packing list items are intended if you’re staying in a mountain hut and will be hanging out with other hikers. If you’re doing our 6-day Luxury Tour du Mont Blanc , you can bring whatever you like.
Indoor Shoes: Mountain huts do not allow regular shoes in certain areas or at all in the hut. Bring a pair of flip flops, slippers, or another pair of comfortable shoes that don’t take up much room to be worn indoors only. Some, but not all mountain huts will provide these.
Pyjamas: You may be sharing a room with others. Even if you have your own private room, you will be sharing a bathroom, so bring something that you’re comfortable with other seeing. I.e. leave the negligee at home. Alternatively, you can sleep in your clean hiking shirt, or long underwear if you’re trying to pack lighter.
Sleeping Bag Liner: A sleeping bag liner serves as a barrier between you and the blankets. It can be very thin, like a sheet. Don’t worry about being cold since the mountain huts provide blankets, and some will provide a pillow. Bring this even if you’re staying in private rooms since some but not all accommodations provide linens.
Quick-Dry Towel: Most mountain huts don’t provide towels, so you need one you can dry off with after a shower, and use to dry your face.
Casual Shirt/Pants For Hanging Out in the Mountain Hut: Comfortable shirt and pair of casual pants or leggings . You’ll wear these after hiking and having dinner in the mountain huts. You can also wear your hiking clothes if you have enough extras, but you’ll definitely want clean ones. And allow time for drying as well.
Universal Travel Adapter: You’ll need an adapter that works in Europe and that has multiple outlets. Outlets are in short supply in the mountain huts, so choose one allows you to charge multiple devices at the same time – i.e. yours and your hiking buddy .
Basic Toiletries: Toothpaste, shampoo, soap, etc, but try to keep it light and pack in a water resistant packing cube to prevent leakages.
Travel Laundry Soap: Hand washing your clothing during your trek means you won’t have to bring as much and will lighten your pack. Look for biodegradable detergent to reduce your environmental impact on the fragile Alps.
Optional Items for the Mountain Huts:
The following items are optional but I find make staying in mountain huts much more pleasurable.
Kindle Fire: If you like to read then bring your Kindle and pre-load with books (like my book Dating Tips for Women with Advice From Cats 😉 since wifi in the mountain huts may not be strong enough to download a good.
Card Game: You’ll likely find yourself with time to relax after hiking when you arrive at the mountain hut each day. Bring a card game or other game that doesn’t take up much space. Also invite other hikers to play. It’s a great way to connect.
Small Massage Ball : I highly recommend bringing a small one that you can use on your feet, aching shoulders, and legs. It doesn’t take up much room and feels soooo good.
Magnesium: This is an optional item, but I find when doing a multi-day hike , like the TMB, that taking magnesium each day helps to reduce muscle soreness.
Muscle-Soreness Relief Cream: If you’re prone to muscle soreness or haven’t done many multi-day hikes before, then consider bringing something to help relieve sore muscles.
Hydration & Food on the Tour du Mont Blanc
You’ll get breakfast, although breakfasts can be small and dinner on our Tour du Mont Blanc Self-Guided tours, and if dinner isn’t included, there will be nearby restaurants. You can also order a packed lunch from your mountain hut the night before to take with you the next day. You can also eat at a mountain hut en route while hiking, but I don’t recommend relying on this since you may reach a mountain hut before or after lunch time, or it may be full. That’s why I recommend the packed lunch and bringing hiking snacks. You can buy hiking snack in Chamonix before the start of your trek and you’ll be able to refill in Courmayeur, but if you have favorite snacks that you can’t live without, then consider bringing them with you.
Water Bladder/Water Reservoir: I prefer hiking with this since I find I drink more, preventing dehydration and can hike and drink at the same time without having to stop and break my pace. I recommend a 3-L one for the TMB.
Water Bottle: You can just use water bottles to hike, or a combination of a water bottle and a water bladder (my preference), but always have at least 2 water sources in case one leaks and you find yourself without water.
Electrolyte Tablets/Powder: These stay in my First-Aid kit and I’ll frequently use it when hiking in hot weather as a preventive measure. If you feel light-headed, dizzy, or have low blood pressure, these can make you feel better in a flash.
Energy Bars: Energy bars are a great food source on the trail. I always keep one or two as an emergency stash in my backpack. Also check out what I recommend for hiking snacks here.
Nuts: Nuts, seeds, trail mix are all good choices as they fill you up and don’t take up much room.
Safety Items for Your Tour du Mont Blanc Packing List
Emergency Thermal Blanket : This is tiny, but may save your life if you get stranded on the mountain since hypothermia is a real risk if you unexpectedly end up having to spend the night on a mountain. I never hike without one. See my post where I talk about why a survival blanket is a must when hiking .
Mini First Aid Kit: For day hikes you probably don’t need a full-size First Aid Kit. I use a mini one which has the basics. Find out more about what should be in your First Aid Kit . Blister Prevention/Treatment:
Anti-Blister Stick: Bring instant comfort to those spots that feel like they are going to blister, especially when doing a hike like the TMB when you’ll be hiking multiple days in a row. Prevention is key. You want to use it before it turns into a blister.
Compeed Blister Cushions: I think Compeed is the best blister treatment on the market! I always carry a few in my backpack.
Navigation Essentials for Your TMB Packing List
Smart Phone: If you’re doing one of our Tour du Mont Blanc self-guided tours , you’ll need one to download your tour and the GPS tracks. Even if you’re going on your own, and not doing one of our tours, I highly recommend downloading the GPS tracks of your day hike into a hiking app such as AllTrails, Gaia, or Mapy, before you go hiking to ensure that you don’t get lost.
While you can bring another GPS device, I prefer a smartphone since you can also use it to take photos of your hike.
Paper Map: Always bring a paper copy of a map and a description of your Tour du Mont Blanc hiking route. It’s fine to use hiking apps/electronic versions, but bring a paper one as a backup in case the electronic version fails.
Miscellaneous Items for Your Tour du Mont Blanc Packing List
Head Lamp & Batteries : I always carry a headlamp in my backpack. While the TMB is well marked and it’s unlikely that you’ll need it while hiking, you may need it in the mountain hut if you have to get up and go to the bathroom in the middle of the night.
Bug spray: This is a small item to carry and is essential in my book.
Toilet Paper: If you’ve ever been without toilet paper while hiking and had a #2 bathroom emergency, you’ll understand why you should always bring a roll with you.
Plastic Bags: You have two choices, either bury your #2 business, or carry out your used toilet paper. Yes, it’s stinky and gross, but do it anyway.
Sunscreen: Sun protection is really important.
Sunglasses: A must on the trail. I never go on a hike without them.
Cooling Towel: A cooling towel is an optional item if you tend to overheat and are hiking the TMB in July or August.
Wipes: Cleansing wipes can be useful if you want to freshen up but aren’t essential. Look for ones that are biodegradable. Most mountain huts have timed showers, but occasionally if it’s been a dry year, you might not have the option to take a shower, and wipes will make you feel cleaner and get some of the sweat off you.
Waterproof Phone Case. Having a waterproof case for your phone on a hike can be a great asset if you’re hiking in a wet area and have your phone out a lot for navigation. Dry Bag: For your electronics and passport. Note, even if you have chosen the luggage transfer option, you’re legally required to have your passport with you at all times (or EU ID if you’re an EU citizen).
Travel Insurance
As soon as your accommodations and hiking tour have been confirmed, I recommend purchasing Travel and trip cancellation insurance right away. I recommend HeyMondo (and you’ll get a 5% discount for being a Monkeys and Mountains reader) since it includes mountain rescue and repatriation insurance which are required and not covered by all insurance policies.
Also, unlike many insurance policies, it also covers pandemics in case we ever find ourselves in a situation like we had a few years ago. Check out their site for the specific details, as not everything is included.
Now you have your ultimate Tour du Mont Blanc packing list. Happy packing!
Get Your FREE Guide to Hiking the
Tour du Mont Blanc
By subscribing you agree to our Privacy Policy. Your email will never be shared and you can unsubscribe at any time.
IMAGES
COMMENTS
Overall Tips for Day 1. To fastback-like we did, take the cable car from Chamonix to Brévent, hike down to Les Houches, hop on the train from Les Houches to Saint Gervais, and then a bus from Saint Gervais to Les Contamines. Total public transport costs per person are about 33 euros per person.
In 5 Tips for Fastpacking the Tour du Mont Blanc (UTMB) . ,Iain Martin shares his advice for a four-day hike around the famous trail running course. For anyone with a place in the UTMB, fastpacking - trail running with a light backpack - is the most time-effective way to recce the course. The classic Tour de Mont Blanc typically takes ...
Fastpacking the Tour du Mont Blanc in 4 days! I cover over 180km (111 miles) with more than 11,000 metres of elevation gain. Check out my full video of this ...
Fastpacking the Tour du Mont Blanc in 4 days.The most physically and mentally challenging trip I've done to date.The Tour du Mont Blanc or TMB is one of the ...
I fastpacked the Tour Du Mont Blanc in 4 days - 184km distance, 11,200m climbing. I wild-camped rather than using the refuges, which meant enduring a snowsto...
3 to 4 pairs of underwear. Fleece jacket (optional) Light down or Primaloft jacket. Rain and windproof hooded jacket (fully waterproof) Rain and windproof trousers. 1 x pair of hiking trousers (pants with zip-off legs that change into shorts are ideal) Comfortable trousers for the evening.
Tour du Mont Blanc (known on the trail as TMB) is the most famous multi-day alps hiking journey in Europe. Mont Blanc (French), Monte Bianco (Italian), or "White Mountain", is the highest mountain in the European Alps at an imposing 4,810m (15,781 ft). The tour follows well maintained trails through France, Italy and Switzerland as it leads ...
How to Hike The Tour Du Mont Blanc In 7 Days Fastpacking Guide • Nomads With A Purpose Tours. Tour du Mont Blanc (known on the trail as TMB) is the most famous multi-day alps hiking journey in Europe. Mont Blanc (French), Monte Bianco (Italian), or "White Mountain", is the highest mountain in the European Alps at an imposing 4,810m (15,781 ft
How to Hike The Tour Du Mont Blanc In 7 Days Fastpacking Guide • Nomads With A Purpose. FRANCE, SWITZERLAND & ITALY / 5 NIGHTS / 6 DAYS. This 5 night / 6 day version of the Tour du Mont Blanc trek is an incredible opportunity to completely immerse yourself in the mountains and enjoy the natural beauty of the valleys that surround western Europe's highest mountain.
A brand NEW guidebook for the Tour du Mont Blanc, and an accompanying waterproof map, has recently been launched by Vertebrate Publishing. It's unique and innovative, in several ways; timings for trip planning for all trail users from steady walkers to faster trail runners, 1:40,000 scale custom mapping provided on the description pages of the ...
Our Method (fastpacking) Our Route; Day-by-Day breakdown of how it went; Our gear list - what we brought with us; A little about the TMB: The 105 mile trail (with 40,000 feet of vertical ascent) makes a giant loop around Mont Blanc, Europe's highest peak. The trail passes through 3 countries - France, Italy and Switzerland.
FRANCE, SWITZERLAND & ITALY / 5 NIGHTS / 6 DAYS. This 5 night / 6 day version of the Tour du Mont Blanc trek is an incredible opportunity to completely immerse yourself in the mountains and enjoy the natural beauty of the valleys that surround western Europe's highest mountain. The trek offers an unusual variety of spectacular scenery and ...
Based in Chamonix in the French Alps, I'm lucky to live at the foot of Mont Blanc -the start/finish of the famous multi day trekking route - the Tour du Mont Blanc. Five years ago I hiked the TMB with my 10 year old girl and 65 year Mother & fell in love with this incredible hut to hut trek through France, Italy & Switzerland.
We did the scenic Tour du Mont Blanc in four days traversing France, Italy, and Switzerland. Circa 180km and 10000m D+. Fastpacking TMB. Filmed in August 202...
Tour du Mont Blanc . Does anyone have experience fast packing the TMB trail? I'm thinking about going for it this year and trying to figure out a good balance between enjoying the experience and towns and running. ... Heading over to do a 4 day fastpacking trip (Bivvy and tarp) middle of September. Taking a couple of the alternative routes for ...
I fastpacked the Tour Du Mont Blanc in 4 days. 184km, 11,200m elevation. Snow storms, no paid accommodation. 1st day in link, the rest are on my Strava with some pics.
2.5K subscribers in the fastpacking community. fastpacking: trailrunning & backpacking, fast. Advertisement Coins. 0 coins. Premium Powerups Explore Gaming. Valheim Genshin ... Fastpacking the Tour du Mont Blanc in 4 Nights (link to film in description)
Duffel Bag/Soft Shell Luggage: If you've chosen the luggage transfer option on our Tour du Mont Blanc Self-Guided Tour, you'll need to put your hiking gear in a duffel bag or soft shell luggage. The maximum weight is 33 lbs (15 kg). If you're carrying your own stuff then you don't need to worry ...
Instagram: https://www.instagram.com/parfloraPinterest: http://pinterest.com/parfloraFacebook: https://www.facebook.com/runparflora0:00 - intro0:26 - Day 1 (...
Fastpacking the Tour du Mont Blanc in 4 Nights (link to film in description) Related Topics Running Trail running Cardio Running Fitness Fitness and Nutrition comments sorted by Best Top New Controversial Q&A Add a Comment. TimeOnFeet • Additional comment actions. Watch the full ...
1st of July I did TMB route in 5 days, taking bus from La Fouly to Champex Lac. I covered 120km and 7000m vertical from Les Houches to Le Tour (and taking bu...
Hi all, I will be fastpacking the 100 mile Tour du Mont Blanc route from 20th of June this year and staying in huts so no camping gear is required. I believe the weather can be variable that time of year with temperatures from 10-30 Celsius, snow on the ground and heavy rain. Goal Baseweight: