Casey Larkin Mazer Carsel
Untitled Babushkas Wandering Jew
Beneath that, the paving stones
NO HARD FEELINGS
“Knobl III”: knobl—soup!
To Me You’re Beautiful
We Will Outlive Them
He Had His Lunch and I Had Mine cry, without words It begins in a fall No one belongs here more than anxious I N V U The Art Yard Is it better yet?
Lights and Perfections
The Eternal
you’d be home by now
“Knobl II”: Knobl Hearts
“Knobl One”: Shum Klum
When a poor man eats a chicken, one of them is sick (but we sing, we still sing)
Rather owe you than not pay you

Wandering Jew

55 most popular Quilt blocks and their names
Quilt blocks are square or rectangular fabric pieces which are assembled and joined together to complete a quilt top.
These quilt blocks are usually made by a technique called Patchwork – which is all about joining together small fabric pieces to form a design. Most of the blocks of a particular quilt will follow a similar pattern. Sometimes the blocks may be appliqued or embroidered.
If I say that this list of quilt block names is a comprehensive one, it will be an outright lie. There are thousands of ways of designing these blocks and many many curious names given to them. Here are some of the most popular Quilt Blocks.
Related posts : Quilting stitches ; Different types of quilts.
Quilt Blocks
Album – quilt block.

Anvil – Quilt Block
Annie’s choice – quilt block.

Antique Tile – Quilt Block

Arkansas Traveller – Quilt Block

At the Depot- Quilt Block

Baltimore Belle – Quilt Block

Bear Track – Quilt Block

Bear’s Paw – Quilt Block

Birds Eye View – Quilt Block
Broken-pinwheel – quilt block.

Braced Star – Quilt Block
Basket weave – quilt block.

Belles Favourite – Quilt Block

Cake stand and Basket – Quilt Block

Chevron – Quilt Block
Card Trick – Quilt Block

Circle & Square – Quilt Block

Courthouse Step – Quilt Block

Colonial Basket – Quilt Block

Cabin in the Cotton – Quilt Block

Diadem – Quilt Block

Ducks & Ducklings – Quilt Block
Drunkard’s path – quilt block.

Dove in a Window – Quilt Block

Evening Star Morning Star – Quilt Block

Eight Point Star – Quilt Block

Friendship Star – Quilt Block

Four Patch – Quilt Block

Grape Basket- Quilt Block

Hens & Chickens – Quilt Block

Jacob’s Ladder – Quilt Block
Lady of the lake – quilt block.

Log Cabin – Quilt Block

Linoleum – Quilt Block

Maple Leaf – Quilt Block

Nine Patch – Quilt Block

Ohio Star – Quilt Block

Pineapple – Quilt Block
Picture frame – quilt block.

Red cross – Quilt Block
Round robin – quilt block, rocky road to california – quilt block.

Split Nine Patch – Quilt Block

Shoofly – Quilt Block

Star & Cross – Quilt Block

Trailing Star – Quilt Block

T Square – Quilt Block

Teddy’s Choice – Quilt Block

Wheel of Fortune – Quilt Block

Wandering Jew – Quilt Block

Wedge & Circle – Quilt Block

Western Spy – Quilt Block

Yankee Puzzle – Quilt Block

Magic happens when you as an individual make specific choices as to the fabric patterns and colors to make the quilt block. A simple quilt block can be transformed by these preferences, when joined together to form your beautiful quilt.
How did you like this post?
Click on a star to rate it!
Average rating 5 / 5. Vote count: 9
No votes so far! Be the first to rate this post.
This article was written on October 26, 2019
& updated on May 23, 2024
Subscribe to get weekly notifications of posts in your email

Author: Sarina Tariq

2 ways to add lace trims to sleeves

How to sew a separate elastic waistband on a skirt

What is Body Rise in sewing? 3 ways to take the measurement

9 types of Elastic Waistbands (& How to sew them)
3 thoughts on “55 most popular Quilt blocks and their names”
Thanks much for this.
My passion is painting in watercolor, but the brilliant colors and patterns two of my fiends sew into their quilting projects is amazing. I don’t have the temperament for quilting but I certainly love the results my friends achieve. It is even more amazing to know many people still sew all their work by hand as the pioneers did. Holy Cow!!! I’ll stick to my paint brush.
Hi Pamela Some of the quilts people make are so colorful and brilliant – and isn’t it amazing that these kinds of work are being done by hand in these times when we don’t have the patience for much simpler things.
- Skip to main content
- Skip to primary sidebar
ellis & higgs
easy to follow PDF quilt patterns

26. Januar 2024 By Nadra
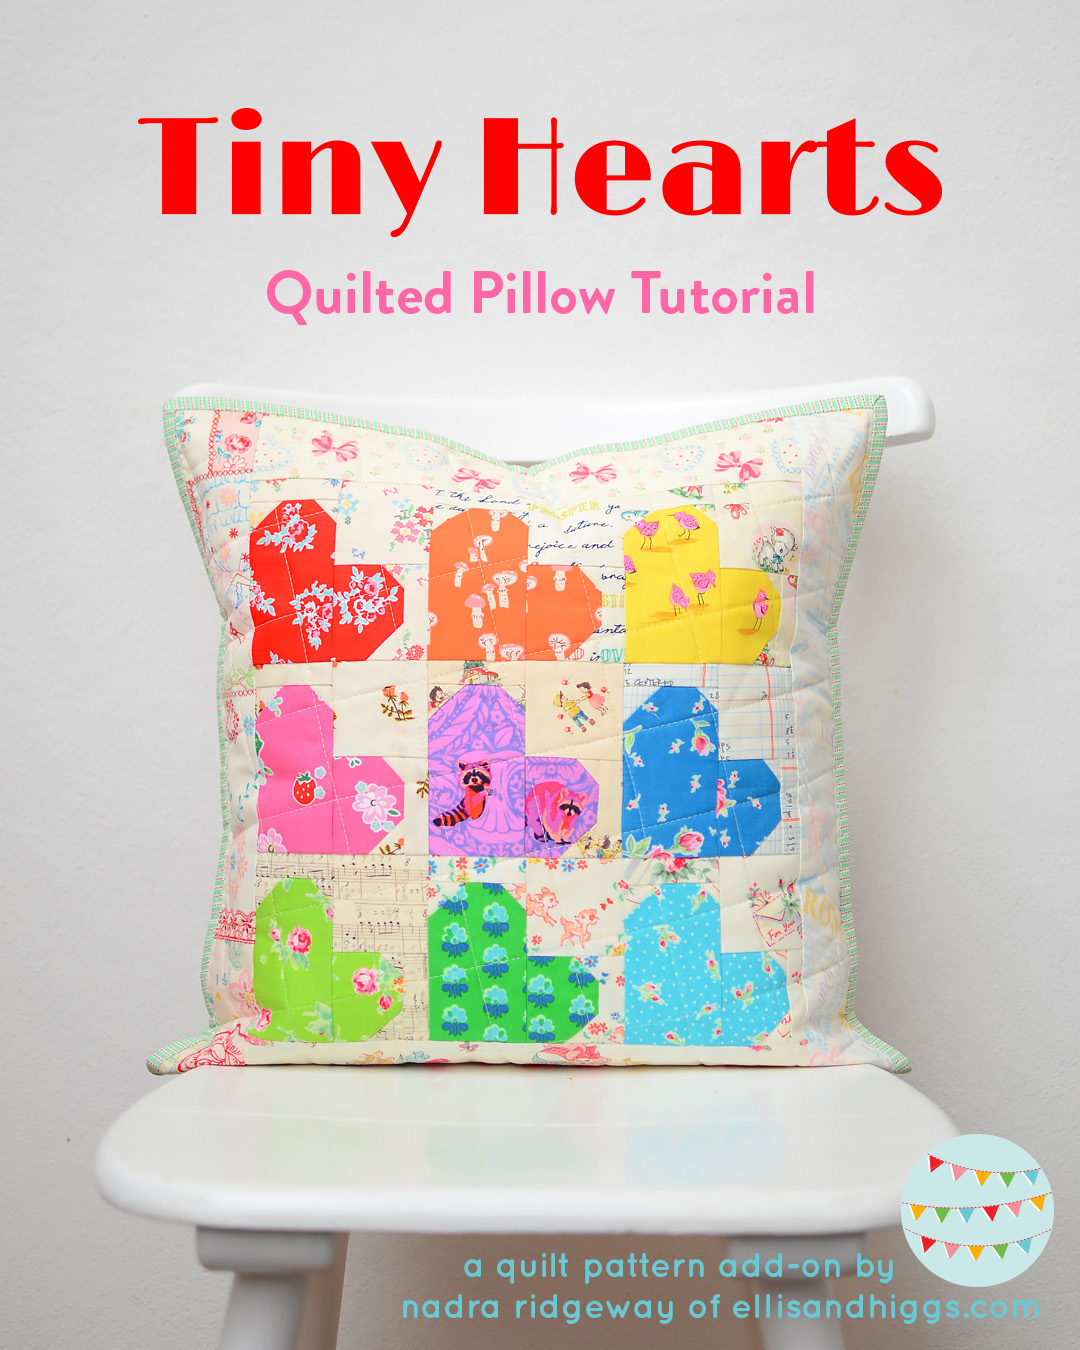
Valentine’s Day Pillow: Tiny Hearts Revisited
Valentine’s Day pillow for your Loved ones
A handmade Valentine’s Day pillow will make the recipient feel especially loved – it shows that you have taken the time and effort to create something truly special. This project has everything you need for the perfect crafty weekend:
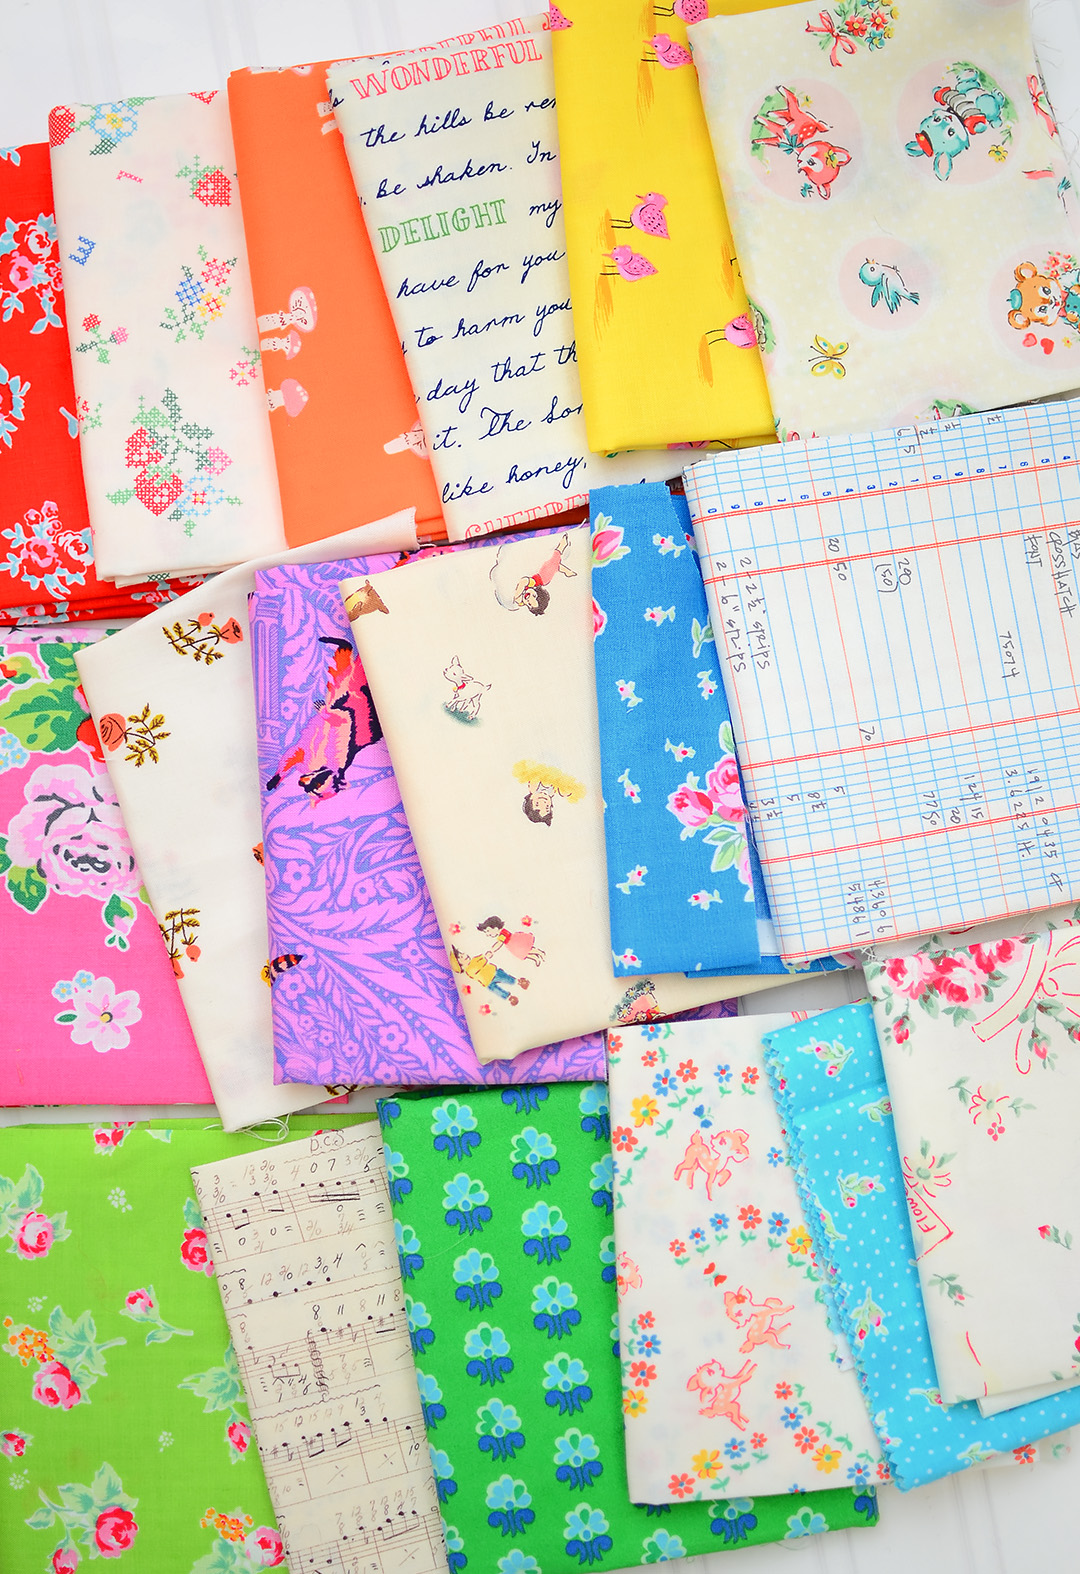
✅ You can dig into your stash and pull out your favourite prints (the pieces are small enough so that you don’t need to worry about using them all up!). ✅ The hearts are super easy and so much fun to make – even for beginners. ✅ The simple envelope closure doesn’t require any buttons or zippers. For this project, I revisited an old favourite and I just love how it turned out! You can purchase the Tiny Hearts quilt pattern in my onlineshop – just click on the blue button below. Follow this link to download the free pattern add-on directly to your computer (click here) Wishing you a relaxing and creative weekend!
SHOP PATTERN NOW
Ein Valentinstagkissen für deine Liebsten
Ein handgefertigtes Kissen zum Valentinstag gibt dem Empfänger das Gefühl, besonders geliebt zu werden – es zeigt, dass du dir die Zeit und Mühe genommen hast, etwas wirklich Besonderes zu kreieren. Dieses Projekt hat alles, was du für ein perfektes Krteativwochenende brauchst: ✅ Du kannst in deinem Vorrat kramen und deine Lieblingsdrucke herausholen (die Stücke sind so klein, dass du dir keine Sorgen machen musst, alles zu verbrauchen). ✅ Die Herzen sind super einfach zu nähen und machen total viel Spaß – sogar Patchwork-Einsteigern. ✅ Der einfache Hotelverschluss kommt ganz ohne Knöpfe oder Reißverschlüsse aus.
Für dieses Projekt habe ich einen alten Favoriten wieder aufgegriffen, und ich finde das Ergebnis einfach toll! Du kannst die Tiny Hearts Patchwork-Anleitung in meinem Onlineshop kaufen – dazu einfach auf den blauen Button oben klicken. Folge diesem Link, um die kostenlose Zusatzanleitung direkt auf deinen Computer herunterzuladen (hier klicken). Ich wünsche dir ein entspanntes und kreatives Wochenende!
27. November 2023 By Nadra
Out Now – Starry Sky Star Quilt Pattern – Pillow Version
Starry Sky Star Quilt Pattern – Pillow Version When a gift is handmade, it carries special meaning. It shows you took the time and effort to make something truly extraordinary. Quilted pillows are one of my favorite go-to gifts. There are unlimited ways to personalize them, and they show thoughtfulness without being too time consuming….

26. November 2023 By Nadra
Out Now – Starry Sky Star Quilt Pattern
Starry Sky Star Quilt Pattern Is there anything better than opening your sewing room closet and planning a new project? For the Starry Sky Star Quilt pattern, you can dig deep into your scrap box and really go wild with colors! I chose some of my favorite fabrics in the basic colors and combined them wildly…

12. Mai 2023 By Nadra
Nautical Zip Pouch – Tutorial and Pattern add-on
Carry your toiletries in style with this adorable Nautical Zip Pouch! This bag has plenty of room for your essentials and is a fun afternoon project! How to Sew the Nautical Zip Pouch Purchase the Beach Hut Quilt pattern in my online shop (click here). And here’s the video tutorial – scroll down for requirements…

5. Mai 2023 By Nadra
Quilted Crab Mug Rug – Tutorial & Pattern add-on
This adorable quilted crab mug rug is the perfect way to make you feel like the ocean is always near…! So needen since it’s already May and the warm and early summer days are long overdue (at least here in Germany)! How to Sew the Quilted Crab Mug Rug Purchase the Crab Quilt pattern in…

27. April 2023 By Nadra
Quilted Tulip Tote Bag – Tutorial & Pattern Add-on
Create a unique bag that adds a little charm to the way you carry your stuff or store the things you don’t need every day! Here’s a free pattern add-on and quick tutorial for you – happy sewing! WATCH TUTORIAL NOW Finished Bag: 10”x15” (10″ x 22″ including handles) Requirements: (1) Small TULIP FIELDS…

26. April 2023 By Nadra
Framed Tulip Mini Quilt – Tutorial & Pattern Add-on
Ho to make a Framed Tulip Mini Quilt Frames are a great way to display your mini quilts and such a fun DIY project – not only super fast, but also easy as it makes binding the quilt optional! The small Tulip Fields quilt block (click here) is perfect for this project bringing early spring vibes to your…

25. April 2023 By Nadra
Large Tulip Mini Quilt – Tutorial & Pattern Add-on
How to sew the Large Tulip Fields Mini Quilt Today I’m sharing another mini quilt featuring two of the large Tulip Fields quilt block (click here). This would make a beautiful wall hanging for your home! I’ve used both light and dark green for the leaves of one tulip, which makes the quilt even more…

24. April 2023 By Nadra
Tulip Table Topper – Tutorial & Pattern Add-on
How to sew the Tulip Table Topper Top your spring table with a quilt that showcases the small Tulip Fields quilt block (click here) – use it on its own to dress up a bare table or pair it with a matching tablecloth to add a dash of color to your table setting! This project is a simple…

23. April 2023 By Nadra
Tulip Wall Quilt – Tutorial & Pattern Add-on
How to sew the Tulip Wall Quilt Welcome friends and family into your home this spring with a bright and colorful wall hanging featuring the large Tulip Fields quilt block (click here). Displayed on a front door or in a foyer, this wall quilt will be a beautiful addition to your spring decor! This project is…

22. April 2023 By Nadra
Tulip Table Runner – Tutorial & Pattern Add-on
How To Sew the Tulip Table Runner Show off your favorite Spring fabrics in this beautiful quilted table runner! This project features seven of my Tulip Fields mini quilt blocks (click here) and is a fun and easy make. The pattern is available in my online shop. Download the Table Runner pattern add-on with a…

21. April 2023 By Nadra
Out now – A Tulip Mini Quilt to celebrate Spring
Celebrate spring and bring the joy of flowers into your home with this adorable Tulip Mini Quilt! The Tulip Fields Quilt and Mini Quilt are the foundation for a variety of spring quilt projects perfect for getting ready for the change of seasons! Gather your favorite spring fabrics and prepare for a fun-filled launch week…

Out now – a Tulip Quilt to Celebrate Spring
Celebrate spring and bring the joy of flowers into your home with this adorable Tulip Quilt! The Tulip Fields Quilt and Mini Quilt are the foundation for a variety of spring quilt projects perfect for getting ready for the change of seasons! Gather your favorite spring fabrics and prepare for a fun-filled launch week with…
Sign up to my newsletter for updates, subscriber only specials & get a welcome gift !
Melde dich für meinen Newsletter an, um auf dem Laufenden zu bleiben & hol dir ein Willkommensgeschenk!
Inhalt Datenschutz
Be sure to check your email to confirm your subscription. Schau gleich nach der Email in deiner Inbox, um deine Anmeldung zu bestätigen.
Welcome guest
- Charm Packs
- Fat Quarters
- 10'' Squares
- Strip Rolls
- Notions & Tools
Creating a Wandering Quilt with Misti from Missouri Star: A Step-by-Step Guide
Ricardo Patrocínio @ Sep 04, 2023
In this exciting video, hosted by Misty from Missouri Star, we dive into the world of quilting and fabric design with the talented Stephanie Organis. Prepare to be inspired as we explore Stephanie's captivating "Wandering" fabric line and the stunning quilt pattern that accompanies it.
Stephanie, a graphic designer turned fabric designer, joins Misty to share her journey into the world of quilting and designing fabric. The story behind her artistic evolution is nothing short of inspiring. As the creator of the mesmerizing Wandering fabric collection in collaboration with Andover, Stephanie takes us through her vibrant color choices, intricate floral designs, and the sheer joy she infuses into her work.
This blog post is your gateway to the enchanting video where Misty and Stephanie's passion for quilting shines through. Get ready to learn about Stephanie's path to becoming a fabric designer, her love for various craft forms, and how she transformed her dreams into reality. With this collection, Stephanie wanted to create something that radiates happiness and brings people together to create beautiful heirlooms and cherished memories.
The Wandering quilt pattern featured in this video is beginner-friendly, making it accessible to quilters of all skill levels. Whether you're a seasoned quilter or just starting your quilting journey, you'll find something to love in this collection. From delicate florals to bold geometric prints, Wandering captures a perfect balance of elegance and playfulness.
As Misty and Stephanie guide you through the step-by-step process of creating the quilt block, you'll witness the magic of piecing together fabrics to form intricate designs. With insightful tips and techniques, they demonstrate how to achieve precise half-square triangles and assemble the hourglass blocks, all while maintaining the distinct character of the fabric collection.
Prepare to be captivated by the seamless interaction between Misty and Stephanie as they discuss the design process, color choices, and the creative decisions that led to the birth of Wandering. Stephanie's passion for her craft and her connection to each fabric design truly shine through their conversation, making this video an absolute delight to watch.
Ready to embark on your own quilting journey? Watch the full video above to immerse yourself in the world of fabric, color, and creativity. Stephanie's story and Misty's guidance will surely leave you inspired and motivated to explore the joys of quilting and fabric design. Don't forget to subscribe to the Missouri Star YouTube channel for more crafting inspiration and tutorials!
So, without further ado, let's dive into the world of Wandering and discover the art of quilting through the eyes of Stephanie Organis. Get ready to be captivated by color, fabric, and the boundless joy that comes from creating with your own hands. Enjoy the journey!
Featured Products

102 piece Crazy Daisy pre cut charm pack 5" squares 100% cotton fabric quilt
Regular price $ 44.36 Sale price $ 36.97

102 White on White pre cut charm pack 5" squares 100% cotton fabric quilt
Regular price $ 49.16 Sale price $ 40.97

102 Yummy Twist pre cut charm pack 5" squares 100% cotton fabric quilt

108 piece Rainbow Basics charm pack 5" squares 100% cotton fabric quilt
Regular price $ 46.76 Sale price $ 38.97

Mystery Fabric Grab Bag LOT beautiful quilt shop fabric 100 dollar value surprise pre cuts
Regular price $ 73.16 Sale price $ 58.97

102 White On Natural pre-cut charm pack 5" squares 100% cotton fabric quilt

102 piece Artista pre cut charm pack 5" squares 100% cotton fabric quilt

102 piece SUNFLOWERS pre cut charm pack 5" squares 100% cotton fabric quilt

96 Snowmen & Snowflakes 5 inch charm packs quilt fabric 100% cotton fabric

102 Piece FEATHERS pre cut charm pack 5" squares 100% cotton fabric quilt

102 Kaleidoscope pre cut charm pack 5" squares 100% cotton fabric quilt

102 piece Rainbow Swirl pre cut charm pack 5" squares 100% cotton fabric quilt
100% satisfaction guarantee, world wide shipping, easy returns, sign up for our sewing club.
Sign up today and be part of a community that shares your passion for creativity and craftsmanship
By signing up for email, you agree to our Terms of Service and Privacy Policy .
Your cart is currently empty
You might like...

100 Natural Beige 5 inch charm packs quilt fabric 100% cotton fabric pre cut
Regular price $ 41.96 Sale price $ 34.97

100 Piece Crosshatch Hunter Green pre cut charm pack 5" squares 100% cotton fabric quilt

100 piece Crosshatch Black pre cut charm pack 5" squares 100% cotton fabric quilt

100 Pce Crosshatch Taupe pre cut charm pack 5" squares 100% cotton fabric quilt

100 Piece Crosshatch Red pre cut charm pack 5" squares 100% cotton fabric quilt

100 Piece Crosshatch Purple pre cut charm pack 5" squares 100% cotton fabric quilt

100 Piece Crosshatch Pink pre cut charm pack 5" squares 100% cotton fabric quilt

100 Piece Crosshatch Steel Gray pre cut charm pack 5" squares quilt fabric

100 Piece Crosshatch Sage pre cut charm pack 5" squares 100% cotton fabric quilt
Search our store, popular searches.

sewliloquies
Gypsy Wife YouTube Tutorials
I was part of the Gypsy Wife quilt along team in 2019. Several of the administrators and moderators of this quilt along worked hard to create blogs, pdfs and other tools to help guide you through the (complex and challenging) Gypsy Wife quilt pattern by Jen Kingwell. Here you will find my YouTube video tutorials for all 10 sections.
This pattern was designed and printed by Jen Kingwell. The pattern is required to create the quilt, as no dimensions other than finished block size are provided in the tutorials. Please visit Jen Kingwell’s website or ask your local quilt shop to purchase the pattern.
You may also like

Half Square Triangles

Monthly Art Quilt Wall Hanging

Sewing Truly is Therapeutic
Search This Blog
Moore about nancy.
The Nancy Cabot Sew Along--Daily quilt blocks by Nancy Cabot as published in the Chicago Tribune in 1933
- Who is Nancy Cabot?
- How to Paper Piece Tutorial
- Double Nickel Quilt Challenge
Tuesday, February 5, 2013
Wandering foot quilt block, 2 comments :.

This is a gorgeous block -- I loved making it, although it's tricky at this small scale...and mine came up 1/4" small :( I'm keeping it even though it's imperfect and I'm going to do some cheating with sashing (!). Here's mine: http://www.flickr.com/photos/48854966@N04/ Thanks so much!
Thank you so much for sharing! I printed and measured the PDF, it came out 5 3/8 inch large. I enlarged it with 116,6 percent, then it was a perfect 6-inch-block :)


- Contact Us
- View Cart
On Wonder Lane Block of the Month

{{errorMessage}}
- {{($index + 1)}}
{{waitlist_contact_errorMessage}}
{{c.errormessage}}, modal title, select available date, add to waitlist.
- Sadie Quilts 1503 Canandaigua Road Macedon, NY 14502 Call or Text: 585.648.8884 Email: [email protected]
Business Hours

Precut Fabrics
Precut Fabric
Wandering Star Quilt Tutorial
- 1 Pack x 10" Squares (Layer Cakes)
- 1/2 yard x Quilt Fabric for Inner Border
- 3/4 yard x Quilt Fabric for Binding
- 1 1/2 yards x Contrasting Fabric by the Yard
- 1 1/4 yards x Quilt Fabric for Outer Border
- 4 1/2 yards x Quilt Fabric for Backing
Finish your masterpiece and let us give it the finishing touch it deserves.
Subscribe to MSQC on YouTube Hundreds of FREE tutorials and a new one from Jenny launches every Friday.
Video transcript.
Hi everybody, it’s Jenny from the Missouri Star Quilt Company. And I’ve got a fun project for you today. This idea came to us straight from our cameraman. The last time we did a quilt using the drunkard’s path template, he said, what if? And I love the what if factor. So the little star added in the middle is the what if factor on this and it just comes together so cute. We’re calling this quilt, Wandering Star. And let me show you how to do it. So to make this quilt what you’re going to need is one packet of ten inch squares. And we have used this line by Jill Findley. It’s called It’s the Berries. It’s a gorgeous red and black line. And it’s made for Riley Blake. You’re also going to need a yard and a half of this accent fabric and this is what’s going to make our star. Your border out here, this is a 2 ½ inch strip and it’s a half yard of fabric. And your outer border, let’s see what size strip that is. It’s a six inch strip, nice big outer border. And you’re going to need a yard and a ¼ for that. Now our backing, we used this nice big floral on the back, so pretty. And you’re going to need 4 ¼ yards of that. This is going to make a quilt that is about 70 by 70 so it’s a nice square quilt and a lot of fun, lot of fun. So let me show you, we’re going to start with the drunkard’s path block. And you’re going to choose two fabrics out of the pack that have contrast. So I’ve got a black and white one here and a red and white one. And I’m going to decide which side is going to have the little corner and which side is going to have this. So you’re going to get two blocks out of this. But I’m going to start by cutting my little corner out first. So this is the drunkard’s path template which you need to make this. And we’re going to start by cutting the little corner piece right here. Alright so now what we’re going to do just line up your rotary cutter right along the edge of that and you’re going to make a perfect little cut. And you’re going to have two of these. And so in one the red will be the corner and the other one, the black will be the corner. So now for the large part of the square we’re going to take our drunkard’s path template and we’re going to lay this on the 9 ½ inch line. And that is the first solid line on here. The other lines are seam allowance lines and so that’s our first little solid line. And actually for me to cut this lefthanded I’m going to need to turn this so I can cut it easier. We don’t want any rotary cutter accidents. Alright so the first thing I’m going to do is I’m going to trim off this side right here. And I’m going to trim up this middle. Now this will just shave a tiny little bit off. That’s one of the things I love about this tool is it’s so little waste. Look at this. Look at that. Look at that tiny little piece. That was pretty cool, huh? Alright so then we’re just going to cut off this little edge right here. So this is all our waste. I love that. Alright. So then we’re going to sew these together. Now the way I like to do it is I like to take these and make a little finger crease on my inside piece and a finger crease on my outside piece. I’m then going to put a little pin in there and match them up crease to crease. Get my little pin over here. And then what I’m going to do is I’m just bring this edge around here like this. Now you can pin this if you want. And if you’re just beginning, I would. I’m actually going to today. Alright there we go. Alright so now what I’m going to do is I”m going to slide this under the edge of my foot, a quarter of an inch. And I’m going to slowly start sewing because I’m going to bring my edges together as I sew along. So we’re going to sew right here. There we go. And I should not have sewed over that pin. That’s a bad idea, that can go wrong really fast. So don’t sew over the pin. Alright I’m going this way. Going to take my pin out and then we’re just going to keep sewing around this edge. And that was a little faster than I intended. And then we bring this up and it should match up pretty close to that edge and bring that over. That little edge is always kind of hard for me, that little last edge. But you get pretty good at it when you do it over and over and over. Alright. So this is the block we’re looking for right here. And then what we’re going to do with this is we are now going to add the star to the corner. And that’s what makes this block different is adding that little star. So what I’m going to do is, this is my accent fabric right here. And I’m going to cut a 2 ½ inch strip off of here. And you can see, so when you, when you want to cut your fabric, when you have a lot of fabric to cut I’m not very good at the whole long ruler thing. And so what I like to do is I like to fold this, you’re going to keep this even with your selvedge edge, keep this even. When you keep all your edges even then when you cut your strip you won’t have any elbows. So I’m going to slide this in and I”m going to cut a 2 ½ inch strip. Now if you want you can cut these apart to use them for your stars. But I like to leave them long. And then I’m just going to take my corner, so it’s this opposite corner from your curve we’re going to add this star. And what we’re going to do is we’re going to, oop I better cut this selvedge edge off of here. I don’t want to mistakenly get that in. Alright what we’re going to do is we’re going to come in, we’re going to come in about two inches. We want to make sure that this covers that corner when we’re done. So we’re going to come about two inches and then we going to just gradually, you know, come off the edge. And so I’m going to go ahead and sew this on here a quarter of an inch, just like this. And then I’m going to press that back. So right here at the ironing board I’m going to go ahead and press this back like this. Now what I’m going to do is I’m going to use my square as the pattern. So this ten inch square then becomes my pattern. And I’m going to take my little ruler and I’m going to slice off this side right here. And you can do that from off the block or on the block. I better use my ruler. Be careful. There we go. Alright. And then depending upon the fabric you choose for your star, you want to look and see if your pattern shows underneath. If your pattern shows underneath then you’re going to want to peel this back and just trim off that corner because we don’t want that to show through. Now on some colors it wouldn’t show through. Because yellow is a lighter color and black is underneath that’s going to show through and we’re going to want to just trim that off. So now we have a block that’s still, because that edge we added, still remains ten inches and it stays square. Our star piece we’re going to put on this other side right here. So it’s going to go this way. And we want to make sure, again, that we don’t, we don’t, that we have enough when we fold it back including our quarter of an inch so that it keeps the star. And I’m just going to sew this down now a quarter of an inch like this. And, the key is to make sure that the wide part stays at the top. Alright so now what I’m going to do is I’m going to press this back right here, making sure, you know, before I cut anything, that I’m covering the edge of my fabric. And I am. So now I’m just going to trim this up right here like this. And then I’ll trim off this little end right here. And again, you want to look again and see if you want to trim this off. And I think we better trim that off. Now it doesn’t hurt to leave it. If you can’t see through it, I don’t mind leaving it. I know that the quilt machine can go through many layers of fabrics as well as fingers and rulers and all kinds of things. So I don’t worry about layering up. But if I’m going to see my fabric underneath then I want to clean that up. Alright so now what you’re going to do is do this to all your squares.And then when you’re ready to put them together you’re going to assemble them like this so they form a star. So I’m going to do two lights and two darks. And I have a red one here. I have several of these blocks made. Isn’t that the coolest thing? And so when you go to put these together you’re just going to lay them right sides together like this and sew them up. Now even though I guessed, I didn’t have an exact place where I came off, they’re going to look fine. Because the yellow, the continuity of the yellow will carry the pattern across. So we’re going to go ahead and sew these like this so that I can show you that point down there. Here let me iron this so you can see it real good. Alright, so see how this, on this one, it was a little shorter and this one is a little longer? Because the sizing, it just carries that point. It just makes that point look like it’s still a point. So what you can do is you can put them together in stars which I did. I sewed four blocks together to make this star. Or you can put them together in rows like this. If you’re going to do stars, we have three by three on this quilt. And if you’re going to do rows you have one, two, three, four, five, six, by six. So it just makes a great quilt. It’s a lot of fun and I love the what happens if factor where you just tweak one little thing, add one little corner and you’ve got a star on a drunkard’s path so we’re calling it Wandering Star. And we hope you enjoyed this tutorial from the Missouri Star Quilt Company.
Our website uses cookies to manage login status, to measure traffic and to support the marketing of our services. By using the website, you agree to our use of cookies. Please read our privacy policy for further information about our use of cookies.
- Choosing a selection results in a full page refresh.
- Opens in a new window.
- My Pattern Shop
My Patterns , Quilting , You've Got a Point!
Meet Cut Glass, from You’ve Got a Point!
Continue Reading
Meet Blossoms & Patches, from You’ve Got a Point!
Meet ribbon rosettes, from you’ve got a point, meet smoke rings, from you’ve got a point, mywanderingpath.


- Virtual and In Person Programs
- Karma Quilt Free Pattern
- Fig Leaf and Flowers Quilt Pattern
- Mary Witherwax Quilt Pattern
- Noah and Matilda Album Quilt Pattern
- Bags, Accessories & Pockets Patterns
- Quilt Patterns
- Catherines Garden Blocks On Point Patterns
- Thankful Doll Quilt Free Pattern
- Lucie Huig Dunnebier Quilter Profile
- Starry Hearts Doll Quilt Pattern Free
Sunday, November 8, 2015
Turkey tracks or wandering foot - looking at clues.

25 comments:

Clever of you to pick that - and thanks for another fascinating post! Must have been quite a job to repair and re quilt over the yellow to match the intense quilting plan. Love the yellow and green combination ...

Kind of like your lily quilt! They could be sisters.

Great detective work. thanks for sharing.

ok - so this is a fascinating post. Gorgeous, gorgeous handquilting and a mystery - who can resist that? So how did they manage to quilt over the "new" yellow applique without having double stitches on the back? Out of curiosity - how was the border quilted? So when you say you discovered it - does that mean it came home with you :0) ?? Loved exploring this old quilt with you - THANKS!
The stitches are only through the top and a bit of the batting. The backing only has the original hand quilting stitches.
It is a gorgeous quilt. I will never look at a quilt the same way after this post. Thank you so much for sharing. Most interesting, entertaining and eye candy on top of that. Love it.

Awesome! Did it come home with you?

It is beautiful and you are amazing! This was so interesting! :)

Looks like someone did a lot of work so they could enjoy that beautiful hand quilting! Very interesting!

I saw the photo, and thought, lovely quilt. But your description is fascinating. o the yellow has been appliquéd over the top and then quilted as well? I hope someone loves my quilts that much is the distant future.
Yes, the stitches in the new yellow appliqué thread do not go through the backing.
Interesting! I think it s a good repair job, despite the yellow---they redid the quilting and did a beautiful painstaking job of repairing this beauty. Would we have preferred red? Probably, but this person's work saved this gorgeous quilt with its exceptional handquilting. Great find and detective work. lizzy
Happy it didn't become a cutter!

Fascinating - sometimes quilts can really talk to us - and someone thought enough of this wonderful quilt to make those repairs. Thank you for sharing.

You are the Sherlock of the quilting world. What a great story and detective work. Somebody saved this for some special reason. Glad you discovered it and I'm assuming you brought it home. Would you ever remove the yellow?

Are you saying you purchased the quilt? The quilting on it is an interesting design and it is well done.

Such a mystery and you solved it! This is what is so fascinating about old quilts, the stories behind them. Wonderful blogpost.

This is fascinating! I would not make a good quilt detective, but I love learning from your experiences. So the burning question seems to be, did you buy it?

Great detective work. Since yellow is my favorite color, I too might have repaired it with the color of my choice. Lovely quilt. Thanks for sharing it and your sleuthing!

What fascinating information on this quilt! I think it's beautiful in it's pieced simplicity and the quilting on it is gorgeous! A very lovely treasure quilt!

Wow...I am impressed

You are quite the sleuth! Such beautiful quilting. Can you tell if there was quilting on the original red applique?
What a timely post. I have an old quilt that I made more than 28 years ago and the recipient of the quilt has used it to the point where it needs repairs. There are some worn spots that will have to be replaced. I think I'll use this post as my inspiration for those repairs!
Wow what a find, this quilt is just stunning, borders and applique, I love the fabrics and all that dainty quilting, it is truly breathtaking. I can't imagine how long this must have taken. Thanks for sharing.
Thanks for your comments!
A Free Pieced Wandering Foot Quilt Pattern
About the Wandering Foot patterns
Be sure to look at The Wandering Foot Quilt History page to learn the facts and myths behind this quilt pattern.
I've chosen two options for this quilt pattern. For the first pattern, shown to the left, I've designed an all pieced version and for the second I am using a pattern that is both pieced and appliqued based on the version by Ruth Finley. The all pieced one is easier as it is all straight seams.
The second pattern involves curved piecing as well as applique. It is the more difficult pattern and more traditional. Find it at Appliqued Wandering Foot . I'm also including a wagon wheel quilting pattern for those of you who might want to use a symbol of the journey west in your quilting.
Cutting the Fabric
Because of the varied angles required I'm giving you templates for this pieced pattern. You will find them at Pieced Wandering Foot PDF .
The number of blocks you will need depends on the size quilt you want. On my quilt I included a one inch border of the background fabric to put a little space between the binding and blocks. A border of a contrasting fabric could be used as well.
The wagon wheel quilting pattern can be found at the Wagon Wheel PDF
1 p154, "The Oregon Trail" , by Mary Bywater Cross

by Stephanie Organes
Quilt Patterns

WANDER BLOOMS
With Wander Blooms, you can create a beautiful quilt full of intricate blooming stars. This design is based on the traditional English Paper Piecing technique, making it the perfect project to take along!
Whether you're a beginner or seasoned quilter, I hope this pattern inspires you to start hand sewing!

WANDERING QUILT
Features the Wandering Collection. Full of brilliant florals and easy half-square triangles. This pattern can be made with fat quarters or layer cake squares. Any way you stitch it, you’re sure to fall in love! And the best part the pattern is FREE!
Want to know how to make this pattern? Watch my tutorial with Misty Doan from the Missouri Star Quilt Company!

INDIE GARDEN QUILT
Immerse yourself in a world of vibrant colors and whimsical patterns. 🦢 To celebrate the launch of ENCHANTED BLOOM, I’m thrilled to show you my FREE quilt pattern called "Indie Garden"!
The "Indie Garden" quilt design showcases enchanting prints from the collection. With its combination of boho-inspired florals, paisleys, and geometric shapes.

COLOR BLISS QUILT
Immerse yourself in a bloom of inspiration with florals, delicate tone-on-tones, and intricate line work in COLOR ME PRETTY - your go-to color box for every project!
The "Color Bliss" quilt is not only beginner-friendly but also a skill-building project. I can't wait for you to experience the blooming beauty of COLOR ME PRETTY.

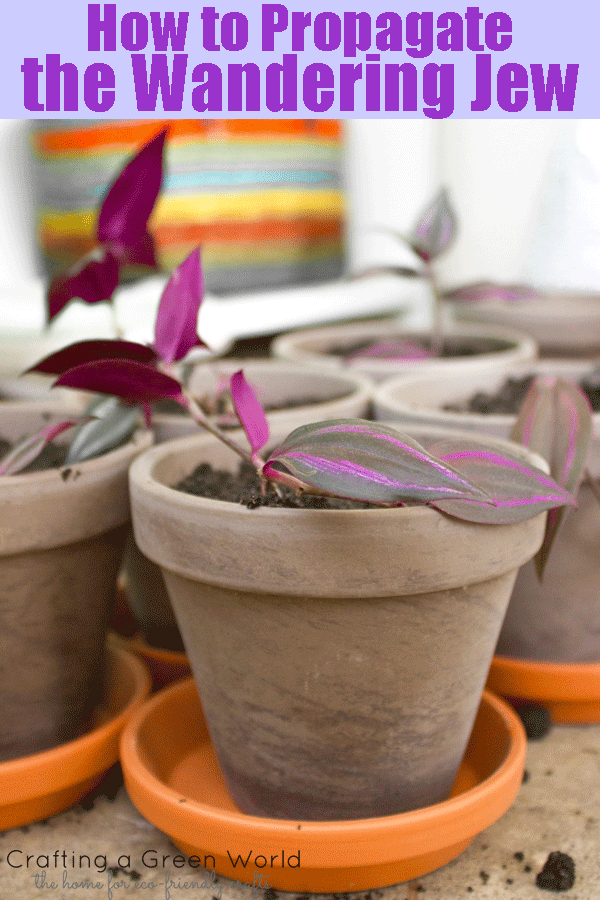
How to Propagate the Wandering Jew: It’s Super Easy!
This tutorial is part of Garden Week here at Crafting a Green World. We’ve teamed up with some of our favorite DIY bloggers to talk about all things gardening!
Gardening can be scary if you don’t think that you have a green thumb. Why waste your money on expensive potting soil and plant starts, if you don’t think they’ll grow? Why spend a bunch of time weeding and watering, only to be disappointed?
If you’re new at gardening, the plant for you is the wandering Jew, or inchplant . It’s in the spiderwort family, so it’s a great houseplant–easy to care for, attractive, and kind of dangly when it’s grown a lot, so that you can set it in a hanging planter or let it trail off the edge of a bookshelf.
My favorite thing about the wandering Jew, however, is that it’s crazy easy to propagate. Not only does this make for an excellent kid’s gardening project, but, unlike much of life, it lets you get more plants for practically free! If you’ve got a grown-up wandering Jew, some extra pots, and good potting soil, then you’ve got yourself another six to a dozen wandering Jews right there for the taking. Here’s how:
1. Prepare a temporary water home for the wandering Jew cuttings. Propagating the wandering Jew is a two-step process that’s separated by several days; this is a bonus, because it means that each step takes just minutes.
Shot glasses? Jelly jars? Vases? Kid-sized cups? They all make great temporary homes for your wandering Jew cuttings.
2. Make cuttings from the wandering Jew. Grab a sharp pair of scissors, and begin to hack up your beloved wandering Jew.
Now, do not make this harder than it needs to be. All the important people will tell you to sterilize your scissors, and cut at a certain angle, and cut exactly at this or that certain place, and cut exactly this or that certain amount. You can do all this, absolutely, but if you did all that, you’d have a green thumb. And you don’t have a green thumb, do you?
The way that I’ve propagated my wandering Jews for years isn’t the “best” way, but it works perfectly for me. I use scissors–any old scissors–and cut my wandering Jew just above a leaf, so that I don’t leave the plant with a random stem sticking out above its highest leaf. Then I clip the lowest set of leaves off of the cutting, so that the cutting will have a node from which to grow new roots.
I put the cuttings in water, making sure that any nodes that I want roots to sprout from are covered, but that any leaves that I want to not rot and die are not covered. Then I set everything in a sunny window and leave it alone.

4. Transplant the cuttings into pots. Any day after all the cuttings have roots, but before the roots get giant and unwieldy, find a nice few minutes to set out little pots, and potting soil.
Fill each pot about halfway full of potting soil (get a really good kind !), then pick up a cutting stand it up gently in the pot, and scoop more soil in all around it until the cutting looks happy and settled. Water it well, and put it back in another sunny window, where you’ll water it as needed and watch it grow.

Don’t actually need six to a dozen more wandering Jews? My kids and I tend to give away all of our propagated wandering Jews in the few months after we’ve transplanted them. There’s always a special kid who my kids think would quite like a wandering Jew for their birthday instead of one more toy, always a housewarming or dinner party or get-together at which a wandering Jew is even more welcome than a sixteenth gifted bottle of wine, always a graduating senior who’s definitely not going to get cash from me, but is going to get something nice to set on their dorm room windowsill.
And when all the transplanted wandering Jews have finally gone away, well, there’s always another wandering Jew to propagate!
Share this page with a friend:
About the author.

Related Posts

How to: Make Paper Beads out of Junk Mail

Happiness is Recycling Folded Paper

Green Tea Party

Green Crafty Q&A: Weaving Plastic Bags

No Limit Hold’em: Make a Playing Card Bag

DIY: How to Save Your Favorite Jeans

DIY: Upcycle Old Jeans Into A Sexy Mini

Upcycle Old Denim Into a Market Tote
14 thoughts on “how to propagate the wandering jew: it’s super easy”.

Ooh I am new to this plant! I was just talking to a friend about how I had to abandon my house plants because Darrol is into eating the dirt right now. When he gets past this phase, I’m going to add Wandering Jew to my list of house plants to get.
It’s non-toxic to cats, according to ASPCA, so just right for our house. They do say it’s toxic to dogs, but our dog has shown zero interest in house plants, so she will be fine.

We are just starting to add houseplants back into our lives. While we don’t have a lot of space, I think the plants will help make our indoor air healthier. Might have to see about getting this next time I am at the store!

I always forget about that, but yes, indoor plants are AWESOME for air quality! I’ve heard there are species that are better than others–I’ll have to look it up.
Oh, if you look it up, that means I can just mooch off your knowledge (it’s kinda a recurring theme I think).

Hi. I have the worst luck with this plant. It grows, yes, but then it dies at the root. Over and over and over and it is endless!! Why does it do this? I water once a week, it is inside, in a morning sun window. Why does it keep dying at the root?
Do you think there might be something in your soil or your water that could be poisoning it? You could do an experiment, perhaps–water one pot with filtered water, or change your brand of potting soil, etc.

Dies at the root? Does the bottom part of the stem shrivel up? Starting from the roots and working it’s way up? Sounds like root rot to me. It comes from too much water or from the plant sitting in wet soil for a long time without getting the chance to dry out. It causes a fungus to grow and spread starting in the roots and eventually killing the plant.

Why won’t my clippings root in my glasses of water? No roots in over 2 weeks. ????????

Anyone have any wandering Jew slips hey could sen? Macmikeal(at)me(dot)com

I am trying to reboot a wandering Jew . Can you help me

Thank you for this, by instinct I threw some cuttings that broke off the plant into a cup of water and white strings starting to appear after only days. Actually I was googling to confirm what I was seeing was in fact roots, and thanks to your knowledge I can confirm they are. Now I know what to do after roots get to the point of planting. Trying this with a Pilea as well. Thanks!

Hello! I have already gotten to the potting process, so thank you for the propagation advice. How long does it normally take to make the plant big? My biology teacher mom wants to use the plant in a year in one of her labs, but she needs a full-sized plant. Will the cutting become full-sized and spilling over the sides of the pot in a year or is that too little time?
I think you could easily have a big and happy plant by then! If you want a plant with several vines, not just one, then propagate a new cutting and plant it in the same pot every few weeks. I recently saw a video where someone took the vine and used a bobby pin to pin it back to the soil at one of the nodes, and she claimed that the vine would root there without having to cut it, and she said it made her plant big and fluffy. I haven’t tried it for myself, but it’s on my to-do list!
Leave a Comment Cancel Reply
Your email address will not be published. Required fields are marked *
Start typing and press enter to search
IMAGES
VIDEO
COMMENTS
The quilt top is pieced in the "Wandering Jew" quilt block pattern, and uses all the fabric the artist took with them to Warsaw, Poland, when they were ordered to evacuate Ukraine in early 2022. Wandering Jew (2022). Hand-quilted cotton. 50" x 50". Photo: Matavai Taulangau.
Wandering Jew - Quilt Block. Wedge & Circle - Quilt Block. Western Spy - Quilt Block. Yankee Puzzle - Quilt Block. Magic happens when you as an individual make specific choices as to the fabric patterns and colors to make the quilt block. A simple quilt block can be transformed by these preferences, when joined together to form your ...
Titles Quilt Blocks, "Wandering Jew" or "Herringbone" pattern (Descriptive); Artist Alabama, Tuscaloosa County, United States; Medium textiles; Dimensions each: 13 x 13 in. (33 x 33 cm); Credit Line Collection of the Art Fund, Inc. at the Birmingham Museum of Art; Gift of Helen and Robert Cargo, AFI.158.2009.1-.8; Work Type quilt blocks; Classification Quilts
How To Sew the Tulip Table Runner Show off your favorite Spring fabrics in this beautiful quilted table runner! This project features seven of my Tulip Fields mini quilt blocks (click here) and is a fun and easy make. The pattern is available in my online shop. Download the Table Runner pattern add-on with a….
buy now. $7.95. $8.00. Missouri Star Colorful Quilting Clips - Pack of 12. buy now. Today, Misty teaches you how to make your very own Wandering Quilt by Stephanie Organes. Watch how Misty uses the Wandering 10" squares to create one of the gorgeous patchwork stars that make up this amazing quilt!
In this exciting video, hosted by Misty from Missouri Star, we dive into the world of quilting and fabric design with the talented Stephanie Organis. Prepare to be inspired as we explore Stephanie's captivating "Wandering" fabric line and the stunning quilt pattern that accompanies it. Stephanie, a graphic designer turned fabric designer, joins ...
I'm excited to present the Wandering Quilt Tutorial, a collaboration between Misty Doan and me! Teaching it together was a blast, and Misty created a beautiful version using Wandering 10" squares. ️ We can't wait for you to enjoy watching it! Download the FREE Wandering Quilt Pattern HERE. Unable to load video. Try again later.
My Wander quilt pattern is a fat-eighth friendly 25-block quilt which finishes at 74 ½″ x 74 ½″. The back cover features a slightly smaller 20-block version finishing at 63″ x 76 ½″ made with slightly different sized sashing. This quilt is based on the striking triangle in a square block and really has a fun look.
Andover Fabrics
Several of the administrators and moderators of this quilt along worked hard to create blogs, pdfs and other tools to help guide you through the (complex and challenging) Gypsy Wife quilt pattern by Jen Kingwell. Here you will find my YouTube video tutorials for all 10 sections. This pattern was designed and printed by Jen Kingwell.
I hope you enjoy making your own Firm Foundation quilt! Don't forget to tag me when you post pics to Instagram, and be sure to use the hashtags #FirmFoundationquilt and #mywanderingpathdesigns. Firm Foundation is a panel-friendly quilt pattern by My Wandering Path, featuring Songbook fabrics by Fancy That Design House for Moda Fabrics.
Wandering Foot quilt block. February 5, 1933-"Colonial Boys Were Never Permitted to Sleep Under "Wandering Foot" Quilt" was the title of Nancy Cabot's Chicago Tribune column. The superstition was that if a little boy slept under a Wandering Foot quilt, he may be afflicted with a "wandering foot" meaning it might incite them to run away from home.
The 12th pattern will include instructions for assembling a 60" x 72" "On Wander Lane" quilt using all 12 month's blocks. This pattern series also offers six additional projects that repeat for each month. The pattern includes separated appliqué templates, and a "placement diagram" for each quilt, to make the appliqué process easy.
You will need to purchase 3 yards of black Kona for this quilt. You will also need about a half of a yard for the red, blue, purple, pink, yellow, orange, and green fabric. Here is how to cut up the fabric. 22 6 1/2 inch black squares 36 3 1/2 inch black squares 18 3 1/2 inch yellow squares 18 3 1/2 inch green squares 20 2 1/2 x 8 1/2 inch red ...
About This Tutorial. Finished Size: 69" x 69". Jenny Doan demonstrates how to make a fun variation of the drunkard's path quilt using 10 inch squares of precut fabric (layer cake). For this project Jenny chose "It's the Berries" 10" Stackers by Jill Finley for Riley Blake. She also used the Missouri Star Drunkards Path Circle Template Set.
Wandering Star Quilt Tutorial. with. Jenny Doan. Quilt Size: 69" x 69". Jenny Doan demonstrates how to make a fun variation of the drunkard's path quilt using 10 inch squares of precut fabric (layer cake). For this project Jenny chose "It's the Berries" 10" Stackers by Jill Finley for Riley Blake. She also used the Missouri Star Drunkards Path ...
My Patterns, Quilting, You've Got a Point! Meet Cut Glass, from You've Got a Point! June 23, 2022. Happy Wednesday! I recently launched a series of posts about the quilts in my newly released book, You've Got a Point! (You can find all the previous posts HERE.) Before I get started, I just want to say a huge THANK YOU to everyone who has ...
Wandering Collection for Andover Fabrics — Stephanie Organes. NEW! Color Bliss Quilt FREE Pattern.
Posted on March 26, 2010. Here is the instructions for the Wandering Ways Quilt Pattern in a down loadable PDF format. Click the link below to download the PDF of the pattern. Wandering Ways Quilt Pattern. This entry was posted in My Free Quilt Patterns and tagged easy free quilt patterns, easy quilt patterns for beginners, easy quilt patterns ...
All the signs of an 19th century beauty. Feathers, double and triple line quilting, double line cross hatch... I think the texture created by the hand quilting is lovely and really 'makes' the quilt. The block is sometimes done with appliqué, sometimes inset seams. Known by many names, I'm calling this one Turkey Tracks. Brackman Applique: 5.36.
Cutting the Fabric. Because of the varied angles required I'm giving you templates for this pieced pattern. You will find them at Pieced Wandering Foot PDF. The number of blocks you will need depends on the size quilt you want. On my quilt I included a one inch border of the background fabric to put a little space between the binding and blocks.
Whether you're a beginner or seasoned quilter, I hope this pattern inspires you to start hand sewing! Learn more WANDERING QUILT. Features the Wandering Collection. Full of brilliant florals and easy half-square triangles. This pattern can be made with fat quarters or layer cake squares. Any way you stitch it, you're sure to fall in love!
1. Prepare a temporary water home for the wandering Jew cuttings. Propagating the wandering Jew is a two-step process that's separated by several days; this is a bonus, because it means that each step takes just minutes. First, you'll want to put the cuttings in water until they grow roots, so prepare this water hotel for the cuttings now.